Nurse Central Quilt – Free Quilt pattern by Quilting Treasures

Loralie Nurse Central quilt
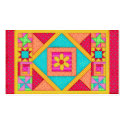
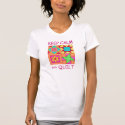
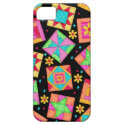
Doesn’t this Nurse Central fabric collection designed by Loralie Designs for Quilting Treasures make a gorgeous quilt!  In addition to designing fabrics for Cranston Printworks (with new lines coming out 2011), I also design some quilt patterns for their free project sheets on their websites.  I designed this quilt using this really fun fabric collection and want to share it with you.

This pattern is available for free download from their Quilting Treasures division. The quilt is pieced in a block layout. Check out all the patterns on their website and you will see that there are many wonderful free quilt patterns for you to enjoy sewing.

A New Year ahead – and an old one almost gone!

If  you are like me, you are wondering where did 2010 go!  It certainly doesn’t seem like its been a year since I looked forward to greeting 2010. Time flies so quickly and the seasons, Christmas and holidays zip by! I meant to accomplish so much this year, and I did accomplish more than I thought possible, but I didn’t get to the bottom of my 2010 To Do list. However, my lists are always longer than humanly possible to accomplish. So I will do what I do with all my lists, roll the items I didn’t cross off onto the next list. I will say that close to the top of my list is to move all chocolate out of my sight, then I can move onto my work related items.

But at the VERY top of my list is to extend the biggest and warmest THANK YOU for visiting my blog! And for those who emailed me or posted comments, I loved hearing from you and would love to hear from bunches of you in the future!

I hope that each of you had a wonderful 2010 and I wish you a very, very happy and healthy 2011!

Phyllis

T’is the Season for gift wrapping – 2 books for unique wrapping!

I love books and while browsing through books, I found these 2 that are fabulous for creating spectacular gift wrapping. The books have different methods of creating wraps and I fell in love with both of them. And they offer fantastic wrapping techniques that can be used right now during “the wrapping season”.

Unique gift wrapping BookUniquely Gifted by Eleanor J. Leinen with beautiful photography by Marc Vaughn shows you how to create a work of art with each gift. Whether you are a crafter or not, you can find yourself creating beautiful gifts with things you already have on hand or can easily purchase. Items such as ribbons, fabrics and papers are combined with such items as old jewelry, tassels, trims, beads, silk flowers, beads, and many more items to create these beautiful wrappings.

Since each wrapping is very unique, instructions are not provided. But with all the “stuff” we have in our stashes, we can follow Eleanor’s inspiration to create our own works of art. Creating them with a box or giftbag that can be opened without damage to our artistic endeavors will allow our work of art to remain intact and a gift in itself. This is a fun book and I plan to create works of art with my wrapping from now on!

Wrapping scarf book

The Wrapping Scarf Revolution by Patricia Lee offers a different method of wrapping by creating gorgeous wrapping scarfs from fabrics. The wrapping scarf can be used over and over which is very economical.

The book is filled with easy-to-follow diagrams of the many different styles of wraps, including wrap bags. You just choose the fabric you want and start creating wraps adding embellishments as you desire. I have a huge stash of fabric and plan to also put the techniques in this book to use.

A wrapping scarf can also allow you to create a tradition when swapping presents back and forth using a special scarf – from friend to friend, mother to daughter, sister to sister.

I love both books so please check back. I will show you projects that I create using the techniques of both books. (My mind is already whirling away with ideas!)

For full disclosure, I purchased both books.

Here’s to pretty wrappings and a happy holidays!

Phyllis

Sizzix Triple Blog Hop Week 7 – Gift Bag Topper

Gift bag topperCreate a treat bag topper to add a special touch to your gift bags! This week for our Sizzix Triple Play blog hop, we are using Eileen Hull’s Treat Bag topper die. There are so many possibilities for uses with this die with its versatility. I love it!

Decoupaged bag topper

I also love decoupaging so I decoupaged my topper to give it texture and color. I like the marbleized look that resulted, although the paper napkin I used was a floral pattern.

The materials I used included:

Die for Treat Bag Toppers Bigz XL Die #656774 by Eileen Hull for Sizzix

Heavy card stock

Mod Podge

Paper Napkin with a pattern

Cabochon bead

Pink oil paint stick

Green acrylic paint

2 pink rhinestone brads

Glue dots

Glue – Beacon Zip Dry

Treat Bag

Instructions:

1.Tear the paper napkin into small pieces and decoupage to the treat topper with Mod Podge. Use the Mod Podge to glue the napkin to the topper and to seal the top of the paper. I used several layers of the napkin to get more texture.

2. Paint the large medallion pink. I used an oil paint stick to paint it – I like the pearled look of the paint. I then painted a smaller oval medallion green.

3. Glue the the green oval centered to the pink medallion and glue the cabochon bead centered on the green medallion. I used glue dots to attach the medallion to the bag topper so that it stands out.

4. Use the rhinestone brads to attach the topper to the bag (after you have added your goodie to the bag!).

Be sure to check the all the other fantastic projects in the Triple Play blog hop by clicking on the forward or back button in the sidebar. This is the last week of this hop and it has been so much fun. I’ve had a blast working on the hop projects and dies.

Thanks for visiting the Triple Play Blog Hop! Please visit the TriplePlay blog for more fun ideas from Brenda Pinnick, Karen Burniston, Eileen Hull and friends. If you have enjoyed seeing all of the inspiring ideas on the blog hop, please “like” Triple Play on Facebook.

Have a great time  hopping!

Sizzix Triple Play Blog Hop Week 6 – Blooms Greeting Card

Greeting card made with Sizzix dieSend a warm message in a special greeting card you make! This week for the Sizzix blog hop, I created a colorful and fun card with Brenda Pinnick’s Album die from Sizzix, the featured die in this week’s hop. I also used fabric from Brenda’s Couleur Vie fabric collection from Henry Glass.

All you need is these few materials:

Album, Brackets, Bigz XL Die #656053 by Brenda Pinnick from Sizzix

Card stock, felt and fabric for the dies

Card or card stock

Felt (Felt in project from National Nonwovens)

Turquoise colored rhinestone brads

Glue (Beacon Zip Dry)

Fusible Web (Steam a Seam 2 from The Warm Company)

Instructions:

Cut each layer from the dies, alternating with cardstock, fabric and felt. The fabric was fused to the layer below with fusible web and the cardstock and felt were adhered with glue.  Punch holes in the corners and add rhinestone brads.  Glue the die layer stack to the front of a card and add your message.

For an alternative use for the die stack, add it to a present instead of a bow for a really unique look.

Be sure to hop to the other blogs to see all the fabulous projects.  Just click forward or back in the Sizzix button in the sidebar.

Wishing you a warm day – its cold here!

Phyllis

Sizzix Triple Play Blog Hop Week 5 – “For You” Gift Card

For You Gift CardCreate a special greeting card to go with a gift and let it speak volumes! For week 5 of our Sizzix Triple Play Blog Hop, I created this embellished greeting gift card.

Gift greeting card open with pop upThe card is fun to make and embellish with the following materials:

Sizzix die – Gift Card Holder, 3D Pop-up, Bigz XL Die #656740 by Karen Burniston

Heavy Paper

Scrapbook double sided paper

Assorted buttons

Rick rack

Adhesive – Beacon Zip Dry

Instructions:

Cut paper to fold for the desired card size. Embellish the card front with buttons and rick rack.

Attach the die cut “For You” to the inside of the card. I added a striped scrapbook paper behind the frame opening. Note – if you are giving money or a gift card for a gift, you can insert it behind the smaller frame. I also glued a heart made of 2 layers of papers to the inside of the card along with more rick rack. The heart is embellished with a button.

With a pad of papers or your stash of scrapbook supplies, you can easily make dozens of cards!

Be sure to click forward or back on the Sizzix button in my side bar to hop to the other blogs to see all the fun and fabulous projects made this week!

Happy hopping!

Phyllis