As I think all quilters know, Quilt Market and Quilt Festival were just held in Houston the end of October through early November. I attended Quilt Market, which is open to the trade only, although I wish I had the time to stay over for Festival. I will give you some of Market from from my viewpoint now and will show some of the gorgeous and spectacular quilts exhibited in Part 2.

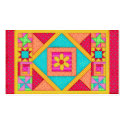
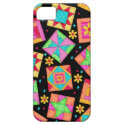
I was really excited at market at the debut of my new fabric collection with Quilting Treasures, “Bee Yourself” (you can see pictures of the fabrics in my earlier post). This “Bee Yourself” Quilt and Tablerunner were displayed in Quilting Treasures booth. (The fabrics will be available December 2012).
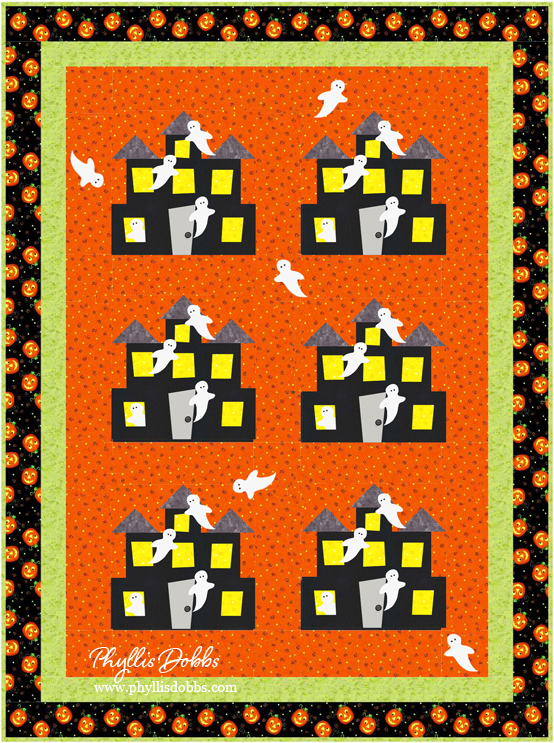
In addition, a preview of my next fabric collection “Tricks and Treats” was also shown in Quilting Treasures’ booth. I know we just had fun with Halloween since Market, but its never too soon to start planning for the next one. This fabric will ship early next year so that it can be in the stores in time for your Halloween sewing.

Market started for me with a Schoolhouse presentation held Friday before Market opened. I discussed and showed wonderful projects that you can create with printed fabric blocks, whether they are “leftover” from your quilt project or bought just to make some of these projects. They all make great gifts. Since “Bee Yourself” has 12 blocks, I created several models using them.

Andrea Rekrut of Quilting Treasures was my lovely assistant in helping show the models. This project is a tablerunner using 4 blocks.

A placemat uses 2 blocks.

A pillowcase uses fabric and blocks from Quilting Treasures’ Dinosaur Train fabric, which is in fabulous colors.
The patterns for all of these projects, including the quilt, will be available on either Quilting Treasures website or here on my blog sometime in December when the fabric ships to stores. I will announce when they are available and will provide links.
I was in Gutermann of America’s booth during part of the show. Some of my Schoolhouse projects decorated the booth walls. In addition, other quilts and projects I made were also on the walls. The quilt above the thread cabinet is from the “Celebrate” fabrics that I also designed for Quilting Treasures that debuted in May. They are great to create projects for birthday celebrations for both boys and girls, young and mature (I don’t like the word old).


After Schoolhouse, I attended a meet and greet, Fabric 2.0. It was packed. I was standing in the middle and this is the view from one direction. Melissa Schulz of Kathy Davis Studios is standing at the front of the picture in the orange dress.

As I walked the show, I saw some fabulous new products that I want to share with you.
I can always count on June Tailor to have some great new products and that held true again this year. The Creative Covers come in 3 style shapes and can be used to create stand along blocks or use for applique. I love the look of an open block quilt like these.

Another new cutting ruler from June Tailor is great for centering designs for cutting for tee shirt quilts. I have a bunch of tee shirts that I want to make into an quilt and this ruler will be a great aid. Also, a lot of fabrics have designs that you may want to center when cutting. I do.

Gutermann of America has some wonderful new treads, recycled polyester from water bottles. It amazes me how you can take a water bottle and recycle it into something wonderful. It’s really treasures from trash and a great way to recycle and eliminate all the water bottle waste. 10 spools of thread can be created from one water bottle. I sewed with it and love the way it sews.

Expo International is always a fun and fabulous booth to visit with all their trims and embellishments. It would be so boring if we didn’t have trims to embellish our projects with. I was extra happy this year as they used some of my quilts to decorate their booth.

Before I leave you, I want to show off another fabric collection that will be out early 2013. “Letters to Santa” is by Janet Wecker Frisch of Tidings of Great Joy for Quilting Treasures. Its pure vintage Santa and is beautiful!

Quilt Market is always such an inspirational show and this year was no exception. As you can see, exciting colors of fabrics, threads, buttons, trim, etc were everywhere. Check back as I’m working on another post to show you some really beautiful and amazing quilts in the exhibits. They were just spectacular!!
And, there will be a “Bee Yourself” fat quarter giveaway shortly, so be sure to check back and enter!
Have a colorful day!
Phyllis