Sizzix Triple Play Blog Hop Week 3- Floral Gift Box

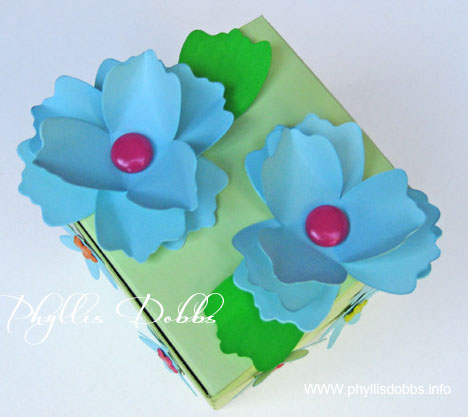
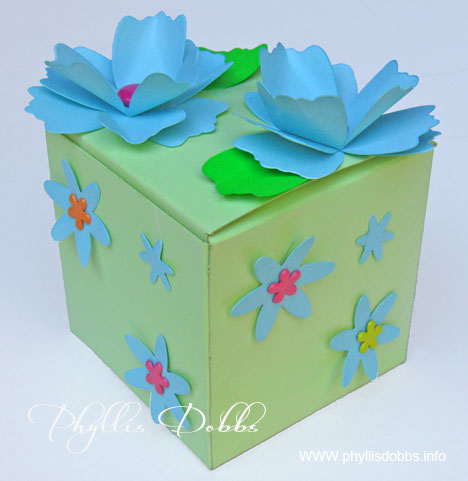
Giftbox decorated with flowers and paintThis week, we used Brenda Pinnick’s Flower, Beauty Bloom Sizzix dies for our Blog Hop project. I really love flowers so I enjoyed using flowers to decorate a gift box – a great way to add a special touch to gift giving.

Gift box painted and decorated with flowers

The materials used were:

Sixxiz die #655455 by Brenda Pinnick

Card stock

Spray paint – aqua and green by Krylon

Green acrylic paint

Gift box

Brads – round and floral designs

Hole punch

Glue – Beacon Zip Dry for paper

Instructions:

I spray painted the box with green paint and all the flower pieces with aqua paint.  2 petal sections were painted a darker green to use as leaves.

After the paint dried, I punched holes in the center of the flower pieces.  2 flowers were created by assembling 3 large flower pieces for each flower and putting a round brad through holes.  I turned up the petals of the top 2 pieces. After punching holes in the box top I attached the flowers with the brads.

Flower shaped brads were ued to attach the large flat flowers to the sides of the box and glue was used to attach the small flowers.

Be sure to hop to the other blogs in the blog hop by clicking on the links in the Sizzix badge in my sidebar!  There are some amazing designs.

All I need to do now is add the gift!

Happy Crafting!

Phyllis

Sizzix Triple Play Blog Hop Week 2 – Spot of Color Twist Box

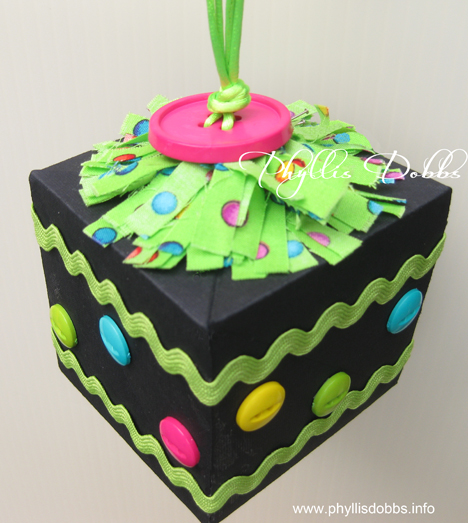
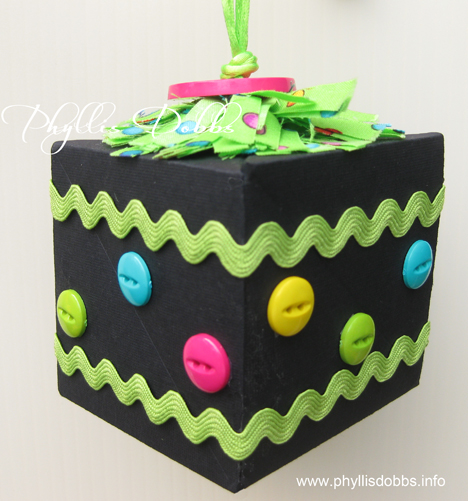
A Spot of Color Twist BlockWhat a fun project – the twist box created with Sizzix’s die by Karen Burniston can be decorated so many ways.  I decided to create a colorful ornament that would also make a fun addition to a birthday card.

Twist Box created with Sizzix die

This was easy to make with a few embellishment items.

Materials:

Sizzix Twist Cube Die

DCWV black card stock

Large 1 1/4″ button

Assorted multi-color buttons

Rick rack

Rat tail cording – 2 pieces 14″

Beacon Paper Tac glue

Fabric – 1-1/2″ x 24″ strip

Instructions:

1. Cut and make box from black heavyweight paper.

2. Thread one piece of cording through 2 holes on the large button so that the ends of the cords are on the back side of the button. Thread the other piece of cording through the remaining 2 holes. Pull ends so that they are even and insert through hole in the top of the box by 1/2″. Glue the ends to the top inside of the box.

3. Sew a gathering stitch on one long edge of the fabric 1/4″ from edge. Cut to fringe on the opposite side edge. Do not cut through the stitches. Pull gathers to 6″ and tie off.

4. Wrap the gathered edge on the top of the box around the opening with the cords. Glue as you wrap. After the glue dries thoroughly, slide the button down the cording to sit on top of the fringe. Tie an overhand knot with the cord on top of the button.

5. Glue 2 rows of rick rack around the box, 1/2″ from the top and bottom edges. Glue buttons around box.

There are 60 designers participating in this Sizzix Triple Play Blog Hop. Please check out their projects – they were all amazing last week and I know they be amazing again this week. Just click on the Sizzix blog button in the side bar to go back or forward.

Enjoy the hopping! (and check back next week).

Phyllis

Sizzix Triple Play Blog Hop Week 1 – Peppermint Candy House

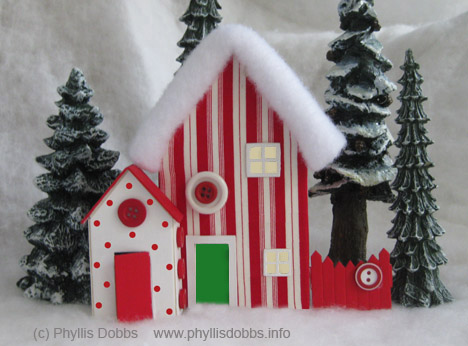
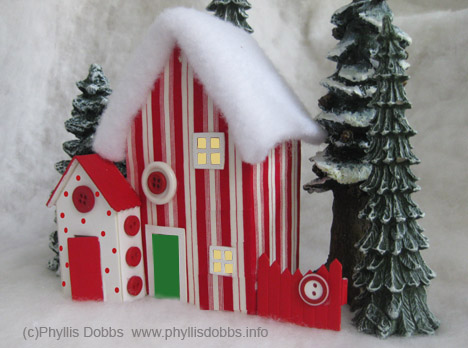
Christmas Candy Cane House from Sizzix diePeppermint Candy Christmas House from Sizzix die

I’m delighted to be part of the Sizzix Triple Play Blog Hop featuring 60 designers. That’s 60 designs with instructions each week.

Christmas is just 7 weeks away!  Can you believe it? I chose to make a Peppermint Candy house since the season is so close.

It was really fun to make so here are the materials you need as well as the instructions.

Materials:

#656836; Sizzix Scoreboards Pro Die – House, 3D, by Eileen Hull

Sizzix 12×12 matboard, white

Sizzix Big Shot Pro die cutting machine

1/4 yard red/white stripe fabric

Beacon Fabric-Tac Glue

White batting

Red acrylic paint

Paint brush

Yellow and green card stock

Assorted red and white buttons

Pencil

Instructions –

1.  Fold tabs areas of the house back and trace the outline of the house on the back side of the stripe fabric with a pencil. Cut out adding 1/4″ all the way around the house outline.

2.  Lay the fabric right side  down and glue the house to the back side of the fabric.   Cut an X in the window and door areas, cutting from corner to corner.  Fold the pieces back and glue to the back side of the house.  Fold edges around the house back and glue to the back of the house.  Cut pieces for the door and windows from the card stock and glue to the back side of the house. Fold house and glue together following instructions with the die.

3.  Fold batting in half and cut a piece of batting the width of the roof and adding 1/2″ to the depth.  Lightly glue the batting together between the layers.  Align raw edges of the batting to the back edge so that the fold is over the front edge of the roof.  Glue the batting to the roof.  Put a line of glue on the front edge of the roof and press the batting over the edge. Glue the window and door frames in place.

4.  Paint the roof and door of the small house red and paint red dots on the front. Paint the fence red. Fold house together and glue on the roof. Glue the small house to the larger house, overlapping by 1/3″. Glue buttons to house. Glue fence to attach to house.

Please click on the Sizzix badge in the sidebar to visit the other blogs in the blog hop.  You will see some fabulous houses!

Phyllis