Crafting Outside My Norm – Fused Glass

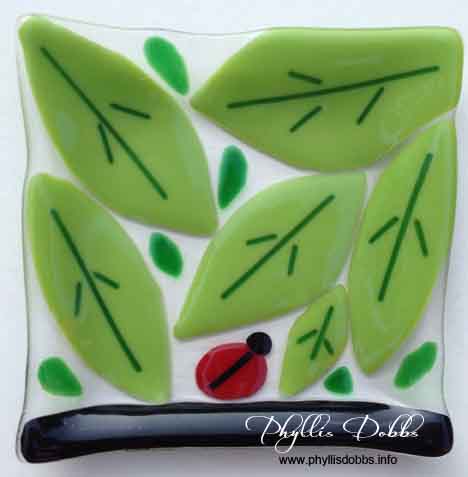
I love my new fused glass piece, sprinkled leaves and a ladybug. I recently took another class in fused glass with a friend just for the fun of it. The night of the class, I was really tired and not feeling creative, but then an idea of nature with leaves popped into my mind and then I forgot that I was tired. I’m really happy with how it turned out.

Fused glas leaves

I took a previous class last year, creating a more abstract fused glass piece with greens and blues. I really enjoyed it so I decided to give it another try. Since my business is based on crafting, almost everything I do is “work” related (although I love my work). So I really enjoy crafting just for the fun of it.

I am planning on going back very soon and create some more fused glass – they have the supplies to make the absolutely cutest bugs and I have really been itching to make some.

Happy Crafting,

Phyllis

Trying a New Craft Technique

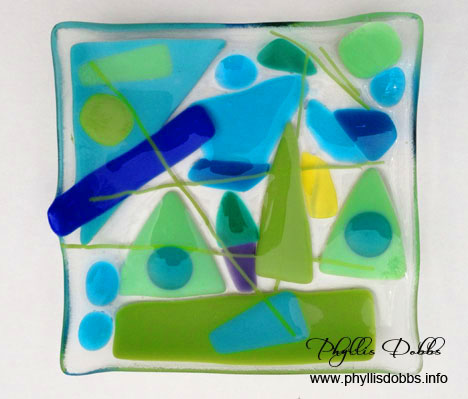
I love crafting and always have. I started crafting as a kid. Before I became a professional designer, I took every craft class and tried every type of craft that came along. I still take classes whenever possible and love trying new (to me) types of crafts. I’m a huge fan of glass and when a fused glass class became available recently, I jumped at it, signing up immediately.  We made 2 projects during the evening classes. I really enjoyed playing with the glass in arranging colors and pieces to make my first project, a shallow dish. I wanted it to look abstract and while it won’t win an award, I love the way it turned out. It was very informative and interesting in seeing how different colors of glass and opaque and transparent glasses work together.

Fused glass dish made in class


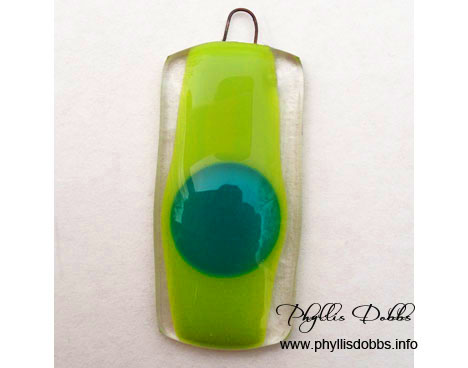
The class included a second project which was a pendent. Somehow I thought the pendent would be much easier – wrong!  I tried arranging several small pieces to create a design. But because everything was so small, I kept bumping the pieces after I arranged some, messing up my design. A large pair of tweezers would have helped. It was getting late so I took the easy way out after many attempts with the small pieces and used 2 large pieces.


Fused Glass pendent made in class

I plan to go back and create some more fused glass pieces as well as take other classes on different mediums. Even though my days and business are based on creating, I still find it relaxing and inspiring to craft and love working with my hands to make something.

I hope you are having a crafty day! (And if you have children, introduce them to crafting if you haven’t already – it will start a life long love of creating something!)

Phyllis

Redux – Paint a Flower Pot for Holiday Entertaining or Decorating

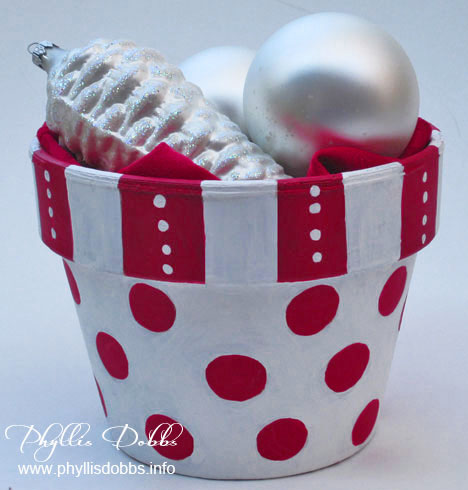
The holidays are rapidly approaching but there’s still time to create some great craft projects to help with decorating and entertaining. I want to share one of my earlier Christmas craft projects that is so quick and easy to make and has so many uses – the versatile terra cotta flower pot painted in holiday colors.

Christmas flower pot for entertaining

This painted flower pot can be used to hold food like cookies and candy (line the pot with a napkin first so that the food doesn’t touch the paint). For decorating use, it can hold ornaments or a plant. The size of pot that you use can also determine the use. A small 3 or 4 inch pot can be filled with food or small gift and given as a gift, or placed by the plates at a dinner party as a favor. Simply line with cellophane, tissue paper or fabric, add a food item or other small gift, bunch at the top and tie with a ribbon. Let your imagination come up with many more uses.

I used red and white for Christmas (which can also double as my school colors), but you can use other colors for different holidays – red, white and blue for the 4th of July, shades of green for St. Patrick’s Day, bright fun colors for a birthday, pastels for Easter, and so on. I also painted a flower pot for Halloween.

Easy peasy! I used a very simple design that is very easy to draw.

Wash the flower pot and go over it with alcohol to disinfect it.  With a pencil draw the lines for the stripes around the rim and draw 1/2″ circles randomly below the rim (or create your own design). Paint as shown in the photo.  I recommend painting one color at a time, allowing it to dry before painting with the second color. The white dots on the stripe were added last, after all drying. When all the paint is dry, seal with a coat of clear satin acrylic.

Enjoy!

Phyllis

Redux – Sew a Christmas Apron

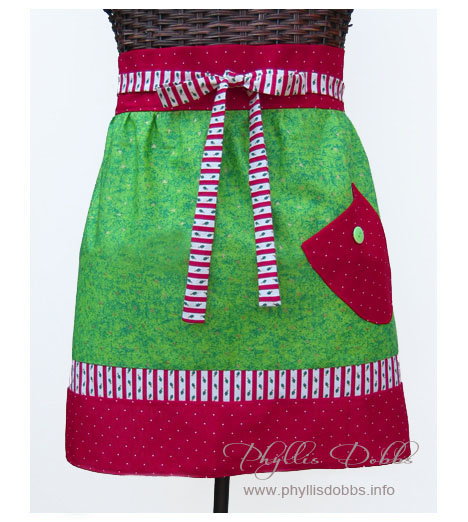
Sew a quick Christmas apron in just a couple of hours and wear it tonight! Aprons are fun and trendy to both sew and wear! I designed this apron pattern to wear for Christmas cooking and entertaining. Designed for an earlier post here on my blog, I wanted to share the apron pattern  again. Its so easy to make, even for a beginner, and can be made in a couple of hours from your fabric stash.

Free Christmas Apron Pattern

This apron pattern and others are available in Etsy WhimsyColor.

Thinking of Christmas aprons brings thoughts of all the wonderful smells of food cooking, cinnamon, and other spices. I also think of the citrus smell of oranges.

Enjoy both sewing and wearing it!

Phyllis

Studio Make-over, One Piece at a Time

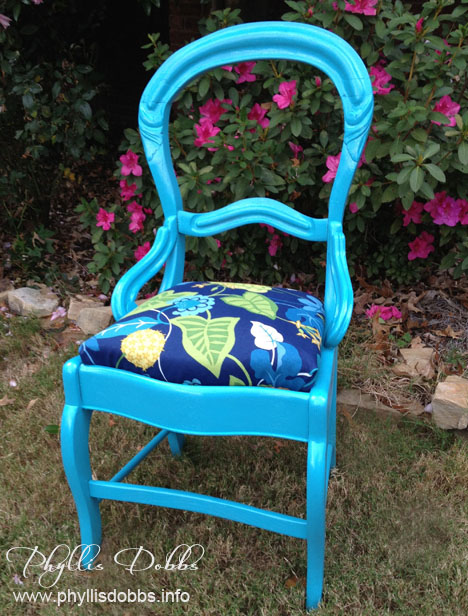
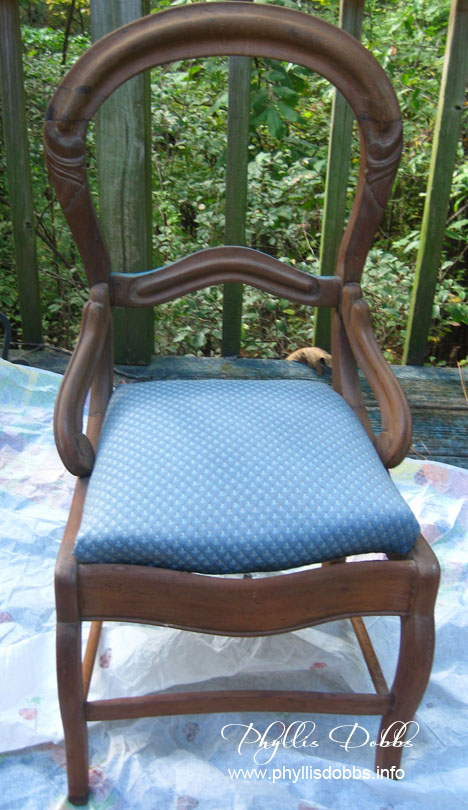
Making over my studio is progressing, but one piece at a time as I can work it in. After painting the file cabinets in my earlier post, I decided to use this poor lonely chair that had been hiding in a corner of my studio. I bought it stripped and unfinished years ago at an auction. I had intentions of doing something with it but had not. So it sat in a corner of my studio, lonely, unloved, unused, and neglected. After a re-do, this chair now shines brightly and sits prominently in front of a desk.

Turquoise painted chair

Hancock Fabrics had a sale on upholstery fabric so I got the amount I needed at 50% off the $17.99 price for around $6. I loved the print and colors, especially the turquoise. Actually, this fabric is an outdoor fabric, which is even better for studio use. I then went to Lowes with fabric in hand and found a great shade of turquoise spray paint. Its a few shades darker than my filing cabinets.

This project was pretty quick and easy. I just sprayed the chair with a few light coats of paint, then wrapped the seat with the fabric, tucked it under the bottom and stapled. And the total cost of the re-do was around $10. Not bad! I think it looks much better than the “before” version below.

Unfinish chair for Phyllis Dobbs studio

I’m so glad I bought this chair all those years ago. And since I also have a boring wing back chair that I use in my studio, also bought at an auction, I went back and bought more fabric for another makeover.  I just have to jump in and try my hand at upholstery which will be much more work than the chair seat. I’m mentally working it out with the help of a couple of books.

Here’s to success with all our little (and big) projects.

Phyllis
Sizzix Triple Play Blog Hop Week 6 – Blooms Greeting Card

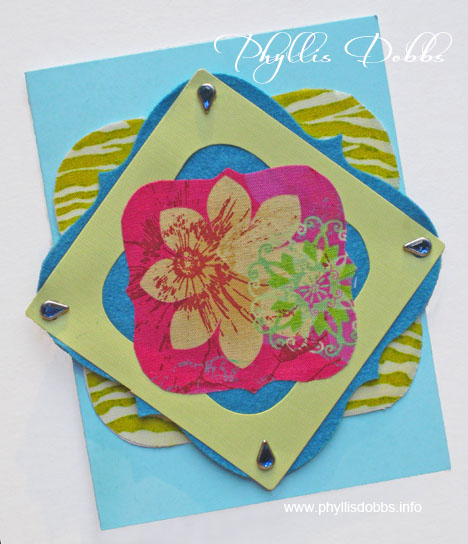
Greeting card made with Sizzix dieSend a warm message in a special greeting card you make! This week for the Sizzix blog hop, I created a colorful and fun card with Brenda Pinnick’s Album die from Sizzix, the featured die in this week’s hop. I also used fabric from Brenda’s Couleur Vie fabric collection from Henry Glass.

All you need is these few materials:

Album, Brackets, Bigz XL Die #656053 by Brenda Pinnick from Sizzix

Card stock, felt and fabric for the dies

Card or card stock

Felt (Felt in project from National Nonwovens)

Turquoise colored rhinestone brads

Glue (Beacon Zip Dry)

Fusible Web (Steam a Seam 2 from The Warm Company)

Instructions:

Cut each layer from the dies, alternating with cardstock, fabric and felt. The fabric was fused to the layer below with fusible web and the cardstock and felt were adhered with glue.  Punch holes in the corners and add rhinestone brads.  Glue the die layer stack to the front of a card and add your message.

For an alternative use for the die stack, add it to a present instead of a bow for a really unique look.

Be sure to hop to the other blogs to see all the fabulous projects.  Just click forward or back in the Sizzix button in the sidebar.

Wishing you a warm day – its cold here!

Phyllis

Sizzix Triple Play Blog Hop Week 5 – “For You” Gift Card

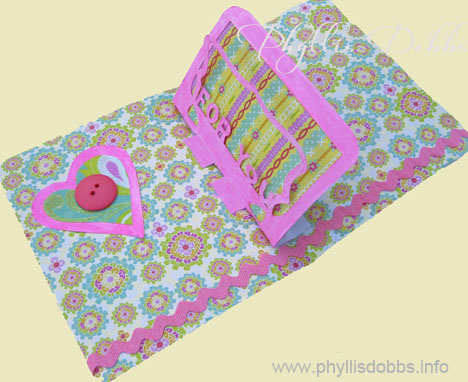
For You Gift CardCreate a special greeting card to go with a gift and let it speak volumes! For week 5 of our Sizzix Triple Play Blog Hop, I created this embellished greeting gift card.

Gift greeting card open with pop upThe card is fun to make and embellish with the following materials:

Sizzix die – Gift Card Holder, 3D Pop-up, Bigz XL Die #656740 by Karen Burniston

Heavy Paper

Scrapbook double sided paper

Assorted buttons

Rick rack

Adhesive – Beacon Zip Dry

Instructions:

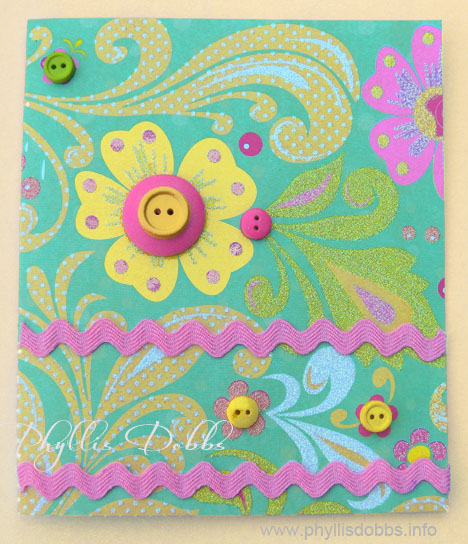
Cut paper to fold for the desired card size. Embellish the card front with buttons and rick rack.

Attach the die cut “For You” to the inside of the card. I added a striped scrapbook paper behind the frame opening. Note – if you are giving money or a gift card for a gift, you can insert it behind the smaller frame. I also glued a heart made of 2 layers of papers to the inside of the card along with more rick rack. The heart is embellished with a button.

With a pad of papers or your stash of scrapbook supplies, you can easily make dozens of cards!

Be sure to click forward or back on the Sizzix button in my side bar to hop to the other blogs to see all the fun and fabulous projects made this week!

Happy hopping!

Phyllis


Sizzix Triple Play Blog Hop Week 2 – Spot of Color Twist Box

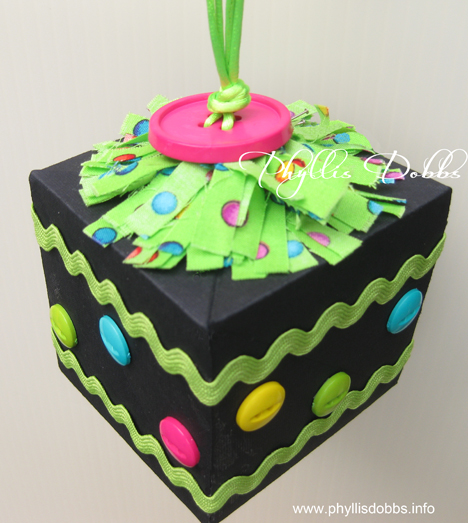
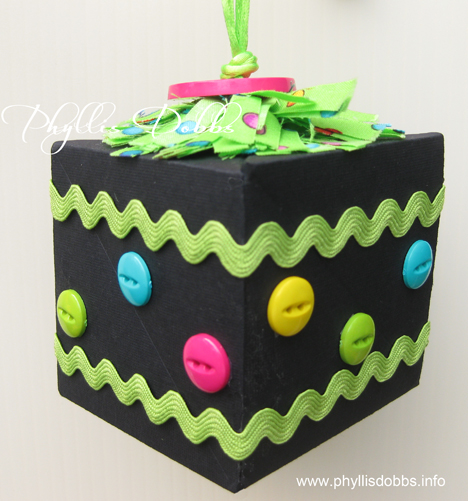
A Spot of Color Twist BlockWhat a fun project – the twist box created with Sizzix’s die by Karen Burniston can be decorated so many ways.  I decided to create a colorful ornament that would also make a fun addition to a birthday card.

Twist Box created with Sizzix die

This was easy to make with a few embellishment items.

Materials:

Sizzix Twist Cube Die

DCWV black card stock

Large 1 1/4″ button

Assorted multi-color buttons

Rick rack

Rat tail cording – 2 pieces 14″

Beacon Paper Tac glue

Fabric – 1-1/2″ x 24″ strip

Instructions:

1. Cut and make box from black heavyweight paper.

2. Thread one piece of cording through 2 holes on the large button so that the ends of the cords are on the back side of the button. Thread the other piece of cording through the remaining 2 holes. Pull ends so that they are even and insert through hole in the top of the box by 1/2″. Glue the ends to the top inside of the box.

3. Sew a gathering stitch on one long edge of the fabric 1/4″ from edge. Cut to fringe on the opposite side edge. Do not cut through the stitches. Pull gathers to 6″ and tie off.

4. Wrap the gathered edge on the top of the box around the opening with the cords. Glue as you wrap. After the glue dries thoroughly, slide the button down the cording to sit on top of the fringe. Tie an overhand knot with the cord on top of the button.

5. Glue 2 rows of rick rack around the box, 1/2″ from the top and bottom edges. Glue buttons around box.

There are 60 designers participating in this Sizzix Triple Play Blog Hop. Please check out their projects – they were all amazing last week and I know they be amazing again this week. Just click on the Sizzix blog button in the side bar to go back or forward.

Enjoy the hopping! (and check back next week).

Phyllis

Terrorific Tuesday – Week 4 of free Halloween DIY’s

TT Week 4 2010

Vanessa shows us how to make a Cute Felt Pumpkin in just a few minutes!

Get creative with Eileen Hull with her Pop Up Bat card. Super festive!

Glory makes a beautiful Autumn Wreath to hang on your door or wall.

Erika shares with us her cute Halloween bandana that her dog Sebastian loves wearing!

Cheryl Ball wows us with an adorable Jack-o-lantern Pin perfect for the season!

Sew a sweet Pumpkin Placement with Phyllis Dobbs!

Crafty Chica gets her glow on with this Sci Fi Senorita Head that is totally spooky!

Crafterella offers up some downloadable custom labels that are super spooky and fun!

Make a spooky Undead Terrorarium with Silvia Chenault.

Whip up some cute and quirky Moss Monsters with Missy at Marvelously Messy!

Kate Pullen offers up a fun Pumpkin Favor Box perfect to hand out at Halloween parties!

Get into the fall spirit with this Pretty Fabric Flower from Ann Butler.

Pattiewack crafts up some Mummy Barbies perfect for a haunting Halloween display!

Alexa a.k.a. Swelldesigner makes a bold Orange and black Mary Jane candy wreath, perfect for hanging or eating!

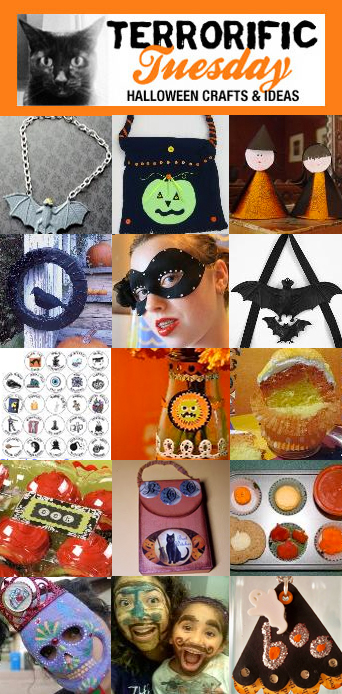
Terrorific Tuesday – Week 2 of Halloween DIY Crafts

terrorific tuesday 2010 week 2

Silvia Chenault turns a toy bat into an instant neckpiece (but will it bite your neck?)

Phyllis Dobbs shows us how to recycle a t-shirt into a really cool Halloween trick-or-treat bag!

Kate Pullen brews up adorable Paper Cone Witches!

Messy Missy makes a super spooky wreath with Duct tape!

Avalon Potter goes glam with her Halloween Masquerade Ball mask!

Patty Cappelluti goes bat crazy making this spooky bat door decoration!

Crafterella is a ghoul gone wild in her Ghoul Scout Costume. Download the custom patches she made for her costume!

Alexa Westerfield a.k.a. Swelldesigner upcycles a Starbucks bottle into a swell Halloween vase!

Cheryl Ball delights us with yummy candy corn cupcakes!

Pattiewack upcycles an apple tray into a festive cupcake carrier. So inexpensive and easy!

Ann Butler crafts up a boo-tiful holder for your ATCs complete with a black cat!

Glory whips up a super fun and healthy pumpkin-inspired muffin meal for her kids. Love it!

Crafty Chica makes the perfect mask to celebrate Dia de los Muertos.

Maya in the Moment has some face painting fun with her little cousin and of course, hilarity ensues!

Eileen Hull has a ghostly good time creating this cute diecut necklace!

That’s it for this week! If you are interested in playing in the fun Terrorific Tuesday roundup, e-mail Alexa at swelldesigner (at) gmail (dot) com and she’ll send you the details!