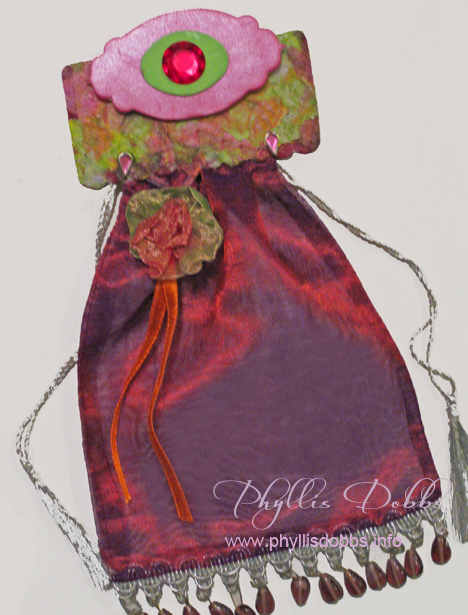
Sizzix Triple Blog Hop Week 7 – Gift Bag Topper

Gift bag topperCreate a treat bag topper to add a special touch to your gift bags! This week for our Sizzix Triple Play blog hop, we are using Eileen Hull’s Treat Bag topper die. There are so many possibilities for uses with this die with its versatility. I love it!

Decoupaged bag topper

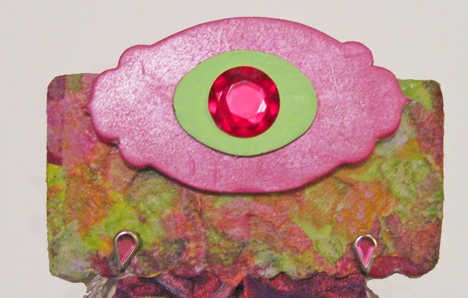
I also love decoupaging so I decoupaged my topper to give it texture and color. I like the marbleized look that resulted, although the paper napkin I used was a floral pattern.

The materials I used included:

Die for Treat Bag Toppers Bigz XL Die #656774 by Eileen Hull for Sizzix

Heavy card stock

Mod Podge

Paper Napkin with a pattern

Cabochon bead

Pink oil paint stick

Green acrylic paint

2 pink rhinestone brads

Glue dots

Glue – Beacon Zip Dry

Treat Bag

Instructions:

1.Tear the paper napkin into small pieces and decoupage to the treat topper with Mod Podge. Use the Mod Podge to glue the napkin to the topper and to seal the top of the paper. I used several layers of the napkin to get more texture.

2. Paint the large medallion pink. I used an oil paint stick to paint it – I like the pearled look of the paint. I then painted a smaller oval medallion green.

3. Glue the the green oval centered to the pink medallion and glue the cabochon bead centered on the green medallion. I used glue dots to attach the medallion to the bag topper so that it stands out.

4. Use the rhinestone brads to attach the topper to the bag (after you have added your goodie to the bag!).

Be sure to check the all the other fantastic projects in the Triple Play blog hop by clicking on the forward or back button in the sidebar. This is the last week of this hop and it has been so much fun. I’ve had a blast working on the hop projects and dies.

Thanks for visiting the Triple Play Blog Hop! Please visit the TriplePlay blog for more fun ideas from Brenda Pinnick, Karen Burniston, Eileen Hull and friends. If you have enjoyed seeing all of the inspiring ideas on the blog hop, please “like” Triple Play on Facebook.

Have a great time  hopping!

Sizzix Triple Play Blog Hop Week 6 – Blooms Greeting Card

Greeting card made with Sizzix dieSend a warm message in a special greeting card you make! This week for the Sizzix blog hop, I created a colorful and fun card with Brenda Pinnick’s Album die from Sizzix, the featured die in this week’s hop. I also used fabric from Brenda’s Couleur Vie fabric collection from Henry Glass.

All you need is these few materials:

Album, Brackets, Bigz XL Die #656053 by Brenda Pinnick from Sizzix

Card stock, felt and fabric for the dies

Card or card stock

Felt (Felt in project from National Nonwovens)

Turquoise colored rhinestone brads

Glue (Beacon Zip Dry)

Fusible Web (Steam a Seam 2 from The Warm Company)

Instructions:

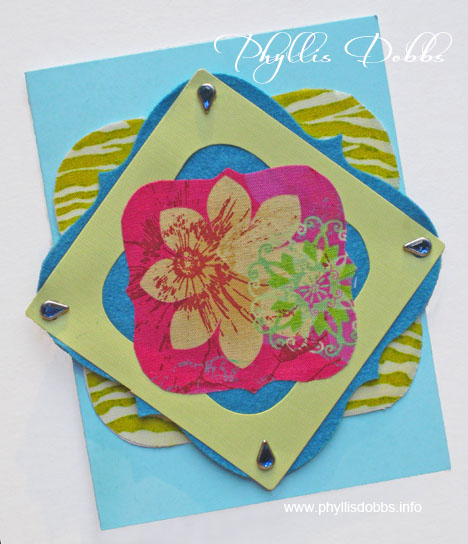
Cut each layer from the dies, alternating with cardstock, fabric and felt. The fabric was fused to the layer below with fusible web and the cardstock and felt were adhered with glue.  Punch holes in the corners and add rhinestone brads.  Glue the die layer stack to the front of a card and add your message.

For an alternative use for the die stack, add it to a present instead of a bow for a really unique look.

Be sure to hop to the other blogs to see all the fabulous projects.  Just click forward or back in the Sizzix button in the sidebar.

Wishing you a warm day – its cold here!

Phyllis

Sizzix Triple Play Blog Hop Week 5 – “For You” Gift Card

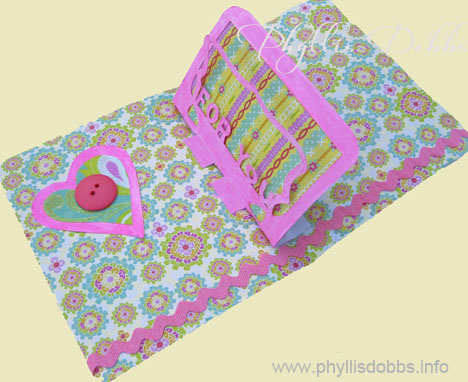
For You Gift CardCreate a special greeting card to go with a gift and let it speak volumes! For week 5 of our Sizzix Triple Play Blog Hop, I created this embellished greeting gift card.

Gift greeting card open with pop upThe card is fun to make and embellish with the following materials:

Sizzix die – Gift Card Holder, 3D Pop-up, Bigz XL Die #656740 by Karen Burniston

Heavy Paper

Scrapbook double sided paper

Assorted buttons

Rick rack

Adhesive – Beacon Zip Dry

Instructions:

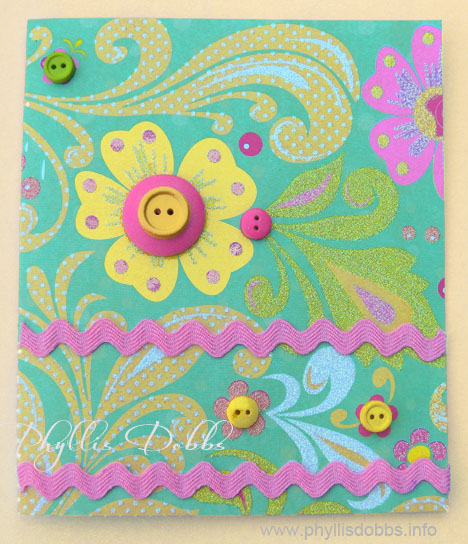
Cut paper to fold for the desired card size. Embellish the card front with buttons and rick rack.

Attach the die cut “For You” to the inside of the card. I added a striped scrapbook paper behind the frame opening. Note – if you are giving money or a gift card for a gift, you can insert it behind the smaller frame. I also glued a heart made of 2 layers of papers to the inside of the card along with more rick rack. The heart is embellished with a button.

With a pad of papers or your stash of scrapbook supplies, you can easily make dozens of cards!

Be sure to click forward or back on the Sizzix button in my side bar to hop to the other blogs to see all the fun and fabulous projects made this week!

Happy hopping!

Phyllis


Sizzix Triple Play Blog Hop Week 4 – Christmas Journal

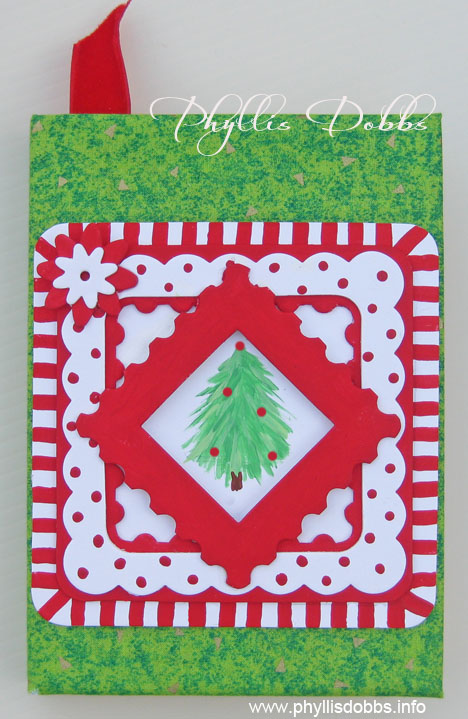
Christmas journal

Christmas is such a special time of the year with all the activities and gatherings of family and friends. Keep the memories of your Chistmas holiday each year by journaling in a Christmas journal.

Our 4th week of the Sizzix Triple Play blog hop is the Frame and Frame back die by Eileen Hull. There are so many uses for this die, especially this time of the year for Christmas photos.  I chose to use it to create and decorate a Christmas journal.

To make the journal, you will need the following materials:

Frame and Frame Back, 3D Pro Scoreboards Die #656835 by Eileen Hull

Heavy card stock

Journal

Green fabric

Red and green acrylic paints

Adhesive – Zip Dry by Beacon

Instructions:

Cut the fabric 2″ larger than the opened journal on all sides.  Center the journal and fold the fabric edges to the inside the cover, fold the raw edge back and glue. Cut fabric pieces out along the edge of the spine.

Paint the frame pieces solid red, red stripes and red dots.

Paint a Christmas tree or other motif centered on the bottom frame.  Align the frame pieces and glue them together.  Turn the small red frame turned catercorner. Glue the completed frame centered on the journal.

Be sure to hop to the other blogs to see an assortment of outstanding and unique uses for this die.  Just click on the Sizzix button in the sidebar and hop forward to the next blog.

Thanks for visiting and enjoy the hop!

Phyllis

Sizzix Triple Play Blog Hop Week 3- Floral Gift Box

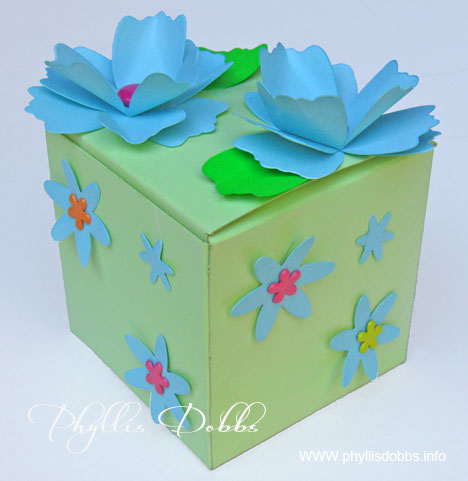
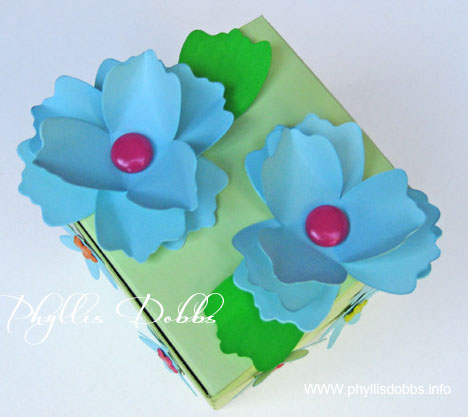
Giftbox decorated with flowers and paintThis week, we used Brenda Pinnick’s Flower, Beauty Bloom Sizzix dies for our Blog Hop project. I really love flowers so I enjoyed using flowers to decorate a gift box – a great way to add a special touch to gift giving.

Gift box painted and decorated with flowers

The materials used were:

Sixxiz die #655455 by Brenda Pinnick

Card stock

Spray paint – aqua and green by Krylon

Green acrylic paint

Gift box

Brads – round and floral designs

Hole punch

Glue – Beacon Zip Dry for paper

Instructions:

I spray painted the box with green paint and all the flower pieces with aqua paint.  2 petal sections were painted a darker green to use as leaves.

After the paint dried, I punched holes in the center of the flower pieces.  2 flowers were created by assembling 3 large flower pieces for each flower and putting a round brad through holes.  I turned up the petals of the top 2 pieces. After punching holes in the box top I attached the flowers with the brads.

Flower shaped brads were ued to attach the large flat flowers to the sides of the box and glue was used to attach the small flowers.

Be sure to hop to the other blogs in the blog hop by clicking on the links in the Sizzix badge in my sidebar!  There are some amazing designs.

All I need to do now is add the gift!

Happy Crafting!

Phyllis

Happy Haunting – Halloween greeting card


Halloween greeting card

Halloween greeting card

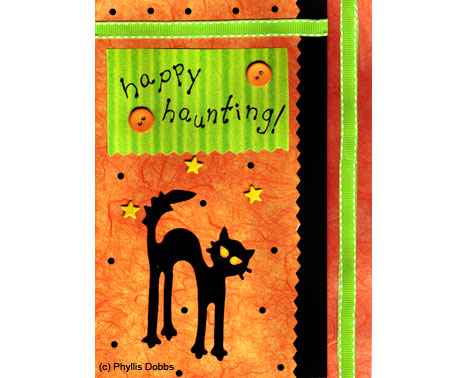
Happy Haunting!  Send your spooky greetings with this black cat card.  The cat die cut was designed by Brenda Pinnick for Sizzix.  Since my own kitty cat is black, this greeting has special meaning.

To make this card, you will need the following materials:

  • Orange, black and green striped cardstock
  • Curvy edged scissors
  • Green ribbon
  • Star brads
  • orange buttons
  • hole punch
  • glue
  • black pen

Fold the card so that the top side edge is 1 1/2 inches from the side edge of the card bottom.  Trim top side edge with curvy scissors.   Arrange and glue items in place.  Punch holes randomally.  Cut a black piece to match the top with the side edge extended  3/4″ beyond the curvy edge.  Glue to the back side of the card top.


(c) Phyllis Dobbs.  This is for your personal enjoyment.  It may not be used commercially without written permission of Phyllis Dobbs.

Terrorific Tuesday – Halloween craft projects

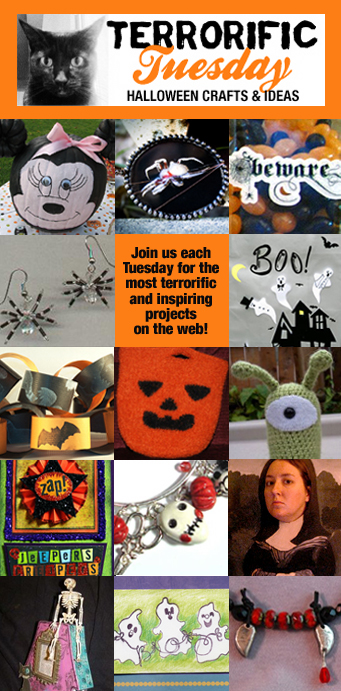
It’s back!!!! It’s the second official post of Terrorific Tuesday! The following very fantastic crafters have brewed up some great projects and want to share them with you. The pics above are in order with the links below, so sit a “spell” and peruse the links or get out your glue gun and scissors and join in on the party!

terrorific tuesday mosaic week 2

Amy Locurto paints & constructs a marvelous Minnie Mouse pumpkin that’s simply adorable.

Rebecca Hull at HHH Enterprises crafts up some spooky “Itsy Bitsy Spider” & “Murder at Midnight” Pendants that are absolutely terrorific! Be inspired to make your own pendant using your favorite Halloween image.

Lori-Lyn Hurley of the Dream Life makes a quick and easy craft by turning plain jars into spooky accents!

Tammy Powley, the jewelry guide at about.com, wears these fun spider earrings every year around this time. Seed beads, a few crystals, and craft wire are all you need to make a pair of your own.

Phyllis Dobbs haunts us with an adorable gift bag using Brenda Pinnick’s Sizzix dies.

Kate Pullen, the Rubber Stamping guide at about.com, does a Halloween spin on a fun & classic craft – the paper chain!

Sarah E. White, the knitting guide at about.com, shares with us knitted jack-o-lantern bag that’s a real treat!

Braaaiiinnssss!!!! Kiki of Kiki’s Craft World crafts up a cute brain slug hair accessory!

Marice Rodriguez gets carded with this totally cute Jeepers Creepers card!

Margot Potter, The Impatient Crafter™,offers this seasonally appropos and simple to recreate ‘Runs with Scissors’ charm bracelet. For those who know the hazards of crafting far too well and yet continue to play with sharp objects, toxic substances and messy paints and inks, this one’s for you!

Alexa Westerfield a.k.a. Swelldesigner shows you how to become a living masterpiece. She creates a costume from a artist canvas.

Kris Tuey a.k.a. the Collage Contessa gets her spookiness on with a Skeleton House Frame and oodles of glitter!

Brenda Pinnick’s three happy little ghosts have figured out how to spell “Boo!” . Her Halloween greeting card is made with her own clear stamp set available from Sizzix and her papers, available on QVC.

Melissa J. Lee gets bit by a passion for vampires with this simple fanged Bite Me necklace.

If you’d like to participate next week, please read more about it here. It’s open to all bloggers out there who want to join in!

Paper craft a Halloween gift bag or trick-or-treat bag

Halloween Gift Bag or Trick-or-treat Bag

Halloween Gift Bag or Trick-or-treat Bag

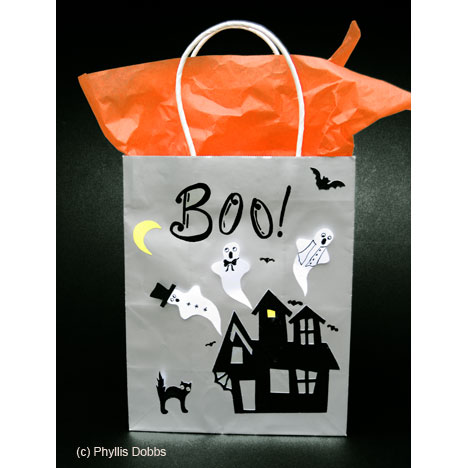
Booooo!   Halloween is rapidly approaching and I am posting a Halloween craft each week as part of Terrorific Tuesday.  This week,  I want to share with you this paper bag that I decorated to use as a Halloween gift bag or a trick-or-treat bag.  In addition, this will make a cute Halloween lunch bag for you or your children.

  1. I started with a plain gray gift bag.  The spooky haunted house and the bat are die cuts using Halloween dies by Brenda Pinnick for Sizzix (available currently in craft stores).  Other supplies needed are  – black Sharpie pens(felt tip and thin tip),  glue stick and black, white and yellow cardstock.  Optional – I used crystals heat set with a wand for the cat eyes.
  2. Draw ghosts and cut out.   Draw and cut out black top hat and cat from black cardstock and a moon and window light from yellow cardstock.
  3. Arrange haunted house, cat, moon, bat, and ghosts and glue.  For the ghosts, glue the bottom point areas so that the tops can stand out from the bag.  Glue the cat except for the tail.
  4. Draw the word Boo and small bats.

If you are carrying a bottle of wine to a Halloween party, you can use the same design on a wine bottle bag, just spread the design elements more vertical.

I hope each of you is enjoying a nice fall and your preparations for  Halloween festivities.

(C)Phyllis Dobbs.  This design is for your personal use and enjoyment.  It may not be used for commercial purposes without the written permission of Phyllis Dobbs