Sizzix Triple Blog Hop Week 7 – Gift Bag Topper

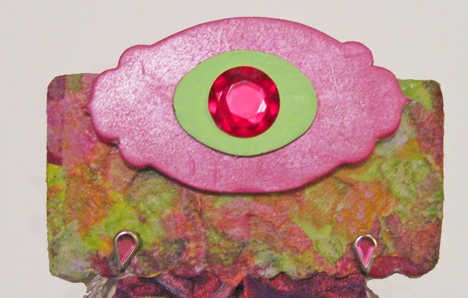
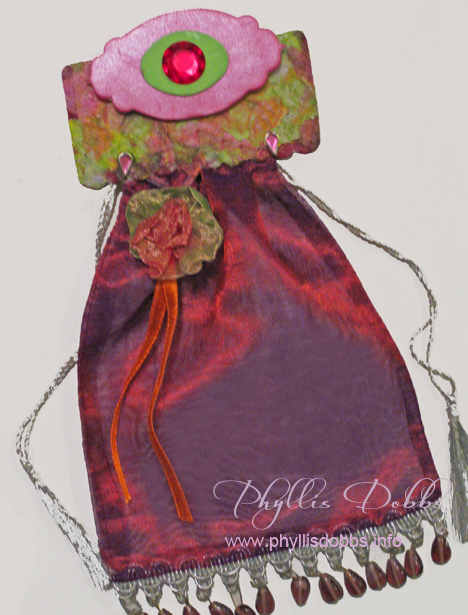
Gift bag topperCreate a treat bag topper to add a special touch to your gift bags! This week for our Sizzix Triple Play blog hop, we are using Eileen Hull’s Treat Bag topper die. There are so many possibilities for uses with this die with its versatility. I love it!

Decoupaged bag topper

I also love decoupaging so I decoupaged my topper to give it texture and color. I like the marbleized look that resulted, although the paper napkin I used was a floral pattern.

The materials I used included:

Die for Treat Bag Toppers Bigz XL Die #656774 by Eileen Hull for Sizzix

Heavy card stock

Mod Podge

Paper Napkin with a pattern

Cabochon bead

Pink oil paint stick

Green acrylic paint

2 pink rhinestone brads

Glue dots

Glue – Beacon Zip Dry

Treat Bag

Instructions:

1.Tear the paper napkin into small pieces and decoupage to the treat topper with Mod Podge. Use the Mod Podge to glue the napkin to the topper and to seal the top of the paper. I used several layers of the napkin to get more texture.

2. Paint the large medallion pink. I used an oil paint stick to paint it – I like the pearled look of the paint. I then painted a smaller oval medallion green.

3. Glue the the green oval centered to the pink medallion and glue the cabochon bead centered on the green medallion. I used glue dots to attach the medallion to the bag topper so that it stands out.

4. Use the rhinestone brads to attach the topper to the bag (after you have added your goodie to the bag!).

Be sure to check the all the other fantastic projects in the Triple Play blog hop by clicking on the forward or back button in the sidebar. This is the last week of this hop and it has been so much fun. I’ve had a blast working on the hop projects and dies.

Thanks for visiting the Triple Play Blog Hop! Please visit the TriplePlay blog for more fun ideas from Brenda Pinnick, Karen Burniston, Eileen Hull and friends. If you have enjoyed seeing all of the inspiring ideas on the blog hop, please “like” Triple Play on Facebook.

Have a great time  hopping!

Sizzix Triple Play Blog Hop Week 6 – Blooms Greeting Card

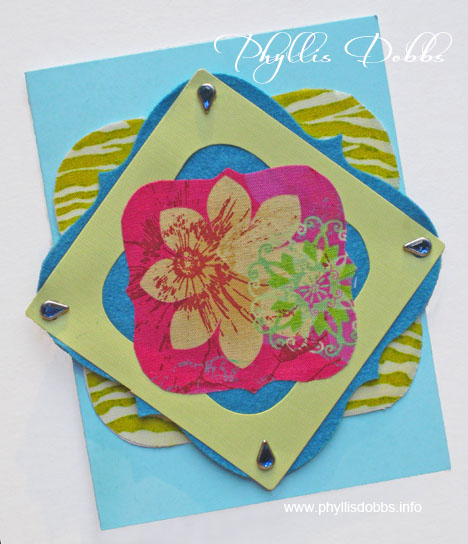
Greeting card made with Sizzix dieSend a warm message in a special greeting card you make! This week for the Sizzix blog hop, I created a colorful and fun card with Brenda Pinnick’s Album die from Sizzix, the featured die in this week’s hop. I also used fabric from Brenda’s Couleur Vie fabric collection from Henry Glass.

All you need is these few materials:

Album, Brackets, Bigz XL Die #656053 by Brenda Pinnick from Sizzix

Card stock, felt and fabric for the dies

Card or card stock

Felt (Felt in project from National Nonwovens)

Turquoise colored rhinestone brads

Glue (Beacon Zip Dry)

Fusible Web (Steam a Seam 2 from The Warm Company)

Instructions:

Cut each layer from the dies, alternating with cardstock, fabric and felt. The fabric was fused to the layer below with fusible web and the cardstock and felt were adhered with glue.  Punch holes in the corners and add rhinestone brads.  Glue the die layer stack to the front of a card and add your message.

For an alternative use for the die stack, add it to a present instead of a bow for a really unique look.

Be sure to hop to the other blogs to see all the fabulous projects.  Just click forward or back in the Sizzix button in the sidebar.

Wishing you a warm day – its cold here!

Phyllis

Sizzix Triple Play Blog Hop Week 5 – “For You” Gift Card

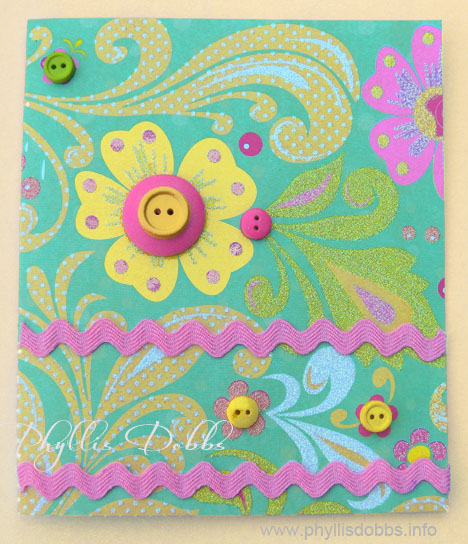
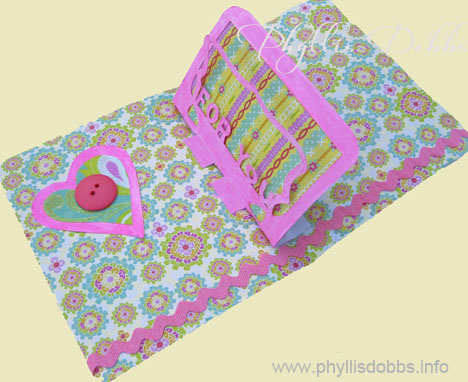
For You Gift CardCreate a special greeting card to go with a gift and let it speak volumes! For week 5 of our Sizzix Triple Play Blog Hop, I created this embellished greeting gift card.

Gift greeting card open with pop upThe card is fun to make and embellish with the following materials:

Sizzix die – Gift Card Holder, 3D Pop-up, Bigz XL Die #656740 by Karen Burniston

Heavy Paper

Scrapbook double sided paper

Assorted buttons

Rick rack

Adhesive – Beacon Zip Dry

Instructions:

Cut paper to fold for the desired card size. Embellish the card front with buttons and rick rack.

Attach the die cut “For You” to the inside of the card. I added a striped scrapbook paper behind the frame opening. Note – if you are giving money or a gift card for a gift, you can insert it behind the smaller frame. I also glued a heart made of 2 layers of papers to the inside of the card along with more rick rack. The heart is embellished with a button.

With a pad of papers or your stash of scrapbook supplies, you can easily make dozens of cards!

Be sure to click forward or back on the Sizzix button in my side bar to hop to the other blogs to see all the fun and fabulous projects made this week!

Happy hopping!

Phyllis


Sizzix Triple Play Blog Hop Week 4 – Christmas Journal

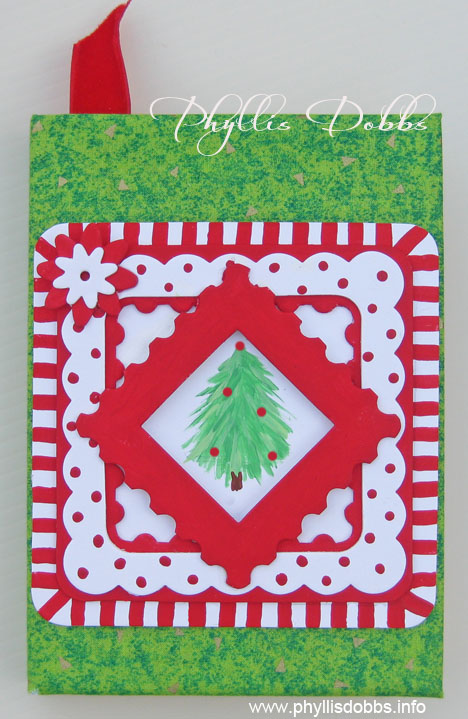
Christmas journal

Christmas is such a special time of the year with all the activities and gatherings of family and friends. Keep the memories of your Chistmas holiday each year by journaling in a Christmas journal.

Our 4th week of the Sizzix Triple Play blog hop is the Frame and Frame back die by Eileen Hull. There are so many uses for this die, especially this time of the year for Christmas photos.  I chose to use it to create and decorate a Christmas journal.

To make the journal, you will need the following materials:

Frame and Frame Back, 3D Pro Scoreboards Die #656835 by Eileen Hull

Heavy card stock

Journal

Green fabric

Red and green acrylic paints

Adhesive – Zip Dry by Beacon

Instructions:

Cut the fabric 2″ larger than the opened journal on all sides.  Center the journal and fold the fabric edges to the inside the cover, fold the raw edge back and glue. Cut fabric pieces out along the edge of the spine.

Paint the frame pieces solid red, red stripes and red dots.

Paint a Christmas tree or other motif centered on the bottom frame.  Align the frame pieces and glue them together.  Turn the small red frame turned catercorner. Glue the completed frame centered on the journal.

Be sure to hop to the other blogs to see an assortment of outstanding and unique uses for this die.  Just click on the Sizzix button in the sidebar and hop forward to the next blog.

Thanks for visiting and enjoy the hop!

Phyllis

Sizzix Triple Play Blog Hop Week 3- Floral Gift Box

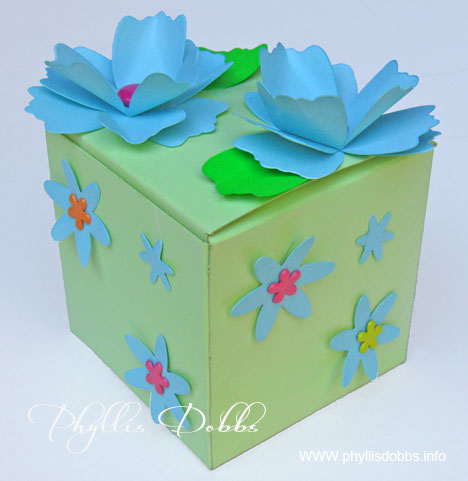
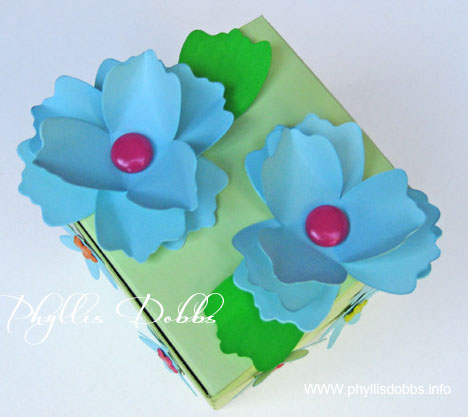
Giftbox decorated with flowers and paintThis week, we used Brenda Pinnick’s Flower, Beauty Bloom Sizzix dies for our Blog Hop project. I really love flowers so I enjoyed using flowers to decorate a gift box – a great way to add a special touch to gift giving.

Gift box painted and decorated with flowers

The materials used were:

Sixxiz die #655455 by Brenda Pinnick

Card stock

Spray paint – aqua and green by Krylon

Green acrylic paint

Gift box

Brads – round and floral designs

Hole punch

Glue – Beacon Zip Dry for paper

Instructions:

I spray painted the box with green paint and all the flower pieces with aqua paint.  2 petal sections were painted a darker green to use as leaves.

After the paint dried, I punched holes in the center of the flower pieces.  2 flowers were created by assembling 3 large flower pieces for each flower and putting a round brad through holes.  I turned up the petals of the top 2 pieces. After punching holes in the box top I attached the flowers with the brads.

Flower shaped brads were ued to attach the large flat flowers to the sides of the box and glue was used to attach the small flowers.

Be sure to hop to the other blogs in the blog hop by clicking on the links in the Sizzix badge in my sidebar!  There are some amazing designs.

All I need to do now is add the gift!

Happy Crafting!

Phyllis

Sizzix Triple Play Blog Hop Week 2 – Spot of Color Twist Box

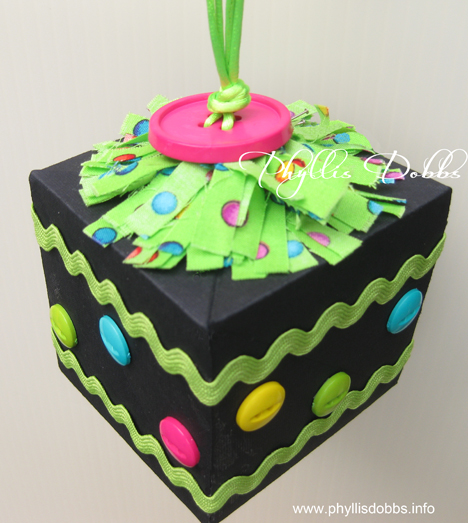
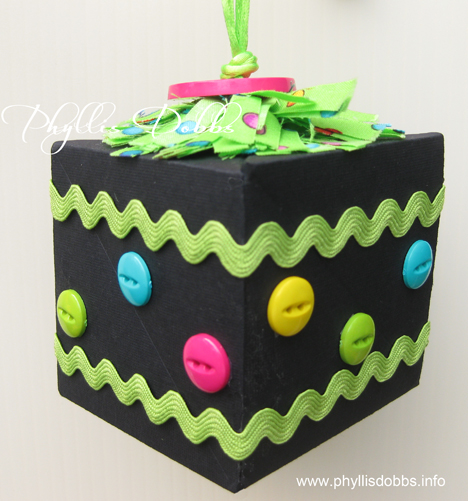
A Spot of Color Twist BlockWhat a fun project – the twist box created with Sizzix’s die by Karen Burniston can be decorated so many ways.  I decided to create a colorful ornament that would also make a fun addition to a birthday card.

Twist Box created with Sizzix die

This was easy to make with a few embellishment items.

Materials:

Sizzix Twist Cube Die

DCWV black card stock

Large 1 1/4″ button

Assorted multi-color buttons

Rick rack

Rat tail cording – 2 pieces 14″

Beacon Paper Tac glue

Fabric – 1-1/2″ x 24″ strip

Instructions:

1. Cut and make box from black heavyweight paper.

2. Thread one piece of cording through 2 holes on the large button so that the ends of the cords are on the back side of the button. Thread the other piece of cording through the remaining 2 holes. Pull ends so that they are even and insert through hole in the top of the box by 1/2″. Glue the ends to the top inside of the box.

3. Sew a gathering stitch on one long edge of the fabric 1/4″ from edge. Cut to fringe on the opposite side edge. Do not cut through the stitches. Pull gathers to 6″ and tie off.

4. Wrap the gathered edge on the top of the box around the opening with the cords. Glue as you wrap. After the glue dries thoroughly, slide the button down the cording to sit on top of the fringe. Tie an overhand knot with the cord on top of the button.

5. Glue 2 rows of rick rack around the box, 1/2″ from the top and bottom edges. Glue buttons around box.

There are 60 designers participating in this Sizzix Triple Play Blog Hop. Please check out their projects – they were all amazing last week and I know they be amazing again this week. Just click on the Sizzix blog button in the side bar to go back or forward.

Enjoy the hopping! (and check back next week).

Phyllis

Sizzix Triple Play Blog Hop Week 1 – Peppermint Candy House

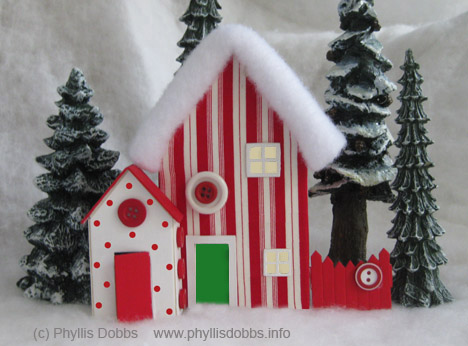
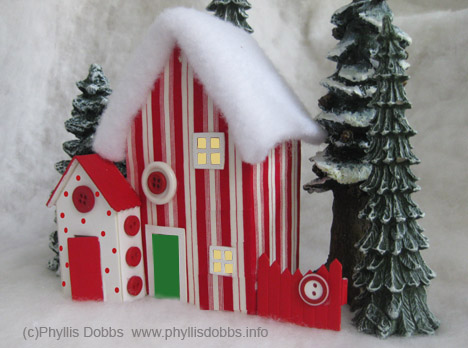
Christmas Candy Cane House from Sizzix diePeppermint Candy Christmas House from Sizzix die

I’m delighted to be part of the Sizzix Triple Play Blog Hop featuring 60 designers. That’s 60 designs with instructions each week.

Christmas is just 7 weeks away!  Can you believe it? I chose to make a Peppermint Candy house since the season is so close.

It was really fun to make so here are the materials you need as well as the instructions.

Materials:

#656836; Sizzix Scoreboards Pro Die – House, 3D, by Eileen Hull

Sizzix 12×12 matboard, white

Sizzix Big Shot Pro die cutting machine

1/4 yard red/white stripe fabric

Beacon Fabric-Tac Glue

White batting

Red acrylic paint

Paint brush

Yellow and green card stock

Assorted red and white buttons

Pencil

Instructions –

1.  Fold tabs areas of the house back and trace the outline of the house on the back side of the stripe fabric with a pencil. Cut out adding 1/4″ all the way around the house outline.

2.  Lay the fabric right side  down and glue the house to the back side of the fabric.   Cut an X in the window and door areas, cutting from corner to corner.  Fold the pieces back and glue to the back side of the house.  Fold edges around the house back and glue to the back of the house.  Cut pieces for the door and windows from the card stock and glue to the back side of the house. Fold house and glue together following instructions with the die.

3.  Fold batting in half and cut a piece of batting the width of the roof and adding 1/2″ to the depth.  Lightly glue the batting together between the layers.  Align raw edges of the batting to the back edge so that the fold is over the front edge of the roof.  Glue the batting to the roof.  Put a line of glue on the front edge of the roof and press the batting over the edge. Glue the window and door frames in place.

4.  Paint the roof and door of the small house red and paint red dots on the front. Paint the fence red. Fold house together and glue on the roof. Glue the small house to the larger house, overlapping by 1/3″. Glue buttons to house. Glue fence to attach to house.

Please click on the Sizzix badge in the sidebar to visit the other blogs in the blog hop.  You will see some fabulous houses!

Phyllis

Ribbon organizing made easy.

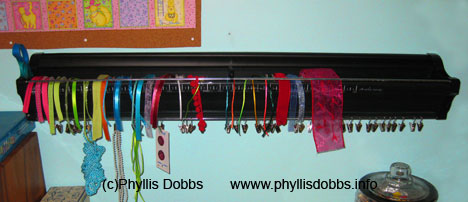
I’m excited to show you a new addition to my studio – a ribbon organizer.  Clip it Up was a new  exhibiting company at the Houston Quilt Market and Festival last month.  They had a supper display in their booth of wonderful organizers for ribbons, scrapbook supplies and just about anything you have in your stash!

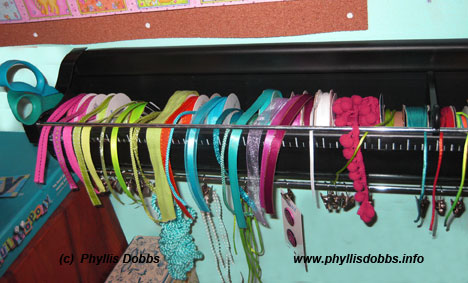
I loved all of the organizers, but especially fell in love with the Ribbon Organizer.  I chose the one that is 36″ long.  It has 40 clips to hang remnants below the organizer and has storage on each end to hold scissors. It also comes with a tape measure decal that applies to the organizer for easy hands free measuring.

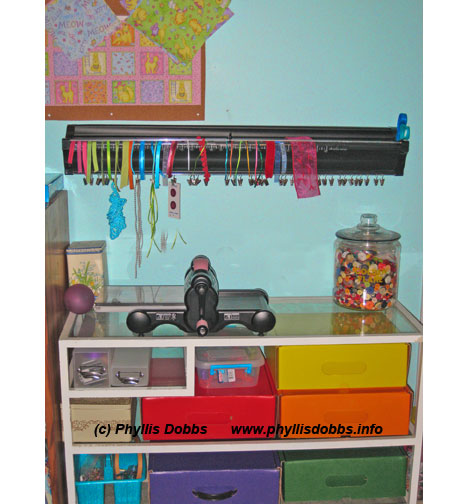
I hung the ribbon organizer over this table in my sewing area, behind my sewing machine, so that the ribbons and trims will be in easy view and reach.  I have boxes of ribbons, but only put my favorite ones in the organizer.  I didn’t fill it up so that I will have space for new ribbons that I have my eyes on for immediate purchase.  You may also notice my Sizzix Big Shot die cutting machine.  I have it close as well for cutting fabric dies for applique as well as paper cuts.  I love color so I have color coded boxes to hold supplies.  (I can’t remember numbers, but I can definitely associate colors with the contents of each box.)  And I also keep my button stash close at hand in a huge jar that is not nearly big enough.

I love attending Quilt Market and look forward to the Spring Market.  There are always fabulous finds at each show and I am treasuring my ribbon organizer.

Enjoy and display your stash!

Phyllis

PS, I just found out this news after emailing ClipItUp to let them know that I loved the ribbon organizer and blogged about it.  It will be on sale the weekend after Thanksgiving Nov 27-30 for almost half price!