Fun Crafty Products at the CHA Summer Show

The exhibitors at the Summer CHA Trade show showcased some really cool products and displays in spite of the heat outside!  I attended the Craft and Hobby tradeshow which was held in Chicago during July and had a delightful time checking everything out.  The focus of the summer show is scrapbooking and all the papers and products that go with creating anything with paper.

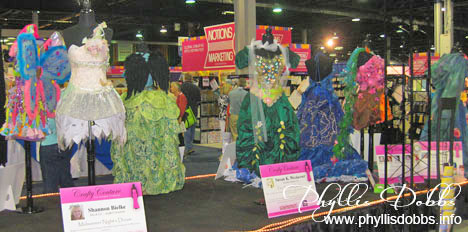
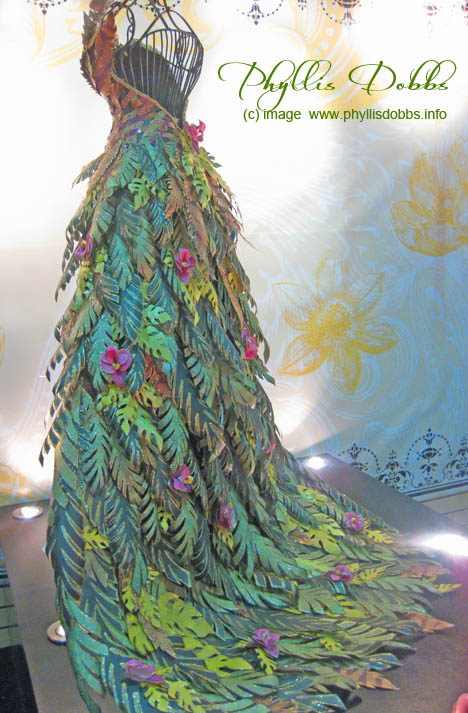
Amazing paper dresses have been created for Paper Runways in past shows and this show hosted a Crafty Couture Runway featuring dresses made with mixed media.  Two displays featured 18 dresses with the 6 winning entries to be featured in Coth Paper Scissors magazine.

Mixed Media dresses in CHA's Crafty Couture display

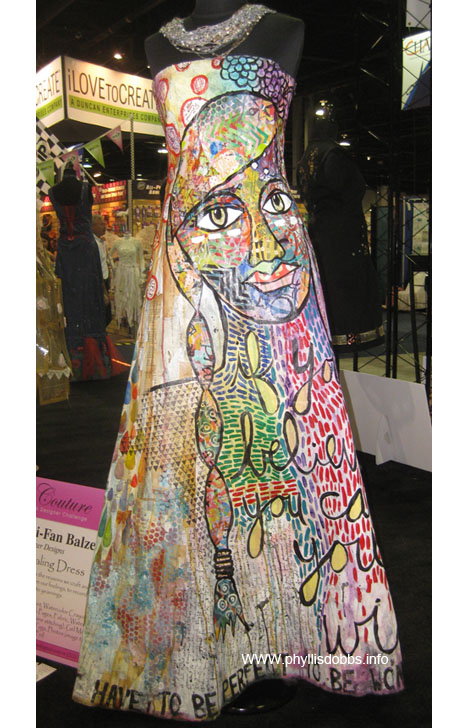
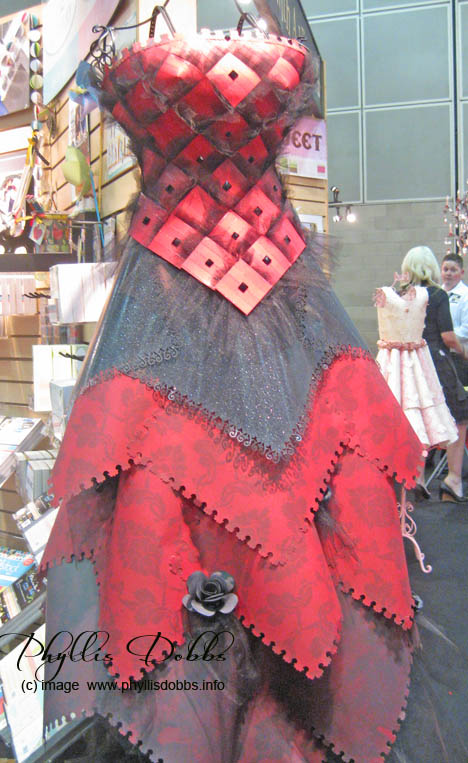
Julie Fei-Fan Balzer‘s dress won “fan favorite” with her fabulous dress of art journaling and made with paper.

Julie Fei-Fan Balzer dress in the CHA Crafty Couture display

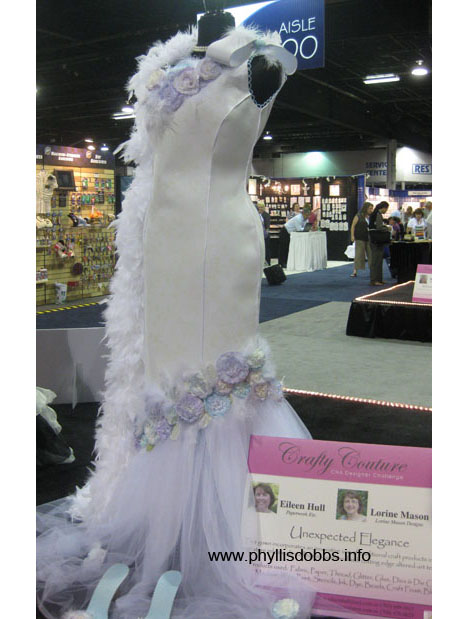
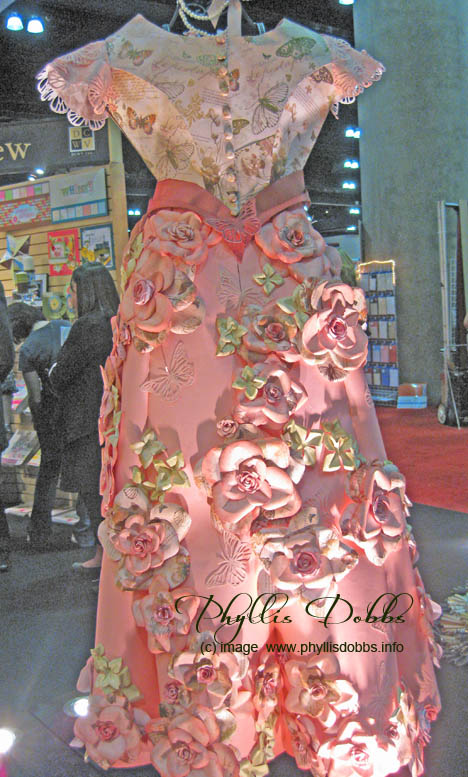
This dreamy white dress was created by Lorine Mason and Eileen Hull.  It may look like fabric, but the dress was created with white craft foam.

Lorine Mason and Eileen Hull's dress in CHA's Crafty Couture

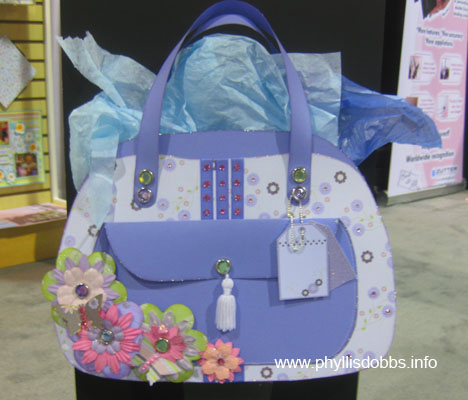
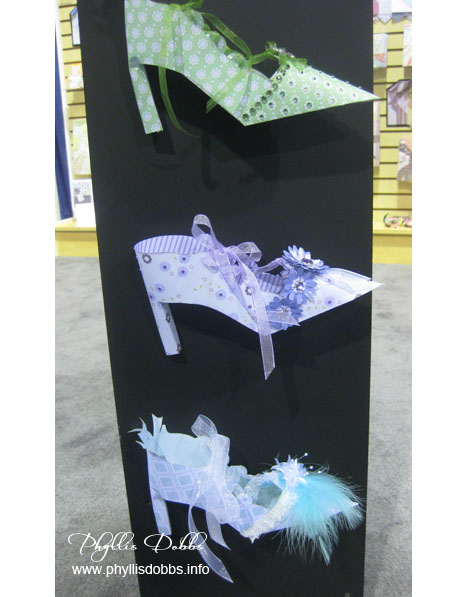
As a purse and shoe addict, I loved the displays in the booth for Zutter Innovate Products. Check out this paper purse and the paper shoes. Aren’t they “to die for”, although I wouldn’t dare to walk the show with heels this high. Let your imagination run wild and you can create anything with paper.

Paper Purse in the Zutter Innovate Booth at the CHA showPaper shoes on display in the Zutter booth at the CHA show

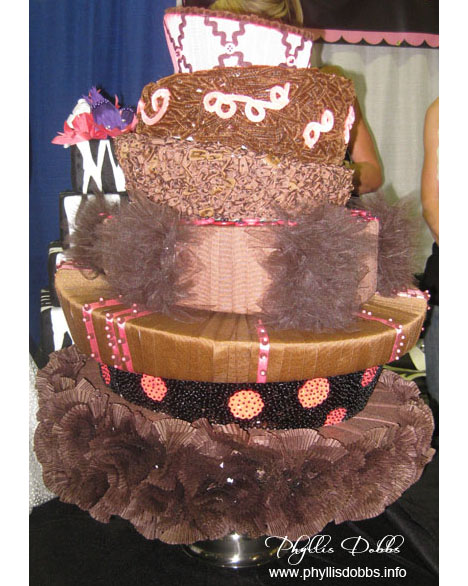
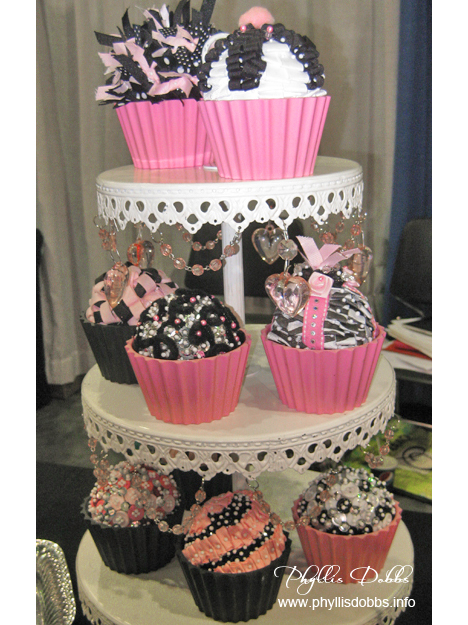
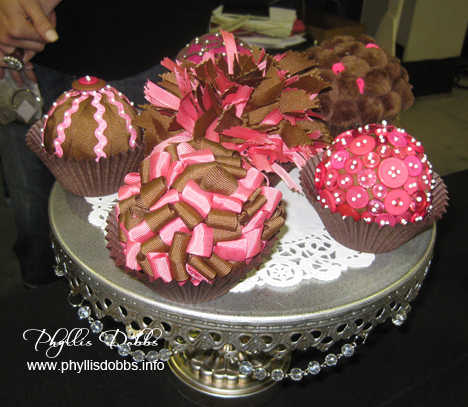
The Ribbon Ring booth made your mouth water and your stomach growl with their displays of luscious pastries made with ribbon. A chocolate cake, a wedding cake, cupcakes, bonbon’s and candy were all gorgeous!

Ribbon Chocolate Cake by Ribbon RingCupcakes made with ribbon by Ribbon Ring

Delicious looking ribbon cupcakes by Ribbon Ring for the CHA show

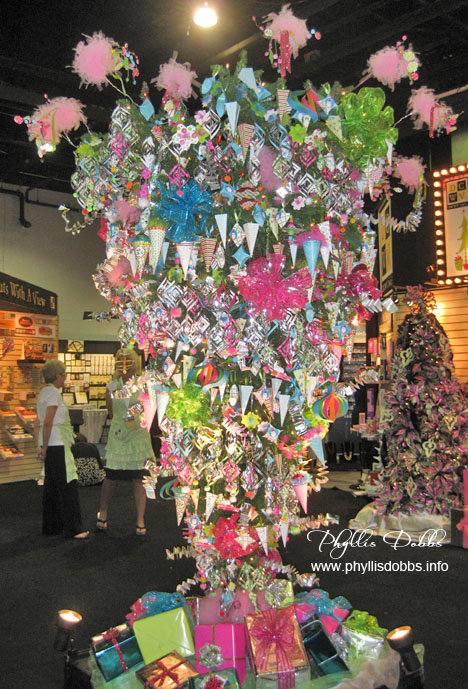
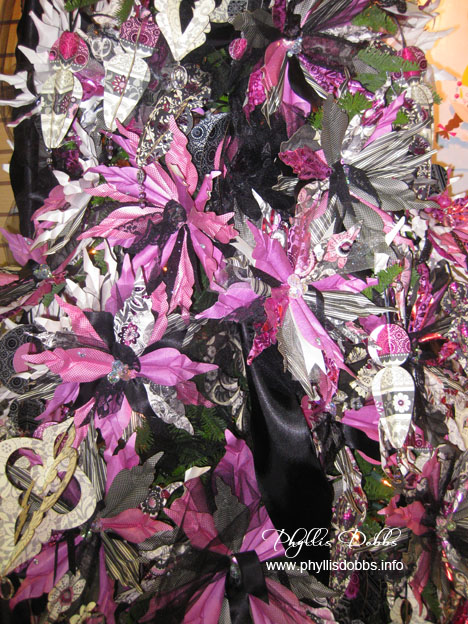
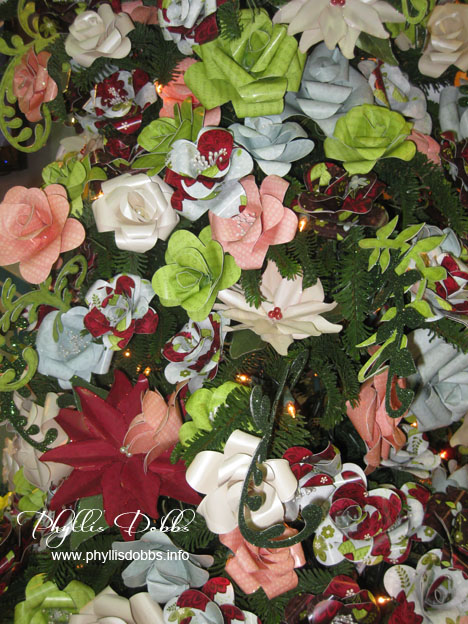
And although it was July, Christmas trees covered with paper ornaments were displayed in the DCWV (Die Cuts With a View) booth. All of the trees were beautiful but I especially loved the whimsy of the upside down Christmas tree.  I took some close-ups of a couple of the other trees to show the beautiful paper flowers.

Christmas ornaments made with DCWV scrapbook papers for the CHA show

Close up of Christmas flowers made with DCWV papersDCWV paper flowers decorating a Christmas Tree

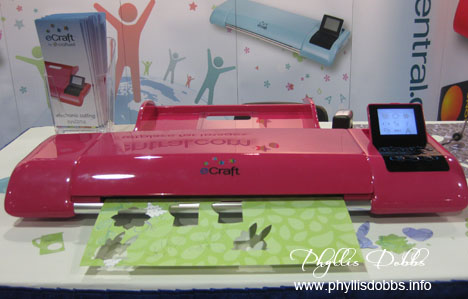
The eCraft electronic cutter by Craftwell caught my eye. I love that this cutter does not use cutting mats and can cut to any length. And as a bonus, the color choices for the cutters are yummy. With this sleek and streamlined design, it looks like the sports car of cutting machines.

eCraft electronic cutter at the CHA summer show.

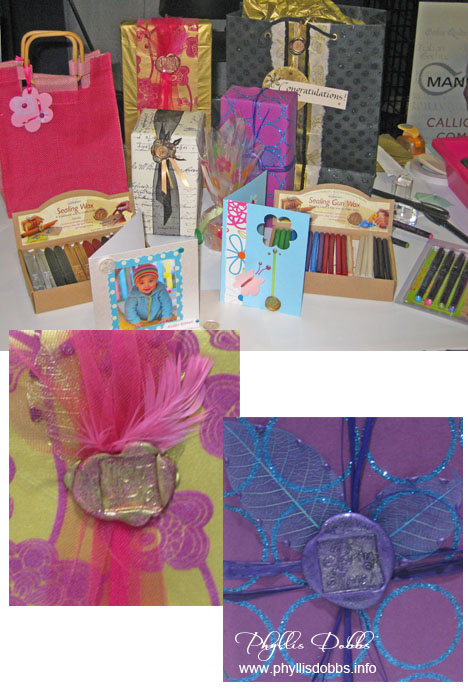
I just adore the seals and sealing wax in the Manuscript Calligraphy booth. I love the way the sealing wax with the seals can be used to decorate gifts and notes as you can see in the close up of the gift wrapped boxes on display in their booth. If I were to receive a gift wrapped so elegantly, I would have a hard time tearing it open…but I would, just carefully on the back side.

Seals from Manuscript Calligraphy

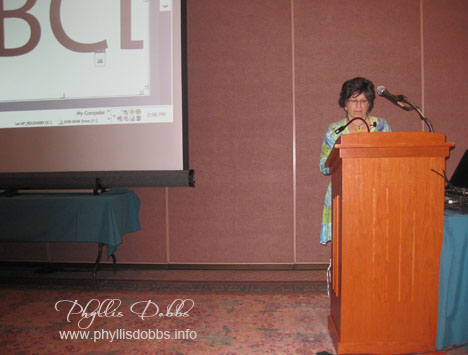
The day before the show opened was filled with educational seminars, workshops and classes. I presented a seminar on Adobe Illustrator covering the basics of using Illustrator and the tools. CHA has a well rounded education program geared to all memebers – designers, retailers and manufacturers.

Phyllis Dobbs teaching Adobe Illustrator at the CHA show

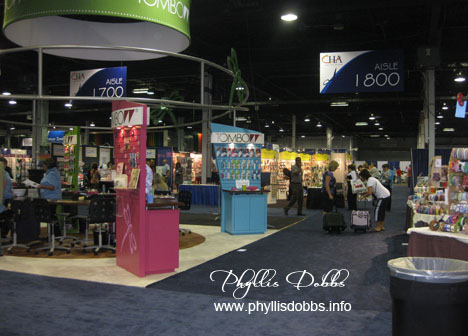
Here’s a peek at the show floor.  Although busy, I caught an aisle during a brief lull.

Show floor at the CHA summer Show

Happy crafting to all of you! I’m already looking forward to the winter show in Annaheim, CA.

Phyllis

Back from the CHA (Craft & Hobby Association) Winter Trade Show

After attending the CHA Winter Conference and Trade Show in Los Angeles last week, I returned home feeling rejuvenated and ready to jump back into work. It was a great trip with both meetings and catching up with friends. Several interesting booths and demonstrations caught my attention and I want to share them with you.

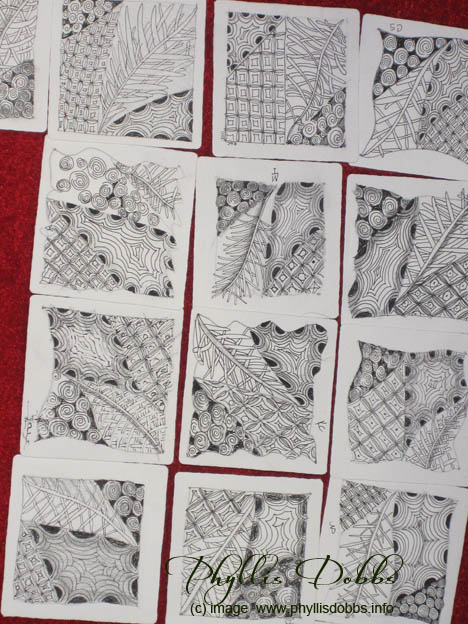
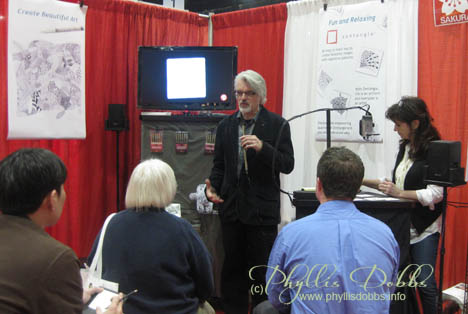
Maria Thomas and Rick Roberts, the founders of Zentangle were demonstrating Zentangle techniques in the Sakura of America booth. Zentangles created during demoI love Zentangles so I stopped and created one. The Zentangles created my the attendees during this demo are shown together. Also pictured are Maria and Rick demonstrating on another day and a picture taken of me with them. Creating Zentangles is not only easy, its therapeutic and relaxing.Maria Thomas and Rick Roberts ZentangleZentangle Rick, Maria, Phyllis
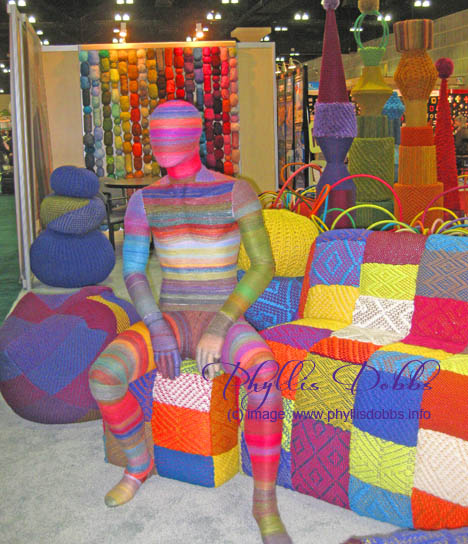
The Lion Brand Yarn booth had a fabulous exhibit using yarn. The colorful male figure along with the tall shapes and hula hoops, all covered with yarn, made for a really colorful and exciting display.Lion Brand Yarn booth

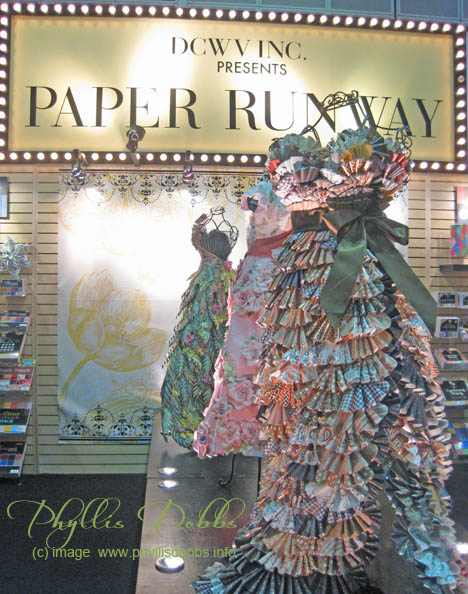
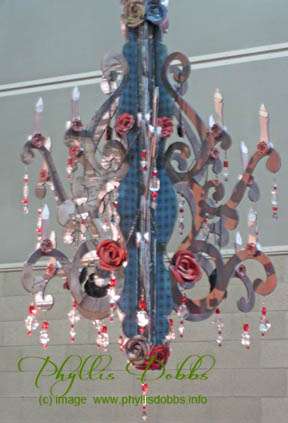
The theme of the DCWV booth was a “Paper Runway” featuring fashions created with paper. Yes, all these gowns are created with paper and made for dynamic diaplays. My photos don’t really do the life sized dresses justice. DCWV Paper RunwayDCWV paper dressDCWV dress part of Paper RunwayDCWV paper runway dressIn addition, paper chandeliers were hanging in the booth.DCWV paper chandelier

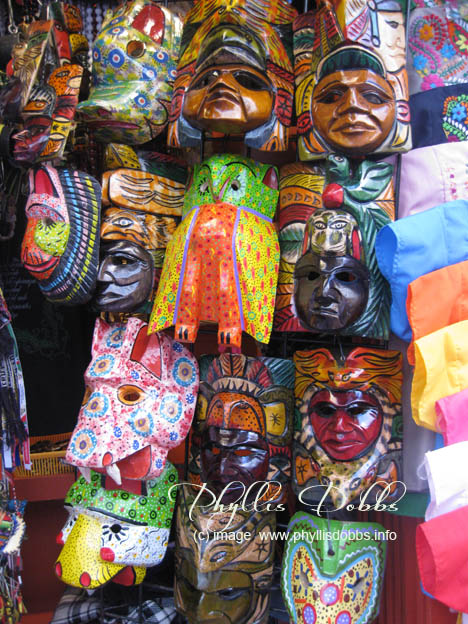
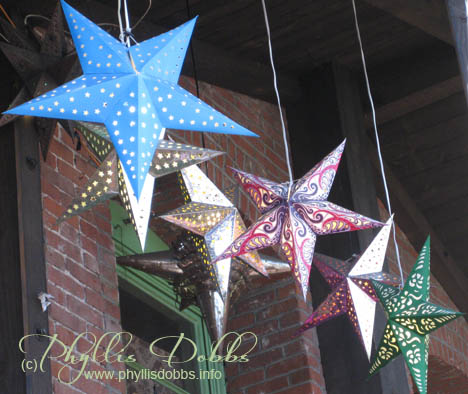
During my last day at the show, I took a break around lunch and walked to Olvera Street which was close to my hotel.  Olvera Street is a block long street filled with restaurants and small shops and stalls filled with colorful Mexican merchandise. A couple of pictures below show a section filled with fun masks and star lanterns hanging from a shop balcony.  Colorful masksStar lanterns Olvera Street

Now, back home, I’m delving into my next project, a quilt book. I can’t wait to show you the fabrics I will be working with.

Stay warm and lets hope for an early spring!

Phyllis
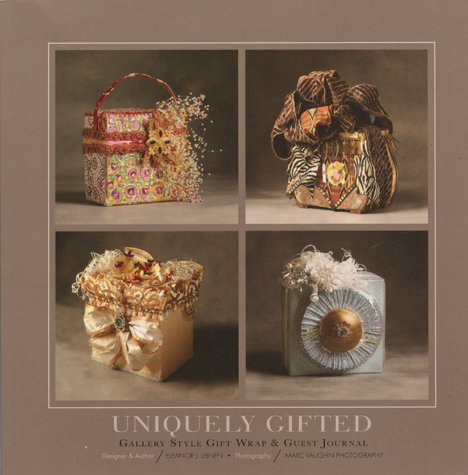
T’is the Season for gift wrapping – 2 books for unique wrapping!

I love books and while browsing through books, I found these 2 that are fabulous for creating spectacular gift wrapping. The books have different methods of creating wraps and I fell in love with both of them. And they offer fantastic wrapping techniques that can be used right now during “the wrapping season”.

Unique gift wrapping BookUniquely Gifted by Eleanor J. Leinen with beautiful photography by Marc Vaughn shows you how to create a work of art with each gift. Whether you are a crafter or not, you can find yourself creating beautiful gifts with things you already have on hand or can easily purchase. Items such as ribbons, fabrics and papers are combined with such items as old jewelry, tassels, trims, beads, silk flowers, beads, and many more items to create these beautiful wrappings.

Since each wrapping is very unique, instructions are not provided. But with all the “stuff” we have in our stashes, we can follow Eleanor’s inspiration to create our own works of art. Creating them with a box or giftbag that can be opened without damage to our artistic endeavors will allow our work of art to remain intact and a gift in itself. This is a fun book and I plan to create works of art with my wrapping from now on!

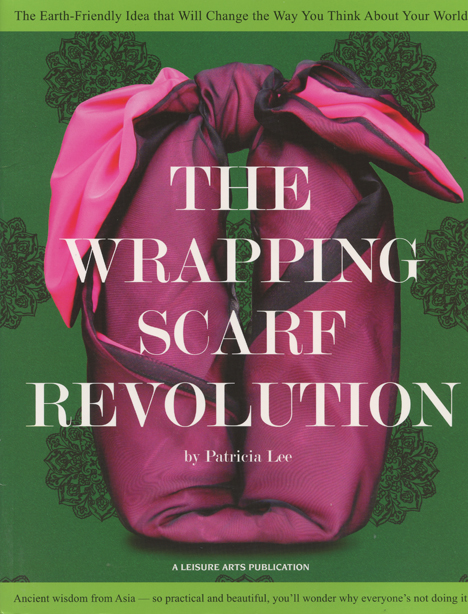
Wrapping scarf book

The Wrapping Scarf Revolution by Patricia Lee offers a different method of wrapping by creating gorgeous wrapping scarfs from fabrics. The wrapping scarf can be used over and over which is very economical.

The book is filled with easy-to-follow diagrams of the many different styles of wraps, including wrap bags. You just choose the fabric you want and start creating wraps adding embellishments as you desire. I have a huge stash of fabric and plan to also put the techniques in this book to use.

A wrapping scarf can also allow you to create a tradition when swapping presents back and forth using a special scarf – from friend to friend, mother to daughter, sister to sister.

I love both books so please check back. I will show you projects that I create using the techniques of both books. (My mind is already whirling away with ideas!)

For full disclosure, I purchased both books.

Here’s to pretty wrappings and a happy holidays!

Phyllis
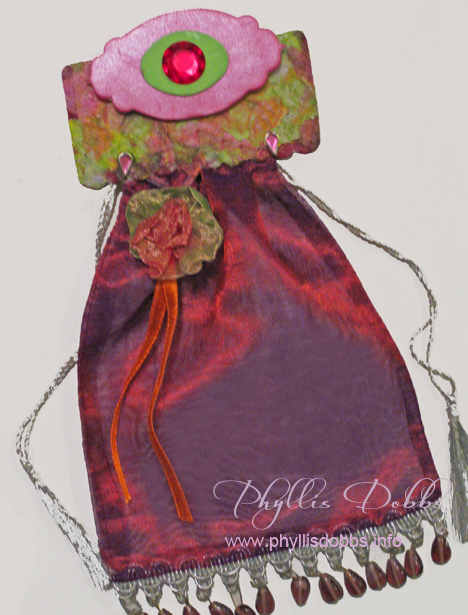
Sizzix Triple Blog Hop Week 7 – Gift Bag Topper

Gift bag topperCreate a treat bag topper to add a special touch to your gift bags! This week for our Sizzix Triple Play blog hop, we are using Eileen Hull’s Treat Bag topper die. There are so many possibilities for uses with this die with its versatility. I love it!

Decoupaged bag topper

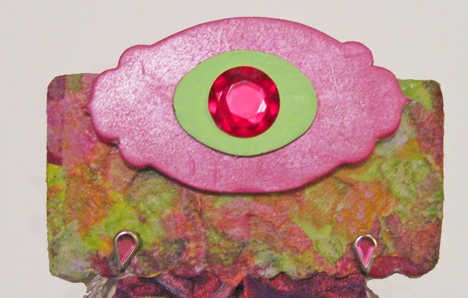
I also love decoupaging so I decoupaged my topper to give it texture and color. I like the marbleized look that resulted, although the paper napkin I used was a floral pattern.

The materials I used included:

Die for Treat Bag Toppers Bigz XL Die #656774 by Eileen Hull for Sizzix

Heavy card stock

Mod Podge

Paper Napkin with a pattern

Cabochon bead

Pink oil paint stick

Green acrylic paint

2 pink rhinestone brads

Glue dots

Glue – Beacon Zip Dry

Treat Bag

Instructions:

1.Tear the paper napkin into small pieces and decoupage to the treat topper with Mod Podge. Use the Mod Podge to glue the napkin to the topper and to seal the top of the paper. I used several layers of the napkin to get more texture.

2. Paint the large medallion pink. I used an oil paint stick to paint it – I like the pearled look of the paint. I then painted a smaller oval medallion green.

3. Glue the the green oval centered to the pink medallion and glue the cabochon bead centered on the green medallion. I used glue dots to attach the medallion to the bag topper so that it stands out.

4. Use the rhinestone brads to attach the topper to the bag (after you have added your goodie to the bag!).

Be sure to check the all the other fantastic projects in the Triple Play blog hop by clicking on the forward or back button in the sidebar. This is the last week of this hop and it has been so much fun. I’ve had a blast working on the hop projects and dies.

Thanks for visiting the Triple Play Blog Hop! Please visit the TriplePlay blog for more fun ideas from Brenda Pinnick, Karen Burniston, Eileen Hull and friends. If you have enjoyed seeing all of the inspiring ideas on the blog hop, please “like” Triple Play on Facebook.

Have a great time  hopping!

Sizzix Triple Play Blog Hop Week 6 – Blooms Greeting Card

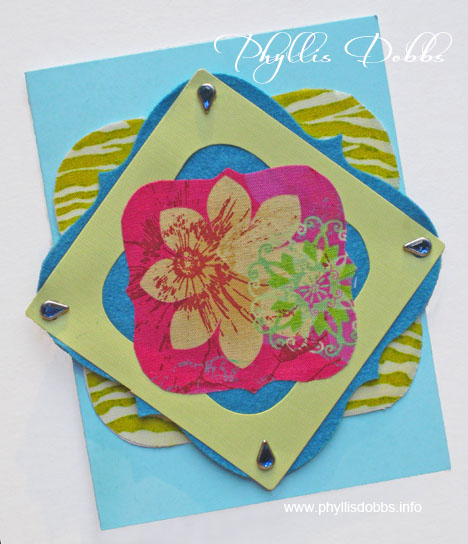
Greeting card made with Sizzix dieSend a warm message in a special greeting card you make! This week for the Sizzix blog hop, I created a colorful and fun card with Brenda Pinnick’s Album die from Sizzix, the featured die in this week’s hop. I also used fabric from Brenda’s Couleur Vie fabric collection from Henry Glass.

All you need is these few materials:

Album, Brackets, Bigz XL Die #656053 by Brenda Pinnick from Sizzix

Card stock, felt and fabric for the dies

Card or card stock

Felt (Felt in project from National Nonwovens)

Turquoise colored rhinestone brads

Glue (Beacon Zip Dry)

Fusible Web (Steam a Seam 2 from The Warm Company)

Instructions:

Cut each layer from the dies, alternating with cardstock, fabric and felt. The fabric was fused to the layer below with fusible web and the cardstock and felt were adhered with glue.  Punch holes in the corners and add rhinestone brads.  Glue the die layer stack to the front of a card and add your message.

For an alternative use for the die stack, add it to a present instead of a bow for a really unique look.

Be sure to hop to the other blogs to see all the fabulous projects.  Just click forward or back in the Sizzix button in the sidebar.

Wishing you a warm day – its cold here!

Phyllis
Sizzix Triple Play Blog Hop Week 5 – “For You” Gift Card

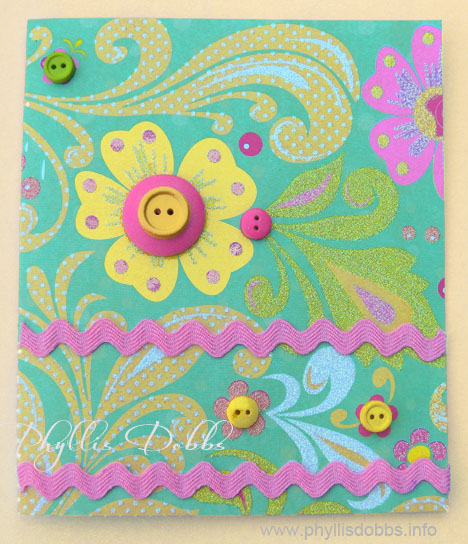
For You Gift CardCreate a special greeting card to go with a gift and let it speak volumes! For week 5 of our Sizzix Triple Play Blog Hop, I created this embellished greeting gift card.

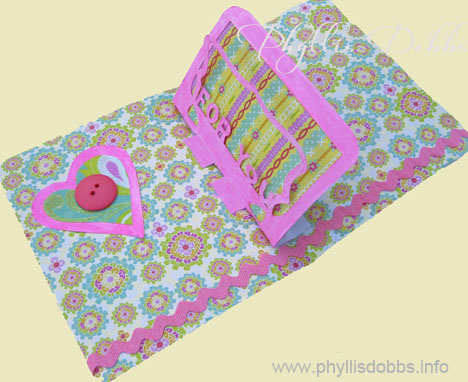
Gift greeting card open with pop upThe card is fun to make and embellish with the following materials:

Sizzix die – Gift Card Holder, 3D Pop-up, Bigz XL Die #656740 by Karen Burniston

Heavy Paper

Scrapbook double sided paper

Assorted buttons

Rick rack

Adhesive – Beacon Zip Dry

Instructions:

Cut paper to fold for the desired card size. Embellish the card front with buttons and rick rack.

Attach the die cut “For You” to the inside of the card. I added a striped scrapbook paper behind the frame opening. Note – if you are giving money or a gift card for a gift, you can insert it behind the smaller frame. I also glued a heart made of 2 layers of papers to the inside of the card along with more rick rack. The heart is embellished with a button.

With a pad of papers or your stash of scrapbook supplies, you can easily make dozens of cards!

Be sure to click forward or back on the Sizzix button in my side bar to hop to the other blogs to see all the fun and fabulous projects made this week!

Happy hopping!

Phyllis

Sizzix Triple Play Blog Hop Week 4 – Christmas Journal

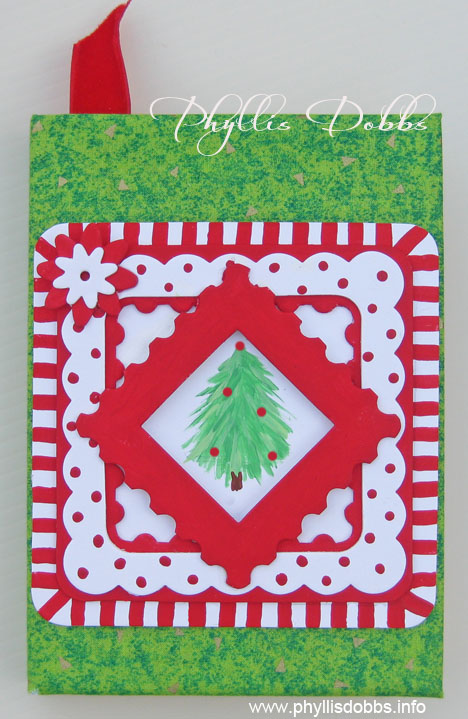
Christmas journal

Christmas is such a special time of the year with all the activities and gatherings of family and friends. Keep the memories of your Chistmas holiday each year by journaling in a Christmas journal.

Our 4th week of the Sizzix Triple Play blog hop is the Frame and Frame back die by Eileen Hull. There are so many uses for this die, especially this time of the year for Christmas photos.  I chose to use it to create and decorate a Christmas journal.

To make the journal, you will need the following materials:

Frame and Frame Back, 3D Pro Scoreboards Die #656835 by Eileen Hull

Heavy card stock

Journal

Green fabric

Red and green acrylic paints

Adhesive – Zip Dry by Beacon

Instructions:

Cut the fabric 2″ larger than the opened journal on all sides.  Center the journal and fold the fabric edges to the inside the cover, fold the raw edge back and glue. Cut fabric pieces out along the edge of the spine.

Paint the frame pieces solid red, red stripes and red dots.

Paint a Christmas tree or other motif centered on the bottom frame.  Align the frame pieces and glue them together.  Turn the small red frame turned catercorner. Glue the completed frame centered on the journal.

Be sure to hop to the other blogs to see an assortment of outstanding and unique uses for this die.  Just click on the Sizzix button in the sidebar and hop forward to the next blog.

Thanks for visiting and enjoy the hop!

Phyllis
Sizzix Triple Play Blog Hop Week 3- Floral Gift Box

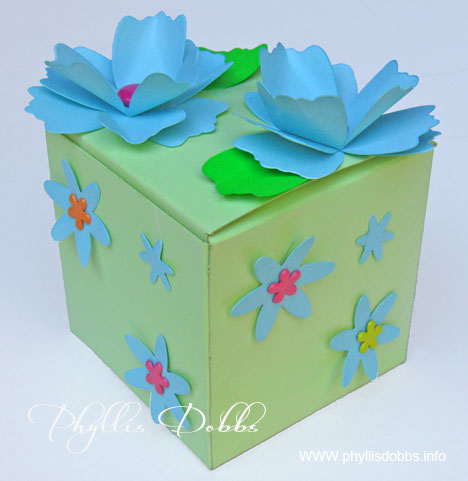
Giftbox decorated with flowers and paintThis week, we used Brenda Pinnick’s Flower, Beauty Bloom Sizzix dies for our Blog Hop project. I really love flowers so I enjoyed using flowers to decorate a gift box – a great way to add a special touch to gift giving.
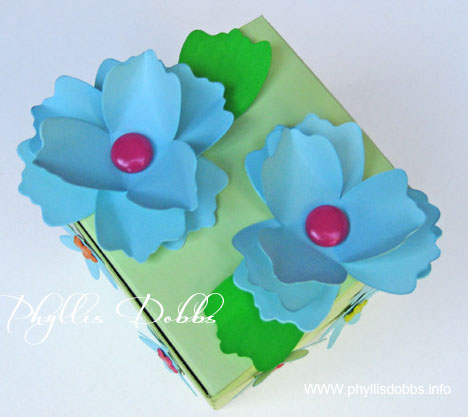
Gift box painted and decorated with flowers

The materials used were:

Sixxiz die #655455 by Brenda Pinnick

Card stock

Spray paint – aqua and green by Krylon

Green acrylic paint

Gift box

Brads – round and floral designs

Hole punch

Glue – Beacon Zip Dry for paper

Instructions:

I spray painted the box with green paint and all the flower pieces with aqua paint.  2 petal sections were painted a darker green to use as leaves.

After the paint dried, I punched holes in the center of the flower pieces.  2 flowers were created by assembling 3 large flower pieces for each flower and putting a round brad through holes.  I turned up the petals of the top 2 pieces. After punching holes in the box top I attached the flowers with the brads.

Flower shaped brads were ued to attach the large flat flowers to the sides of the box and glue was used to attach the small flowers.

Be sure to hop to the other blogs in the blog hop by clicking on the links in the Sizzix badge in my sidebar!  There are some amazing designs.

All I need to do now is add the gift!

Happy Crafting!

Phyllis

The Gift of a Special Mermaid!

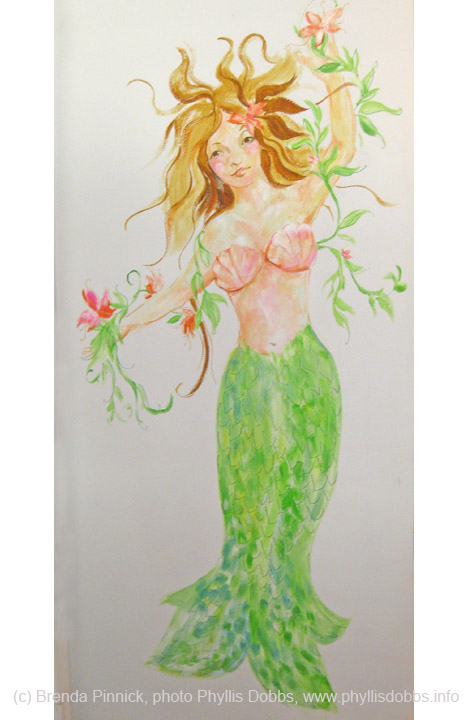
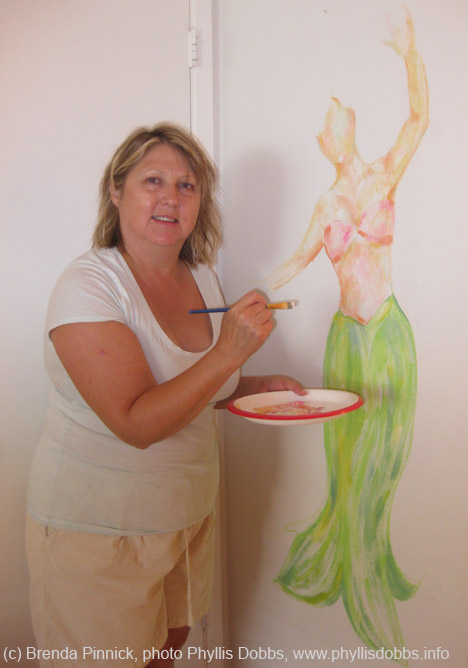
When I was on a work-cation at the beach a few weeks ago with my husband who was vacationing, my talented friend Brenda Pinnick visited (see my prior blog post on one of the craft projects resulting from our craft brainstorming). After we talked crafts, bought some craft supplies and then crafted a while, Brenda asked if she could paint something on one of my walls. Of course, I said yes immediately (Brenda is a well known artist and an expert at painting murals).

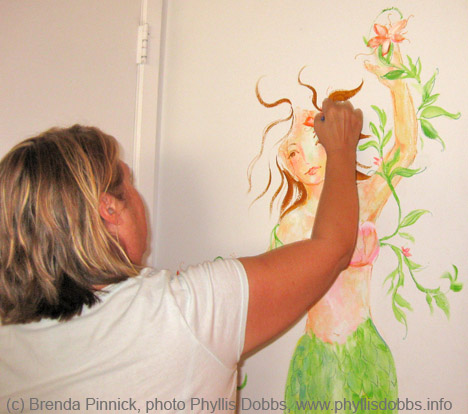
Brenda selected a wall, made a quick sketch and started painting. A gorgeous mermaid emerged from her paint brush. I have always loved mermaids as they are so romantic and whimsical, so I was more than thrilled to have one on my wall, especially since it was painted by a wonderful friend.

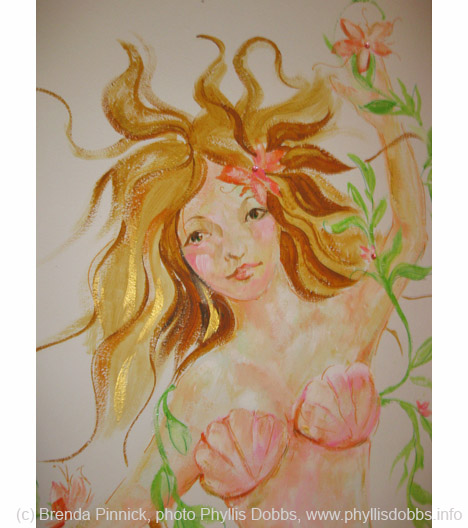
Here’s a closeup of her face,  isn’t she beautiful!

Now, is there such a thing as a MerMAN?

Phyllis

Sizzix Triple Play Blog Hop Week 2 – Spot of Color Twist Box

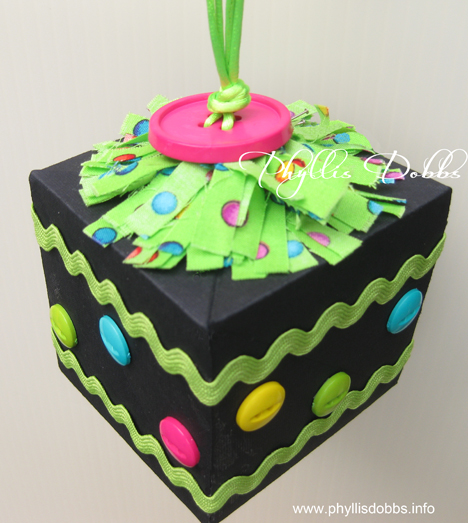
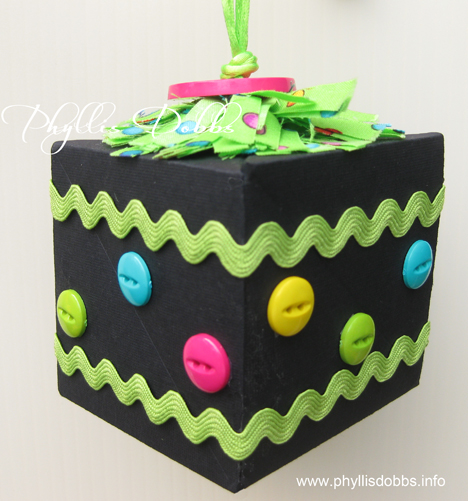
A Spot of Color Twist BlockWhat a fun project – the twist box created with Sizzix’s die by Karen Burniston can be decorated so many ways.  I decided to create a colorful ornament that would also make a fun addition to a birthday card.

Twist Box created with Sizzix die

This was easy to make with a few embellishment items.

Materials:

Sizzix Twist Cube Die

DCWV black card stock

Large 1 1/4″ button

Assorted multi-color buttons

Rick rack

Rat tail cording – 2 pieces 14″

Beacon Paper Tac glue

Fabric – 1-1/2″ x 24″ strip

Instructions:

1. Cut and make box from black heavyweight paper.

2. Thread one piece of cording through 2 holes on the large button so that the ends of the cords are on the back side of the button. Thread the other piece of cording through the remaining 2 holes. Pull ends so that they are even and insert through hole in the top of the box by 1/2″. Glue the ends to the top inside of the box.

3. Sew a gathering stitch on one long edge of the fabric 1/4″ from edge. Cut to fringe on the opposite side edge. Do not cut through the stitches. Pull gathers to 6″ and tie off.

4. Wrap the gathered edge on the top of the box around the opening with the cords. Glue as you wrap. After the glue dries thoroughly, slide the button down the cording to sit on top of the fringe. Tie an overhand knot with the cord on top of the button.

5. Glue 2 rows of rick rack around the box, 1/2″ from the top and bottom edges. Glue buttons around box.

There are 60 designers participating in this Sizzix Triple Play Blog Hop. Please check out their projects – they were all amazing last week and I know they be amazing again this week. Just click on the Sizzix blog button in the side bar to go back or forward.

Enjoy the hopping! (and check back next week).

Phyllis