Redux – Paint a Flower Pot for Holiday Entertaining or Decorating

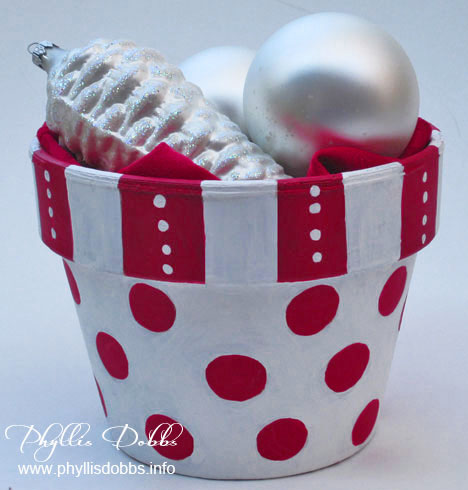
The holidays are rapidly approaching but there’s still time to create some great craft projects to help with decorating and entertaining. I want to share one of my earlier Christmas craft projects that is so quick and easy to make and has so many uses – the versatile terra cotta flower pot painted in holiday colors.

Christmas flower pot for entertaining

This painted flower pot can be used to hold food like cookies and candy (line the pot with a napkin first so that the food doesn’t touch the paint). For decorating use, it can hold ornaments or a plant. The size of pot that you use can also determine the use. A small 3 or 4 inch pot can be filled with food or small gift and given as a gift, or placed by the plates at a dinner party as a favor. Simply line with cellophane, tissue paper or fabric, add a food item or other small gift, bunch at the top and tie with a ribbon. Let your imagination come up with many more uses.

I used red and white for Christmas (which can also double as my school colors), but you can use other colors for different holidays – red, white and blue for the 4th of July, shades of green for St. Patrick’s Day, bright fun colors for a birthday, pastels for Easter, and so on. I also painted a flower pot for Halloween.

Easy peasy! I used a very simple design that is very easy to draw.

Wash the flower pot and go over it with alcohol to disinfect it.  With a pencil draw the lines for the stripes around the rim and draw 1/2″ circles randomly below the rim (or create your own design). Paint as shown in the photo.  I recommend painting one color at a time, allowing it to dry before painting with the second color. The white dots on the stripe were added last, after all drying. When all the paint is dry, seal with a coat of clear satin acrylic.

Enjoy!

Phyllis

Studio Make-over, One Piece at a Time

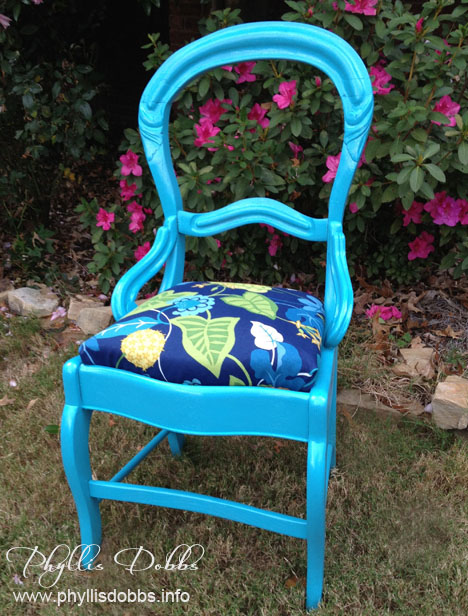
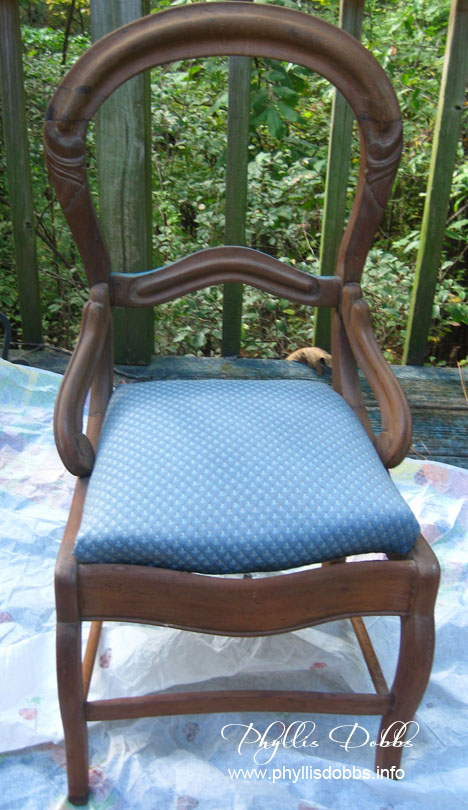
Making over my studio is progressing, but one piece at a time as I can work it in. After painting the file cabinets in my earlier post, I decided to use this poor lonely chair that had been hiding in a corner of my studio. I bought it stripped and unfinished years ago at an auction. I had intentions of doing something with it but had not. So it sat in a corner of my studio, lonely, unloved, unused, and neglected. After a re-do, this chair now shines brightly and sits prominently in front of a desk.

Turquoise painted chair

Hancock Fabrics had a sale on upholstery fabric so I got the amount I needed at 50% off the $17.99 price for around $6. I loved the print and colors, especially the turquoise. Actually, this fabric is an outdoor fabric, which is even better for studio use. I then went to Lowes with fabric in hand and found a great shade of turquoise spray paint. Its a few shades darker than my filing cabinets.

This project was pretty quick and easy. I just sprayed the chair with a few light coats of paint, then wrapped the seat with the fabric, tucked it under the bottom and stapled. And the total cost of the re-do was around $10. Not bad! I think it looks much better than the “before” version below.

Unfinish chair for Phyllis Dobbs studio

I’m so glad I bought this chair all those years ago. And since I also have a boring wing back chair that I use in my studio, also bought at an auction, I went back and bought more fabric for another makeover.  I just have to jump in and try my hand at upholstery which will be much more work than the chair seat. I’m mentally working it out with the help of a couple of books.

Here’s to success with all our little (and big) projects.

Phyllis

A Coat of Paint can do Wonders for the Studio Furnishings

When I get the urge to redecorate or rearrange things, nothing can stop me.  When I start focusing on a room, the ideas just hit me and I have to do something. My husband hates it when I’m siting quietly and my eyes and head are in a constant state of turning and looking (not quite like in The Exorcist because my head doesn’t turn all the way around). It usually means something is going to change

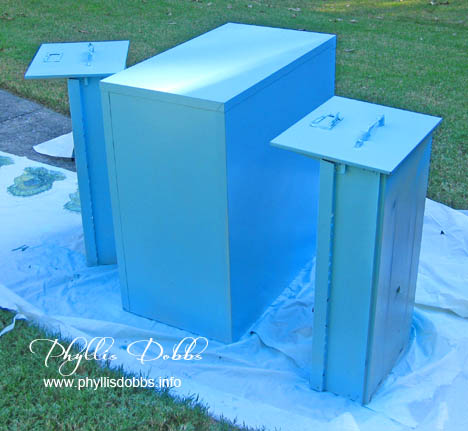
Since I spend most of my time in my studio, I tend to frequently move things around, repaint the walls and so on.  OK, I’m really tired of putty colored filing cabinets.  They are so blah!  So after hitting the stores looking for a good color, I decided on just the right shade of light aqua by Rustoleum, my favorite color.  I couldn’t wait to get home to start spraying this beautiful color on this 2-drawer filing cabinet  which is outside drying.  The color in the photo is more intense and darker than the aqua actually is because its in the late day shadows but take my word for it, it’s great! I have a couple more cabinets to finish and am excited at the way this one turned out. But I have to space myself and get some work done in between painting them.

Phyllis Dobbs painting filing cabinet turquoise

Go ahead and make some changes in your space. Even the smallest changes can make a difference.

Phyllis

The Gift of a Special Mermaid!

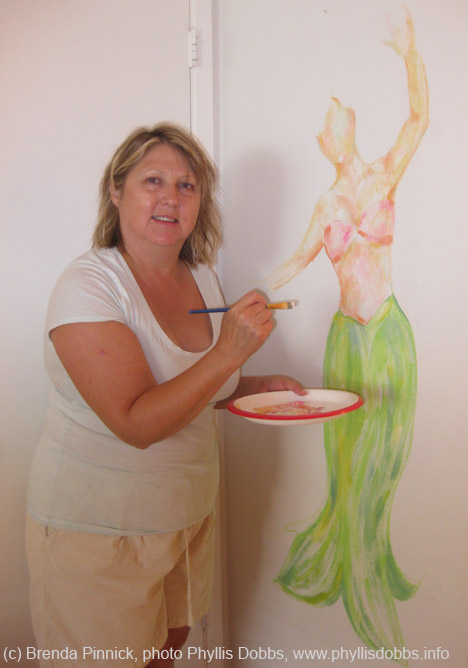
When I was on a work-cation at the beach a few weeks ago with my husband who was vacationing, my talented friend Brenda Pinnick visited (see my prior blog post on one of the craft projects resulting from our craft brainstorming). After we talked crafts, bought some craft supplies and then crafted a while, Brenda asked if she could paint something on one of my walls. Of course, I said yes immediately (Brenda is a well known artist and an expert at painting murals).

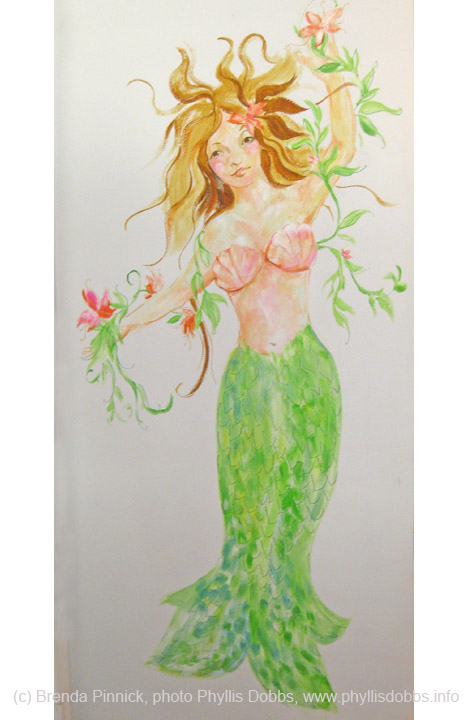
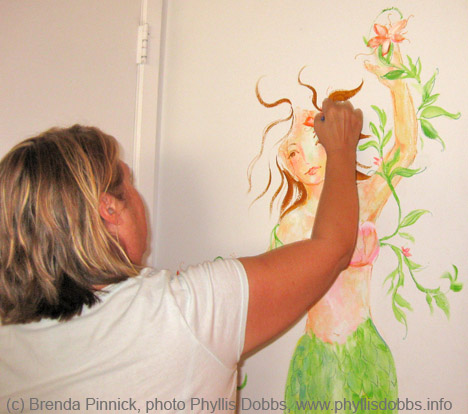
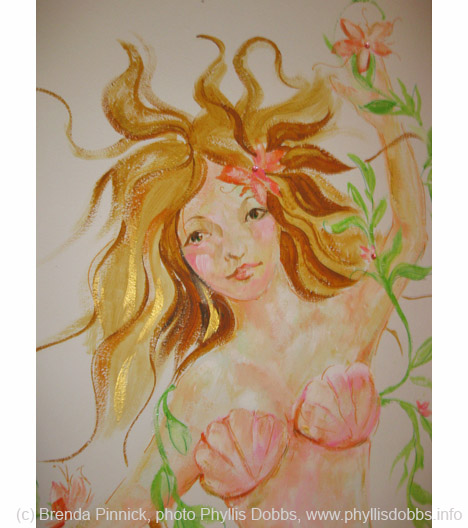
Brenda selected a wall, made a quick sketch and started painting. A gorgeous mermaid emerged from her paint brush. I have always loved mermaids as they are so romantic and whimsical, so I was more than thrilled to have one on my wall, especially since it was painted by a wonderful friend.

Here’s a closeup of her face,  isn’t she beautiful!

Now, is there such a thing as a MerMAN?

Phyllis

Decoupaging Red Poppies to Embellish a Table

Does a crafter/artist/quilter/sewer ever get away from creating? Even if you are away from all your stashes of products, the mind is still buzzing away on new ideas and projects to work on.

A few weeks ago, I was  work-cationing (working while on vacation, with emphasis on working).  My friend Brenda Pinnick visited for a few days, which lead our brainstorming on craft projects we loved creating. Since we didn’t have our product stashes with us, we visited local craft stores to pick up a few suppies.

We detoured by Tuesday Morning were we found a fabulous selection of paper napkins.  Hummmmm, there are so many uses for paper napkins other than the normal wiping of hands and decoupaging heads the list.  After buying a bottle of Mod Podge, we were set.

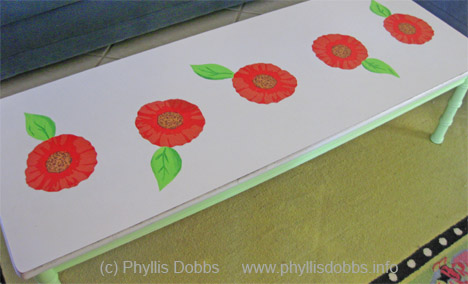
I have previously painted the legs of this coffee table a light apple green and thought the top would look great with flowers. My napkin selection included a package of red poppy shaped napkins, perfect for my project.

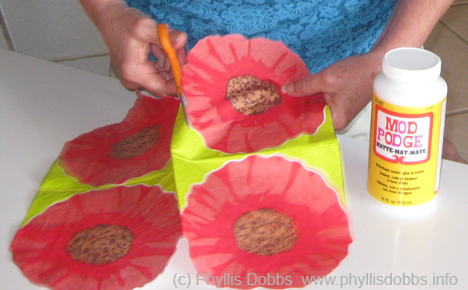
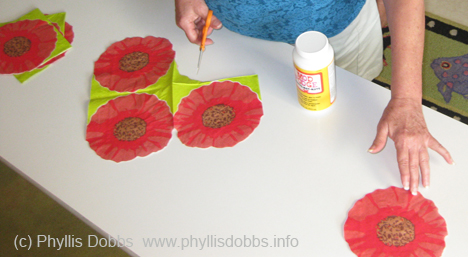
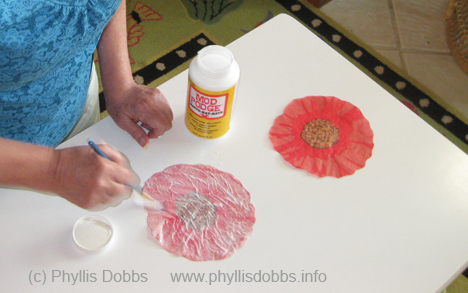
First, I cut the flowers and  arranged 5 down the center of the table. I painted Mod Podge to the back of the flowers to glue them to the table. After the flowers dried on the table, I added several coats of Mod Podge to the top to seal the flowers, allowing drying time between each coat of Mod Podge.

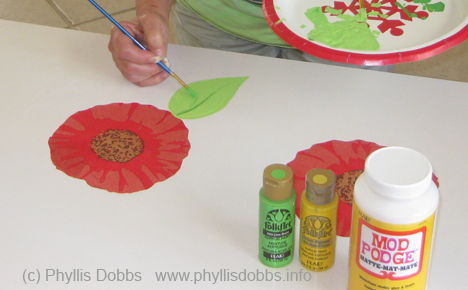
After the Mod Podge dried, I painted a leaf to each flower.

Since red poppies have always been one of my favorite flowers, I’m excited that I can enjoy them on the table for years to come.

Look around and if you have a table or other items that has gotten stale, think decoupage with fun prints.

Have a great craft day,

Phyllis

Halloween Craft – Decoupaged Pumpkin Treat Basket

Make an easy Halloween Basket to hold candy for trick-or-treaters.  All is takes is a basket to decorate (I found this one at Goodwill for $1) and a few supplies.

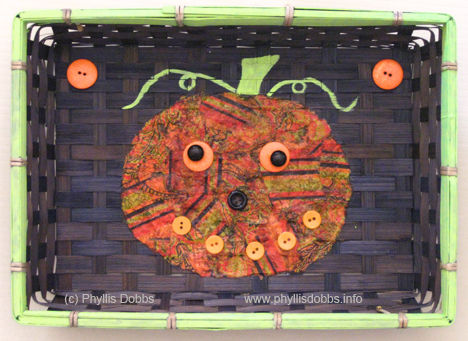
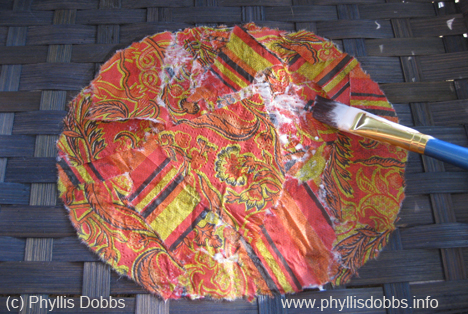
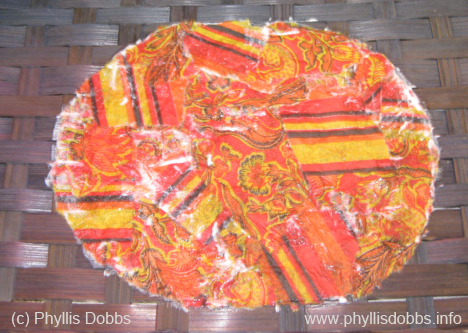
The pumpkin was created with a paper napkin torn into pieces then decoupaged with Mod Podge.

Supplies –

Basket

Mod Podge

Assorted orange and black buttons

Green Paint (Plaid Folk Art)

Paper Napkin or other orange pattern paper

Paint brushes

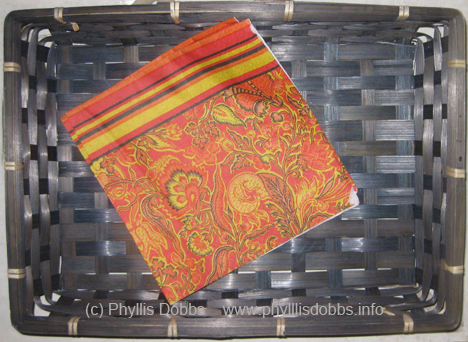
I found these gorgeous paper napkins at Tuesday Morning.  They are the perfect colors for Halloween and the fall season.

After drawing pumpkin shape on the basket, I tore the napkins into assorted sizes and shapes, with curved edges on some to loosely fit the curved edge of the pumpkin. Then I applied Mod Podge with a brush to the basket inside the pumpkin area, a section at a time.  I added the pieces of torn napkin on to the area with the Mod Podge, overlapping pieces and fitting the curved edges along the outside edge of the pumpkin.

After filing the pumpkin and I keep adding the paper pieces so that there were 2 layers of paper for the pumpkin.

When all the napkin pieces were in place, I applied a final coat of Mod Podge on the top of the pumpkin to seal the paper.

After the pumpkin dried, I painted the stem and vine as well as around the rim of the basket.  I glued buttons for eyes with smaller round black buttons on larger orange buttons.  A black button was used for the nose and a row of small orange buttons for the mouth.  A large orange button was glued in the top corners.

I wish you a boo-dashious Halloween.  Please check back – I’m working on several more crafty and sewing items for Halloween!

Phyllis

Trick or Treat – Paint this terra cotta pot to serve candy for your trick or treaters.

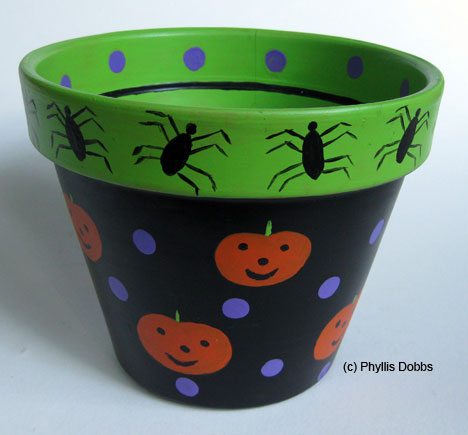
Halloween painted terra cotta pot

Charm your Halloween trick or treaters by serving candy from this terra cotta flower pot that you can paint in time for Halloween.

  1. All you need to complete this project is a terra cotta flower pot the size of your choice (I used an 8″ wide pot). a 3″ piece of card stock, paint brushes and 4 colors of DecoArt Patio paints, Wrought Iron Black, Citrus Green, Petunia Purple, and Tiger Lily Orange.
  2. Paint the inside of your pot and the outside rim with the green.  Draw a black line around the inside bottom edge of the rim, then paint purple dots spaced on the inside rim.
  3. Paint the the remainder of the outside pot black.  Paint spiders as shown spaced around the rim with black paint.
  4. On card stock, draw a 2″ wide pumpkin and cut out to create a pumpkin shaped hole in the card stock.  Use the pumpkin opening as a stencil and paint the pumpkins on the pot with orange.  Paint the mouth, nose and eyes with black paint and a stem with green paint.  Paint purple dots randomly between the pumpkins.

Fill with candy or fruit and have a fun, spooky Halloween.

Copyright Phyllis Dobbs – This design is created for your personal use.  It can not be used for commercial use without the written permission by Phyllis Dobbs.