Kool Tak Fabulously-Fall Blog Hop – Felt Pumpkin Pillow

I am delighted to be a part of the Kool Tak Fabulously-Fall Blog Hop sponsored by Crafty KT.  With fall around the corner, I decided to make a pumpkin felt pillow. There are 12 of us in the hop, so hop to see all the really “Kool” projects.

Crafty KT is also offering a giveaway of an assortment of Kool Tak products. See the details below on the products in this giveaway as well as how to enter to win.

Felt Pumpkin no sew pillow Phyllis Dobbs


This 9″ square pumpkin pillow is a no-sew project, except for a few simple embroidery stitches, and is very easy to make.

Materials needed:

  • Felt – dark green, light green and orange (National Nonwovens felt).
  • Dark orange 6-strand embroidery floss (Sullivans)
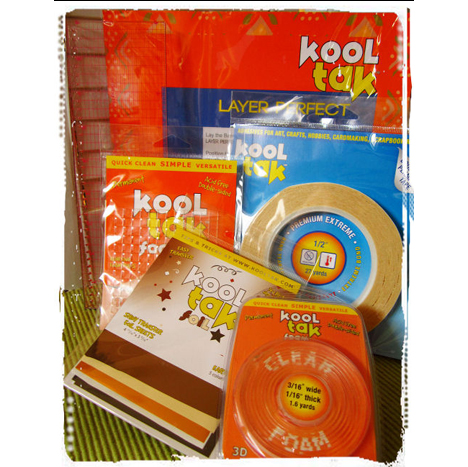
  • Kool Tak™ 1 Layer Perfect Tool
  • Kool Tak™ 1 Shiny Transfer Foil Sheets (Earth Tones)
  • Kool Tak™ Clear Foam tape ¼ x ¼ x 1/32” thick
  • Kool Tak™ Clear Foam tape 3/16 x 1/16 thick by 1.6 yards
  • Kool Tak™ Premium EXTREME tape 2 ½ x 27 yards
  • Batting or fiberfil
  • Embroidery needle

Instructions:

1. Divide the 6 strands of embroidery floss and use 3 strands. Sew long running stitches for the vertical “pumpkin lines”.  (See the finished pillow – I forgot to stitch the lines until after step 4.  Its a lot easier to stitch before the adhesive tape is added!)

2. Cut the felt:  dark green – 2 pieces 9″ square; light green – 1 piece 6″ square; orange – a 4″ x 4″pumpkin (download Pumpkin applique pattern ).  From the dark green, cut a stem for the pumpkin.

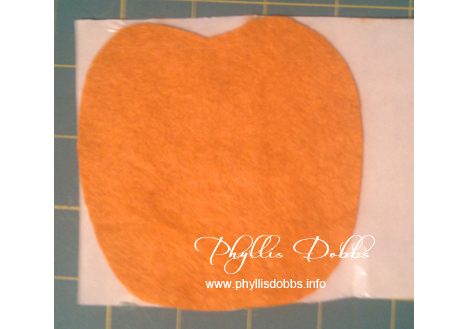
3.  Use the Premium EXTREME tape on backside of the pumpkin to attach it to the light green piece of felt. After adhering strips of the tape on the back of the pumpkin, trim the edges to align with the pumpkin.

Pumpkin with the tape on the back

4.  Remove the paper backing from the tape and use the Layer Perfect tool to align the pumpkin onto the light green felt. Place some of the Premium Extreme tape to the back of the pumpkin stem and trim to match the stem. Remove the paper backing and adhere the stem above the pumpkin center.

Centering the felt pumpkin to the light green felt background


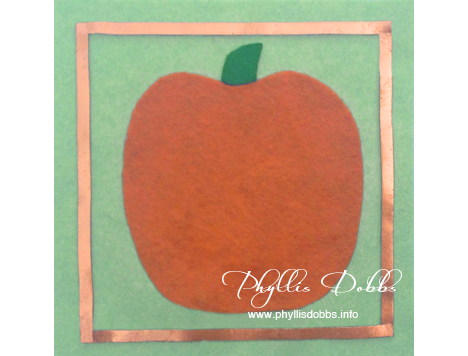
5.  Attach strips of the 1/16″ Clear Foam Tape 1/2″ from the edge of the green felt, forming a square going around the pumpkin.  Remove the liner from the tape and rub the gold Shiny Transfer Foil Sheet over the adhesive tape. Repeat to foil the foam tape square with the gold surface.

Pumpkin felt pillow with gold foil

6.  Attach the Premium Extreme tape to the back of the light green square. Remove paper backing and adhere the light green square centered to one of the dark green squares.

7.  Adhere a 1/4″ foam clear adhesive pad to the dark green square at the corners of the light green piece and half way between the corners. Remove the liner pieces from the foam squares and rub the gold Shiny Transfer Foil Sheet over the squares.

8.  Align the dark green pumpkin pillow top to the remaining green felt square and pin around 3 sides. Sew edges with a running stitch using 3 strands of the floss. Leave the 4th side open. Fill the pillow with fiberfil then finish sewing the pillow closed.

Click on the blue Designer Crafts button in my sidebar to hop back and forward to other blogs with fabulous projects in this hop!

Blog Hop Giveaway Crafty KT Kool Tac

And be sure to sign up for the Crafty KT newsletter to be entered for the giveaway $70 in Kool Tak products including:

  • Kool Tak™ 1 Layer Perfect (Use it for centering, piercing, and edge stitching) Tool
  • Kool Tak™ 1 Shiny Transfer Foil Sheets (Earth Tones)
  • Kool Tak™ Clear Foam tape ¼ x ¼ x 1/32” thick
  • Kool Tak™ Clear Foam tape 3/16 x 1/16 thick by 1.6 yards
  • Kool Tak™ Premium EXTREME 2 ½ x 27 yards
  • *the giveaway is open only to the mainland residents of the US

Thanks for visiting and enjoy hopping to all the other crafty fall projects.

Phyllis

Hi Resolution – New Years Studio Meet and Greet!

Welcome to my studio! I am joining with 11 other artists on a hop through our studios. We are showing you where we spend the majority of our time, creating new art, designs, and other creative endeavors. I invite you to check out each of the fabulous studios of the other artists by clicking on the links below or the forward button.

New Years Artist Studio Visit

The artists participating in this hop are:

Aaron Christensen

Barbara Johansen-Newman

Beth Logan

Brenda Pinnick

J. Wecker-Frisch

Karen Embry

Paula Joerling

Phyllis Dobbs

Samantha Walker

Sharon Himes

Shelly Comiskey

Sue Zipkin

My studio is a work in progress and if I ever finish it, I will probably be starting over within a few weeks! I work best with everything completely organized (not that I stay organized) and have created distinct areas in my studio for the way I work. I keep striving for the perfect work flow to fit me and the various techniques that I use. After a recent big upheaval and reorganization of my studio, I think I have found the best arrangement for me, although I’m 100% sure I will continue to tweak it.

I am both and artist and designer.  My art is licensed for various products such as fabrics, garden flags, kitchen textiles and more. I also design quilt and sewing patterns and have a new quilt book debuting in April. In addition I work with textiles and mixed media.  So with working in all 3 of these mediums, I have have tons of “stuff” that I use.  So all of my supplies need to be where I can find them easily in addition to being close at hand.

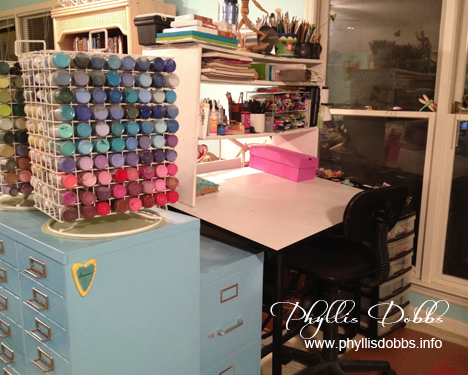
Pyllis Dobbs Studio Drawing and Painting Table

My drawing/painting table and supplies are located next to a set triple windows so I can catch the natural light. Sometimes it’s hard to keep my focus inside.  I have 2 plastic storage units with drawers to hold paints and painting supplies. They tuck neatly under the left edge of my table when not in use and are easy to pull out when I need them. I’ve been repainting a lot of my studio furnishings and have painted the filing cabinet and the multi-drawer cabinet turquoise. Both are great for holding additional supplies. The cabinet with the small drawers has 30 drawers and is my favorite for storage.

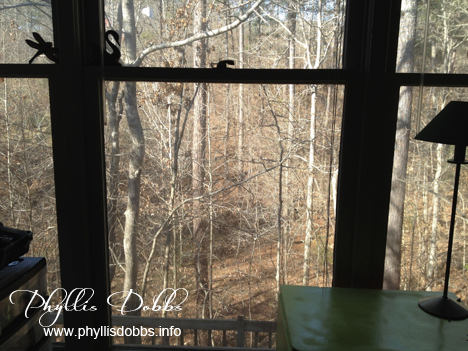
Studio View

My studio is on the 2nd floor of my home but the view from my windows is like looking from a 5th floor window or a treehouse. Our backyard drops at a steep slant to a bubbly creek at the bottom.  Although I like the winter view, my favorite is the spring and summer with all the green. The fall is also beautiful with the golds, oranges and reds as the leaves turn. Like I said, sometimes its hard to keep my focus inside, especially when there is a woodpecker knocking away.

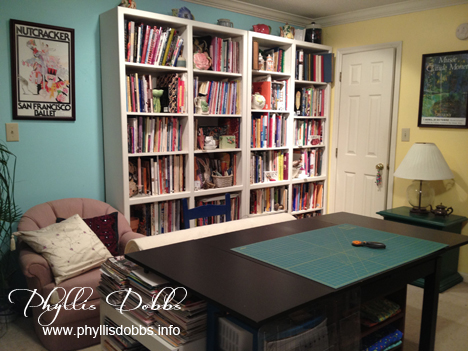
Studio cutting table

My fabric cutting table is set up in front of bookshelves filled with all my craft, needlework and quilting books. I love books as well as magazines (stacks of which are at one end of the cutting table). I use an antique chair that was my grandmothers to hold a large roll of batting behind the table making the batting easy to pull out as I need it. My cutting rulers are stored under the table and another plastic drawer unit and a low book shelf unit tucked under the table hold all my cutting tools and supplies.

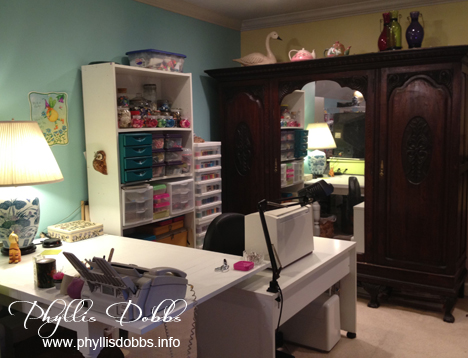
Studio sewing area

My sewing area is set up in one end of my studio with an antique pub table painted white and a low white table. I store fabrics in an antique triple armoire that I bought at an auction years ago. To keep all my threads, fibers, buttons and all things related to sewing handy, I use two plastic drawer units stacked together as well as a white bookcase loaded with smaller draw units. I save all sizes of jars to hold buttons, pins, and anything else that needs a home.

Studio crafting and work area

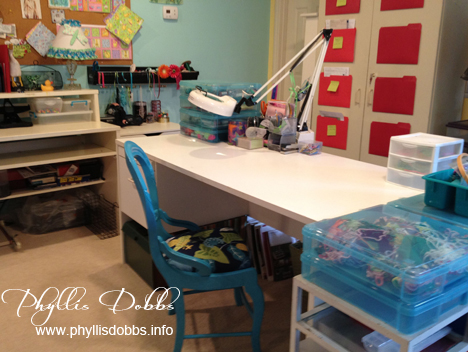
This table is my play space. I craft, draw, play with textiles, ribbons and beads, and create mixed media here. For a before and after makeover of the chair, visit my chair makeover post. You can’t see them all but I have lots of storage boxes filled with the supplies I use in this area. You can see a black ribbon storage rack on the wall and part of my 8 ft. cork idea board.  You may wonder what I do with all those red folders on the cabinet behind the table.

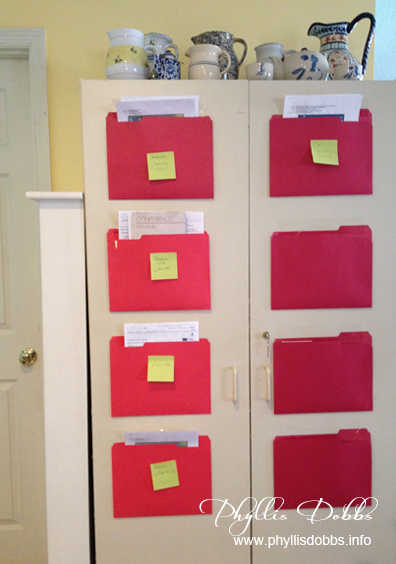
Red folders for organization

I travel a lot with my business and accumulate a lot of paper for each trip – hotel and airline reservations, badge and show information, and classes plus a multitude of other papers related to a trip. I used to have a horrible time keeping up with the papers for each trip, having to rush around at the last minute searching through stacks of  papers or files. So I came up with the “Red Folder Method of Keeping Travel Records Straight”. I taped red folders on the front of this cabinet and annotate each folder with a post it note for the trip. Then I put all my papers for that trip in the folder as I receive them. I keep the trips in order and move the information up after a trip. It works for me and has been a big help with my travel organization.

Computer area in the Phyllis Dobbs' studio

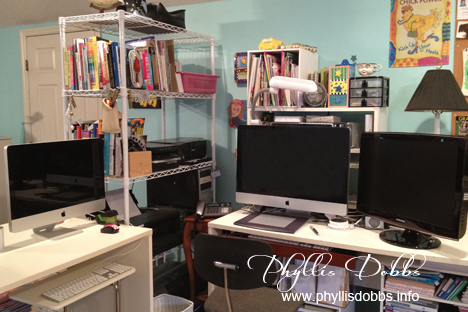
This area is the brain of my studio – the computers where I put it all together digitally. A shelf unit holds the printers and scanners close for easy access and so I don’t have to reach too far. All my papers for printing are stacked on a shelf unit under my desk. The desks with the computers plus the crafting work desk above form a large U shape area that works fabulously for me.

Phyllis Dobbs Studio Cat

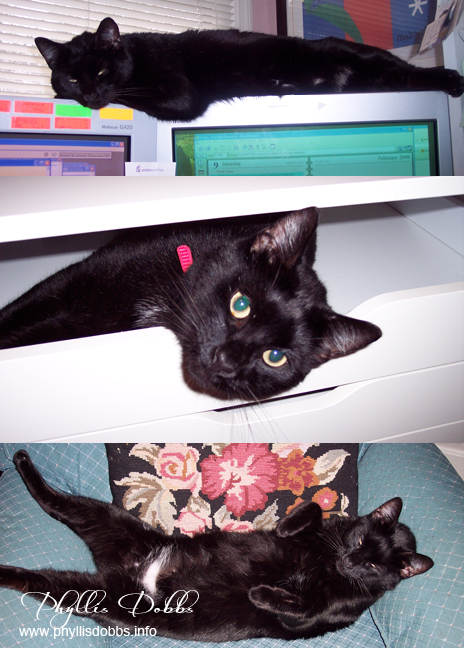
And, what studio is complete without a studio cat (or dog). I adopted Kitty Kat when he was about 6 months old and since he answered to Kitty, I kept that as his name. I should have named him Lucky because he lives a life of relaxation and luxury and thinks he’s boss of the house. He loved my old CRT monitors in the top picture, but didn’t like it much when I went to flat screens. He loves helping me put together things, such as this Ikea drawer unit – maybe its the supervising part he loves. But resting in a chair close by while I work is his favorite activity. I think he’s wishing for a hammock.

Thanks for visiting and please hop forward to visit the other artists studios!

New Years Blog Hop Forward

Phyllis