How Many UFO’s (Unfinished Object Projects) do you have hiding away?

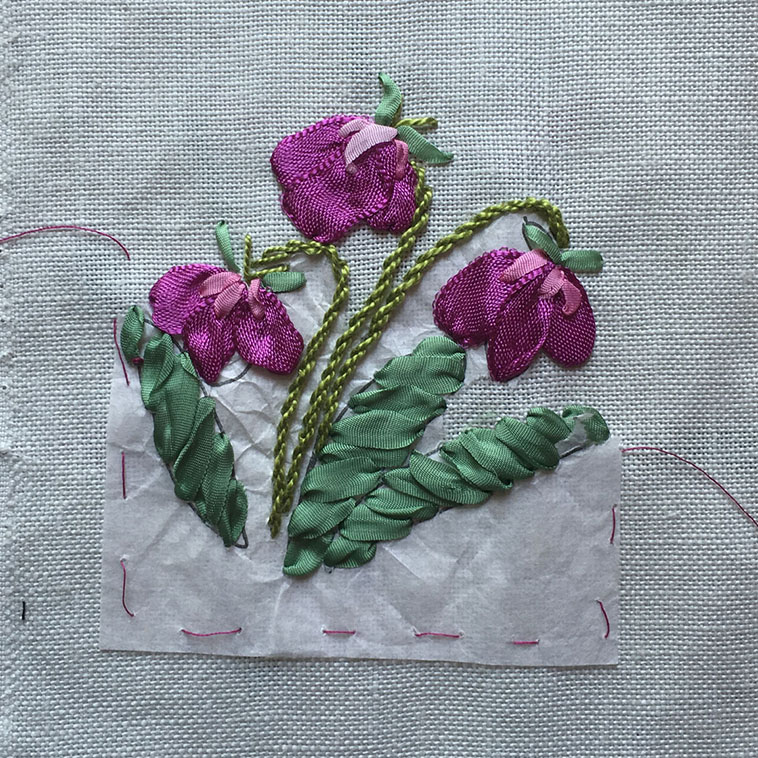
I love needlework! But somehow this little piece ended up unfinished, a small UFO, sitting in my closet with more UFO’s.

Unfinished Ribbon Embroidery Project

During the years that I was a member of the Embroider’s Guild of America, EGA, I took every class offered and attended regional retreats. As a result, I ended up with a lot of UFO’s in addition to the finished projects. But, all was not lost with UFO’s!  I enjoyed every stitch that I did complete and learned so much about embroidery and other forms of needlework and canvas work.  In addition, I loved spending time with  friends and the conversations we had while sitting and stitching.

The stitching of this little project is finished. I started tearing away the paper but something distracted me and I didn’t finish the project. I will most likely turn it into a small sachet pillow or frame it, so I hope to post the finished piece shortly!  I’m also feeling guilty about my other UFO’s so will pull them out and work on them while being a couch potato at night. That will also limit my couch potato guilt!

I hope you pull out your UFO’s and give them a little love!

Phyllis

Embroidery Design with my Cat’s Help!

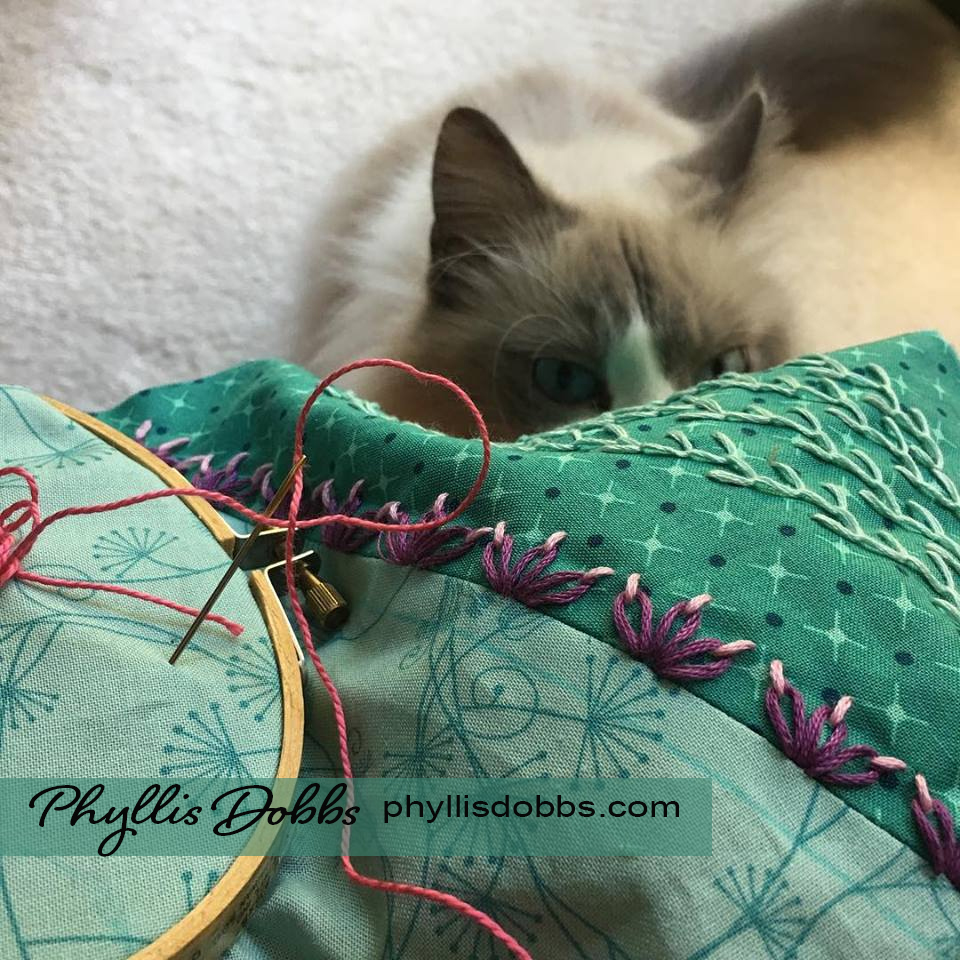
I have been giving embroidery needles a workout and have been creating some embroidery for new designs to combine with quilting. As you can see, I have help – my cat Bandit has to inspect what I am doing. He quickly lost interest and settled down for a nap, which is a good thing with needles flying back and forth.

Embroidery for quilt

Embroidery has been my first love for needlework. I started needlework at a very young elementary school age by my aunt as an excellent teacher. All the women in my family, my mother, aunts and grandmother, all spent a lot of time with needles with various mediums – quilting, crochet, knitting, sewing and needlework. I’ve continued with each medium except for knitting (I love knitting but keep forgetting how to knit between projects).

I am delighted to see young and fresh embroidery designs being created and love that embroidery continues with its “nine lives”!

Check back as I will be showing the finished design!

I hope you pick up your needles, no matter the medium!

Phyllis

Fabric Love for New Sewing and Quilting Projects!

I look at fabric as mini pieces of art!  I’m enthralled with the colors and patterns and cannot resist touching and feeling fabrics. I love designing fabrics as well as buying fabrics I find in the marketplace. I have attended the Modern Quilt Guild convention, QuiltCon, a couple of times and am headed there again next February. In addition to enjoying the classes and lectures, I do a lot of shopping!  Its irresistible and so fun!

Fabrics for new projects

I bought a lot of the above fabrics at Quiltcon’s (plus one is my design). I’m currently working on projects with these fabrics and think I will add some embroidery, another love! I can’t tell you what the finished projects will be at this time, but will post as soon as I can.

Enjoy thinking about your little pieces of art as you make something wonderful with them. Sometimes, I really hate to cut the fabrics, but then remind myself of the beautiful creation that will result.

Are you one of “those” people like me who can’t resist touching any kind of fabric, to feel the softness, weight and textures?

Phyllis

Embroidery – Its so timeless!

I am using my embroidery needles, along with my water soluble pens, and have been creating embroidery designs. Embroidery was my first creative love! Years ago, as a pre-teen, I began my interest in the creative world by picking up a needle. Needles have never been far from my hand, whether creating needlepoint, cross stitch, canvas work, sewing or quilting. It all begins with a needle, after a great design, of course!

Crewel Embroidery Phyllis Dobbs

This design is from my past and is part of a design I created for an ad the DMC Corporation. Its more crewel in nature with the pattern.  I love creating a variety of stitches and really enjoyed stitching this.

The patterns that I am creating now are more contemporary but based on the past. How can you not design embroidery without recognizing the past influences! The stitches are timeless!

Check back for more embroidery designs as well as my continuing fabric and quilt designs! Embroidery with project patterns will soon be in both my Craftsy and Etsy stores.

Pick up your needles!

Phyllis


Kool Tak Fabulously-Fall Blog Hop – Felt Pumpkin Pillow

I am delighted to be a part of the Kool Tak Fabulously-Fall Blog Hop sponsored by Crafty KT.  With fall around the corner, I decided to make a pumpkin felt pillow. There are 12 of us in the hop, so hop to see all the really “Kool” projects.

Crafty KT is also offering a giveaway of an assortment of Kool Tak products. See the details below on the products in this giveaway as well as how to enter to win.

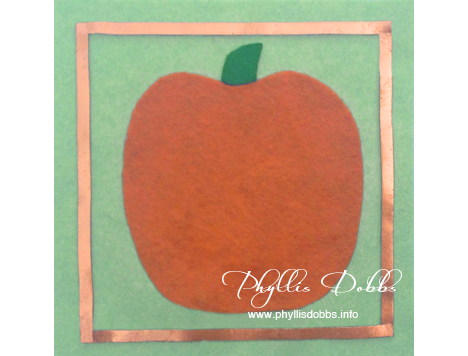
Felt Pumpkin no sew pillow Phyllis Dobbs


This 9″ square pumpkin pillow is a no-sew project, except for a few simple embroidery stitches, and is very easy to make.

Materials needed:

  • Felt – dark green, light green and orange (National Nonwovens felt).
  • Dark orange 6-strand embroidery floss (Sullivans)
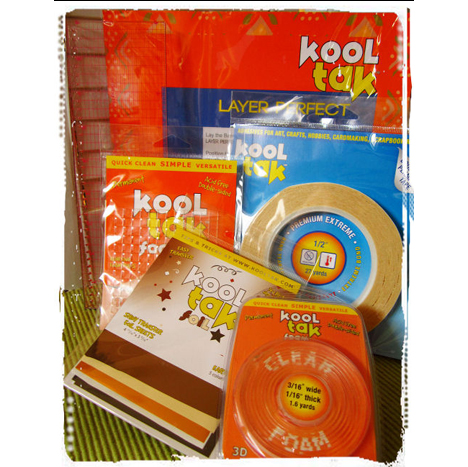
  • Kool Tak™ 1 Layer Perfect Tool
  • Kool Tak™ 1 Shiny Transfer Foil Sheets (Earth Tones)
  • Kool Tak™ Clear Foam tape ¼ x ¼ x 1/32” thick
  • Kool Tak™ Clear Foam tape 3/16 x 1/16 thick by 1.6 yards
  • Kool Tak™ Premium EXTREME tape 2 ½ x 27 yards
  • Batting or fiberfil
  • Embroidery needle

Instructions:

1. Divide the 6 strands of embroidery floss and use 3 strands. Sew long running stitches for the vertical “pumpkin lines”.  (See the finished pillow – I forgot to stitch the lines until after step 4.  Its a lot easier to stitch before the adhesive tape is added!)

2. Cut the felt:  dark green – 2 pieces 9″ square; light green – 1 piece 6″ square; orange – a 4″ x 4″pumpkin (download Pumpkin applique pattern ).  From the dark green, cut a stem for the pumpkin.

3.  Use the Premium EXTREME tape on backside of the pumpkin to attach it to the light green piece of felt. After adhering strips of the tape on the back of the pumpkin, trim the edges to align with the pumpkin.

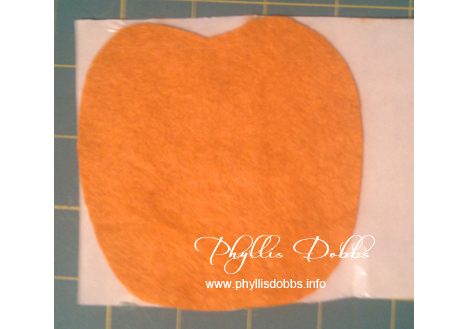
Pumpkin with the tape on the back

4.  Remove the paper backing from the tape and use the Layer Perfect tool to align the pumpkin onto the light green felt. Place some of the Premium Extreme tape to the back of the pumpkin stem and trim to match the stem. Remove the paper backing and adhere the stem above the pumpkin center.

Centering the felt pumpkin to the light green felt background


5.  Attach strips of the 1/16″ Clear Foam Tape 1/2″ from the edge of the green felt, forming a square going around the pumpkin.  Remove the liner from the tape and rub the gold Shiny Transfer Foil Sheet over the adhesive tape. Repeat to foil the foam tape square with the gold surface.

Pumpkin felt pillow with gold foil

6.  Attach the Premium Extreme tape to the back of the light green square. Remove paper backing and adhere the light green square centered to one of the dark green squares.

7.  Adhere a 1/4″ foam clear adhesive pad to the dark green square at the corners of the light green piece and half way between the corners. Remove the liner pieces from the foam squares and rub the gold Shiny Transfer Foil Sheet over the squares.

8.  Align the dark green pumpkin pillow top to the remaining green felt square and pin around 3 sides. Sew edges with a running stitch using 3 strands of the floss. Leave the 4th side open. Fill the pillow with fiberfil then finish sewing the pillow closed.

Click on the blue Designer Crafts button in my sidebar to hop back and forward to other blogs with fabulous projects in this hop!

Blog Hop Giveaway Crafty KT Kool Tac

And be sure to sign up for the Crafty KT newsletter to be entered for the giveaway $70 in Kool Tak products including:

  • Kool Tak™ 1 Layer Perfect (Use it for centering, piercing, and edge stitching) Tool
  • Kool Tak™ 1 Shiny Transfer Foil Sheets (Earth Tones)
  • Kool Tak™ Clear Foam tape ¼ x ¼ x 1/32” thick
  • Kool Tak™ Clear Foam tape 3/16 x 1/16 thick by 1.6 yards
  • Kool Tak™ Premium EXTREME 2 ½ x 27 yards
  • *the giveaway is open only to the mainland residents of the US

Thanks for visiting and enjoy hopping to all the other crafty fall projects.

Phyllis

Book Review – a Fabulous New Needlework Book by Linda Wyszynski

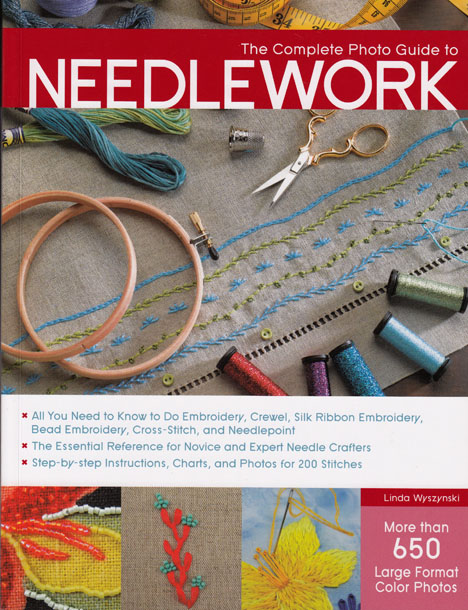
I love, love needlework and have collected needlework books for years. I just added The Complete Photo Guide to Needlework by Linda Wyszynski to my collection and have to say that along with it being a beautiful book, its also the most comprehensive book I have. Needlework is so versatile. In addition to all types of needlework projects you can create, you can also use needlework to add beauty and detail to quilts and sewing projects. A few embroidery stitches can also make such a difference with your favorite craft technique, even paper crafts.

The Complete Photo Guide to Needlework by Linda Wyszynski

This book has photos and diagrams for 200 stitches you can use for creative embroidery, crewel, silk ribbon embroidery, bead embroidery, cross stitch and needlepoint. In addition to all the photos, the book is filled with easy to follow diagrams. With this book, you will have all the information to get you started with needlework – stitching equipment and supplies, canvases, charts, fabrics, threads, ribbons and much more.

Included in The Complete Photo Guide to Needlework, published by Creative Publishing International, are projects to use with the different techniques. You will love this book whether you are a beginner or an experienced stitcher.

A little bit about Linda – I’ve known Linda for at least 20 years. She is the most talented needlework designer I know and designs for numerous magazines and books as well as correspondence classes for The Embroider’s Guild of America. She worked very diligently on this book to insure its completeness and to design the beautiful projects. She was aided by her husband Dennis, who created the graphs, illustrations and took the photographs – a winning combination to produce a beautiful book!

Put a little stitching in your day!

Phyllis

More Great Products and Displays from the Craft and Hobby Show (CHA)

Welcome back for more great products and displays from the Craft and Hobby (CHA) Winter Trade Show held in Anaheim, CA. If you missed my first CHA review post, please visit it to see some great color and design.

One of the fun trends I saw at CHA was paper sculpting and the Die Cuts With a View (DCWV) booth had so many fabulous projects, I took photos of all just about of them.

Paper Bird Sculpture at the DCWV booth at CHA

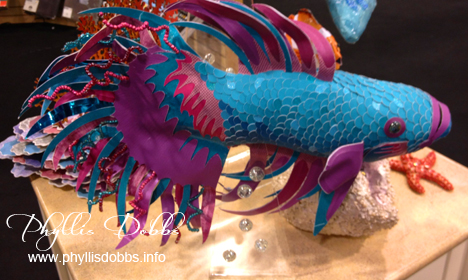
Paper fish sculpture by DCVW at CHA show

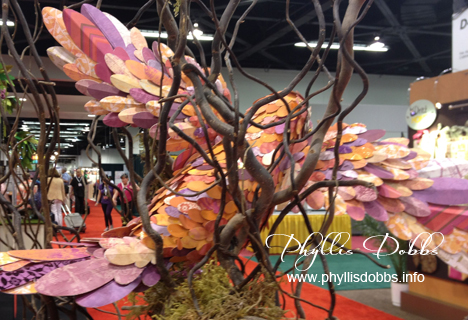
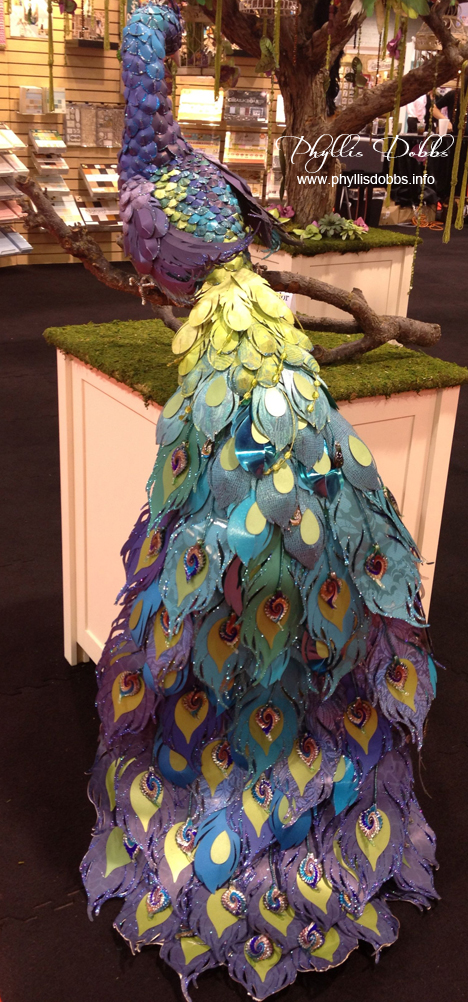
Paper sculpture Peacock by DCWV at CHA show

The bird, fish and peacock were all gorgeous and my favorite was the peacock with its tail “feathers” cascading to the floor.

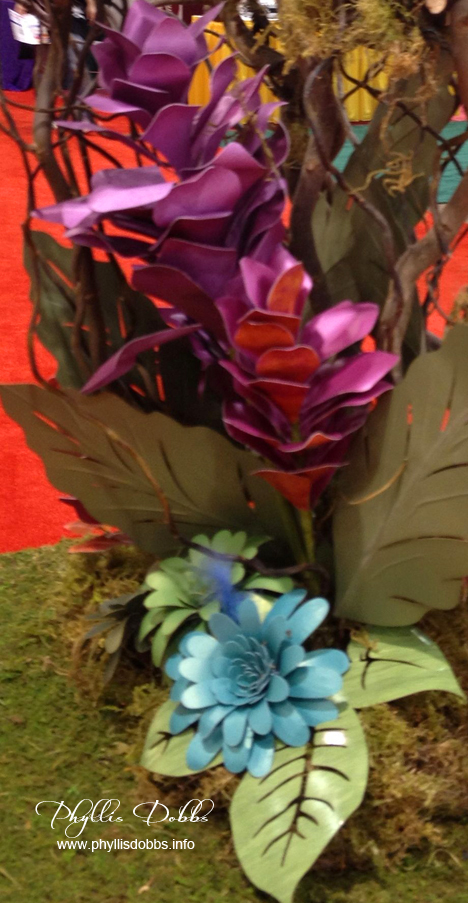
Floral paper sculpture display by DCWV at CHA

Loved the paper flowers!

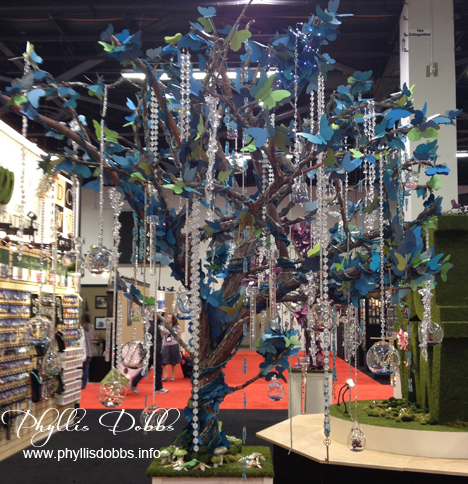
Paper tree with beads by DCWV at CHA

The paper sculpture tree held streamers of the beads from their bead line. DCWV also won the best booth for an island or peninsular. The DCWV booths at prior shows were also spectacular, including the one with full size paper dresses.

June Tailor booth with new products at CHA

June Tailor flower template to create multi-size flowers

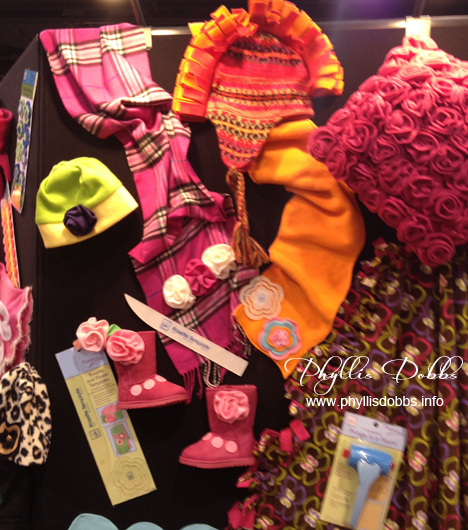
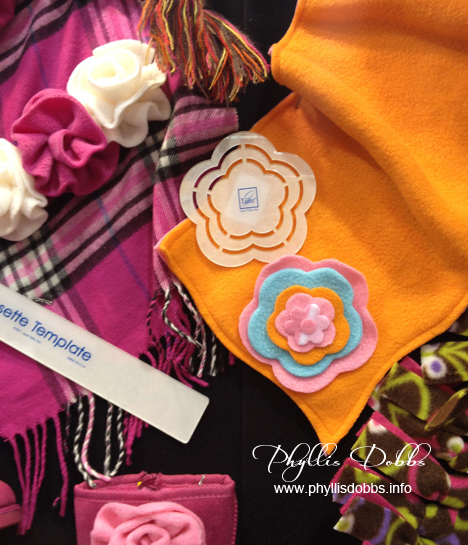
June Tailor had several new products in their gorgeous booth. Two of their new tools were the Rosette Template and the multi-size flower template as shown with the layered felt flower. The rosettes made with the Rosette Template can be used as accent pieces on boots, knit caps and much more. With your imagination, you can come up with tons more uses. The fringe on the cap in the top center was made with their new fringe tool. And I love the colors of pink and orange color combination they used in this section of the booth.

Rose pillow using June Tailor Rosette Template at CHA

Blue Hydrangea pillow created with the Rosette Template by June Tailor

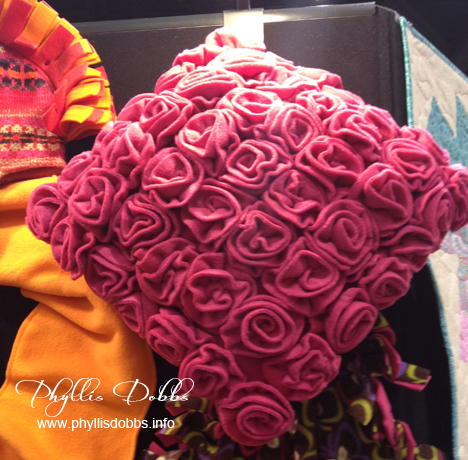
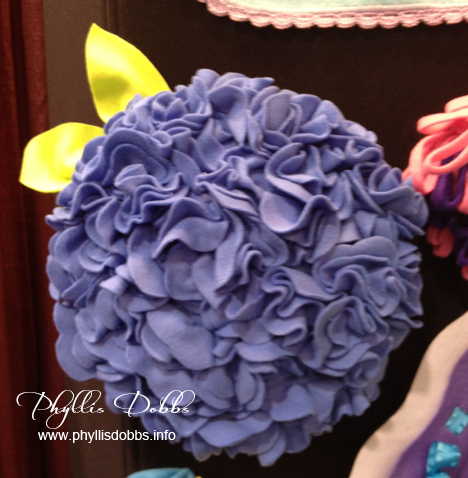
The gorgeous rose and hydrangea pillows were created with the Rosette tool and I guess you can tell that I love this tool!

Claudine Hellmuth at Ranger Booth at CHA

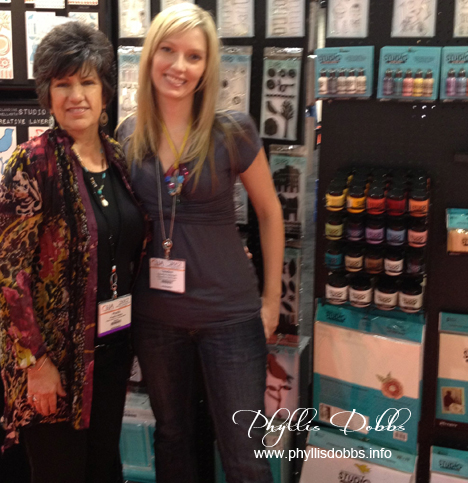
I ran into the talented and beautiful Claudine Hellmuth at the Ranger booth after she finished her demonstration using her product line for Ranger –  Studio Paints, Studio Brushes and Studio Sticky Back Canvas.

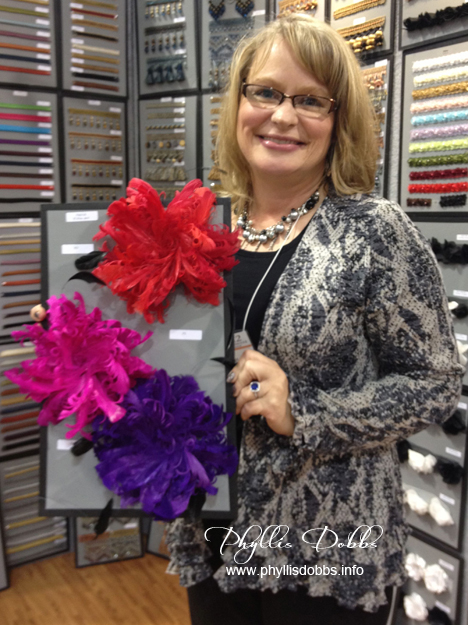
Debi Schmitz in the Expo International booth at CHA

Feather swirl accessory by Expo International at CHA

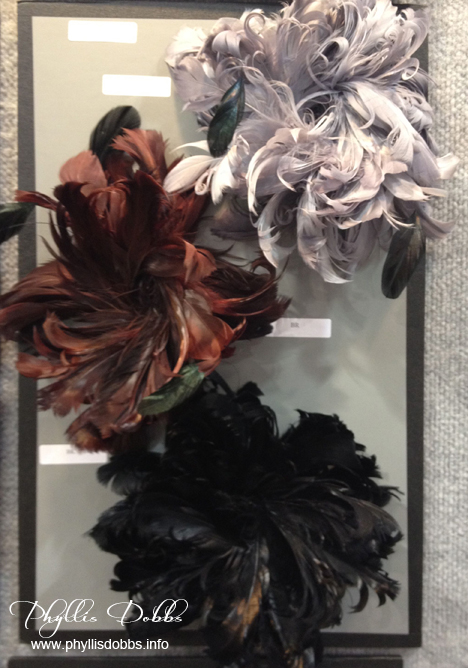
Debi Schmitz of Expo International is just adorable!  She’s pictured above holding some of the new feather swirls that come in both the bright colors she is holding as well as the more neutral colors that are pictured right below her. They are beautiful, no matter which color!

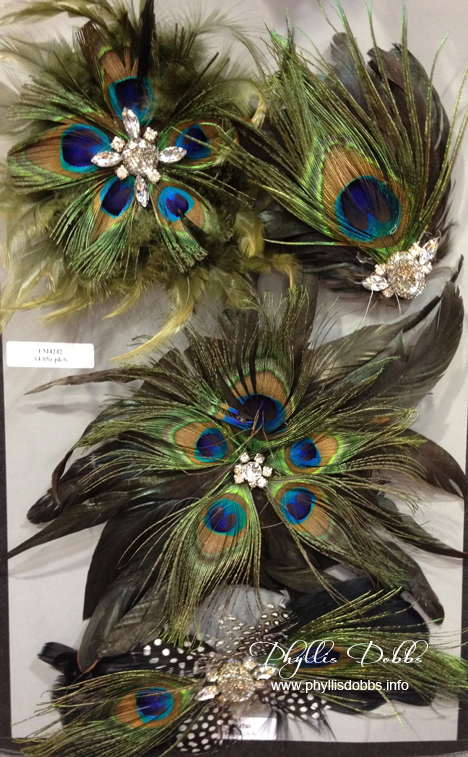
Peacock feather trim by Expo International at CHA

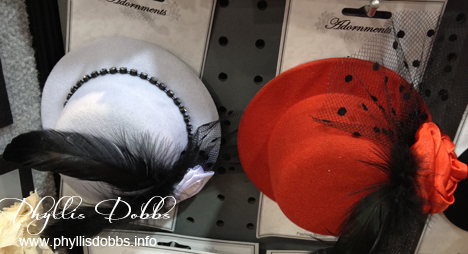
Small hat adornments by Expo International at CHA

Peacock’s are really trendy in both design, decoration and motifs. Their peacock feather adornments were gorgeous, especially with the bling in the center.  The hats are about 5″ – 6″ and are so cute. Expo had an entire line of the small hat adornments.

EK Success Crewel embroidery at CHA

The EK Success booth had a line of crewel kits for their Dimensions Brand, all designed by Lori Siebert. I’ve always loved crewel and embroidery and am excited to see this type of needlework being featured.

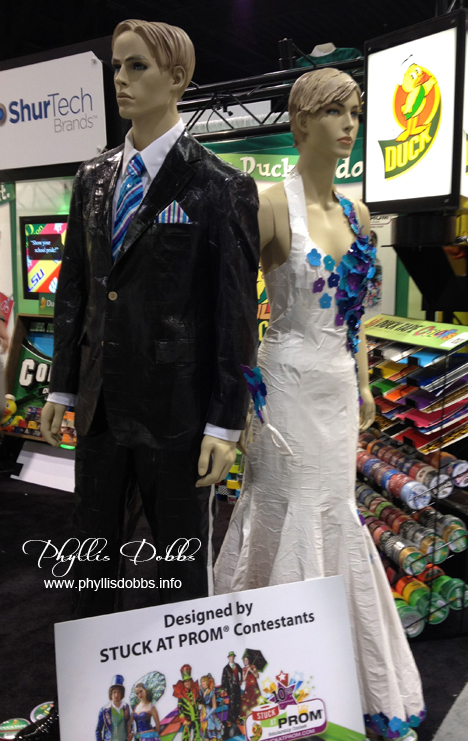
Duck tape prom dress and suit at CHA

In the recent years, Duck Tape has been put to much more creative uses than just being used as tape, with all kinds of fun things being made with it including clothing. Shurtech Brands displayed a prom dress and suit, all made with Duck Tape.

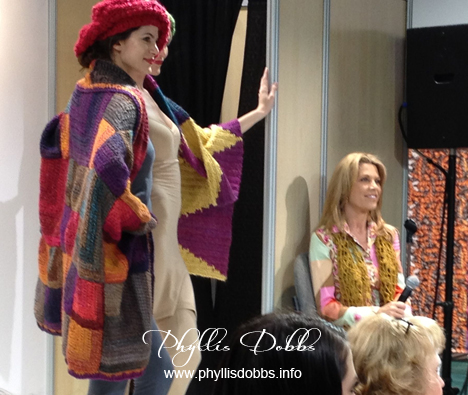
Vanna White at Lion runway at CHA

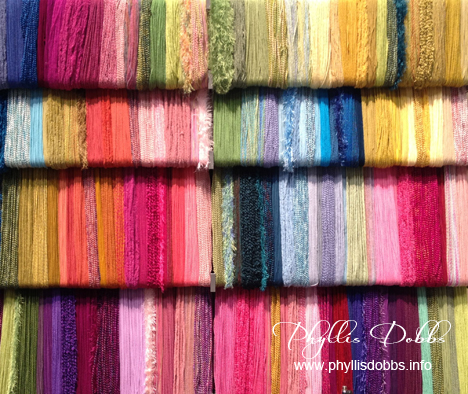
Lion colorful yarn display at CHA

Vanna White was at CHA again, presenting the Lion Brand Yarn runway show. Vanna has been the spokesperson for Lion Brand Yarns for over 14 years. This display of their yarns really made a splash of color!

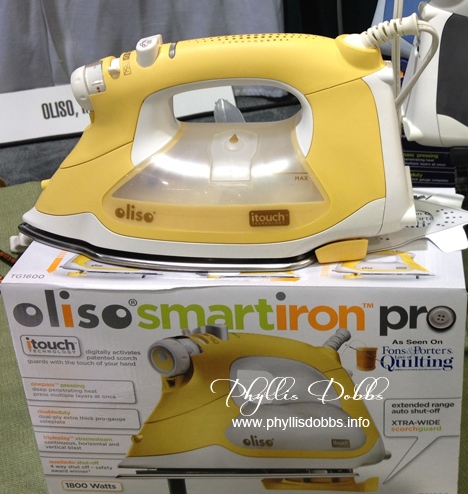
Oliso Smart iron 2

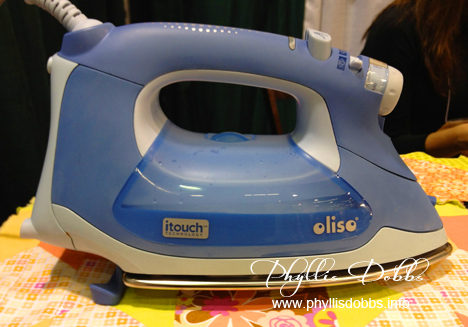
Oliso smart iron in use at CHA

I don’t usually get excited about irons, but this one is the exception. The Oliso steam iron the “iTouch” is fabulous and its on my shopping list. You just leave it flat and after a few seconds, prongs come out of the bottom and lifts the iron up from the surface. You don’t stand this iron on its “rear” end like most irons, but leave it flat. When you get ready to use it again, just touch the handle and it lowers back to the surface. So no burned or scorched fabrics!  And since it stays flat, is harder to knock over. Oh, another thing I love about it is that it fills on the side instead on the front top end.

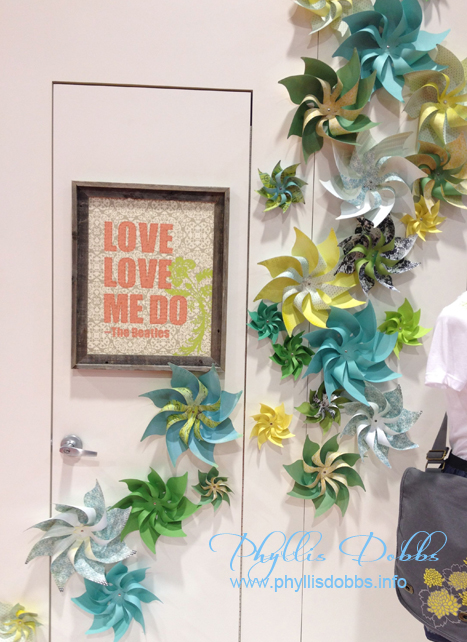
Paper pinwheel in the Silhouette both at CHA

More paper sculpture – the pinwheels in the Silhouette booth were cute and fun!

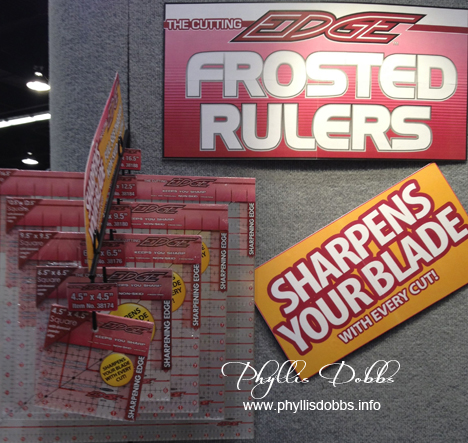
Sullivan Sharpening cutting mats at CHA

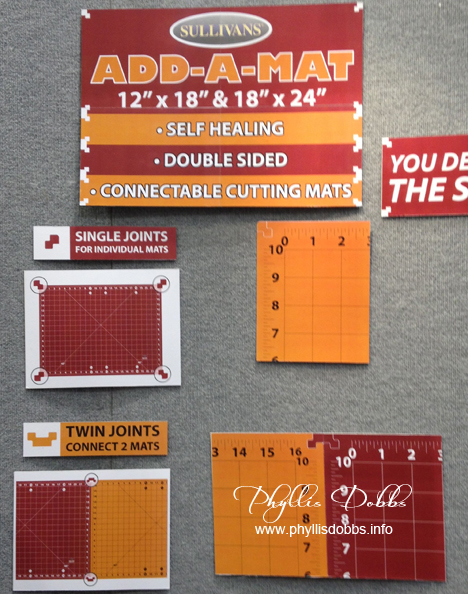
Sullivan Add a Mat cutting mat at CHA

For you sewers and quilters, Sullivans USA had some exciting new products that caught my attention. The top photo shows cutting rulers that sharpen your blades as you cut. In addition, they have a new mat, Add-a-Mat, lets you size the mats as you need them.  This is a great idea for travel where you need to take a cutting mat, like to classes, or are limited in storage space.

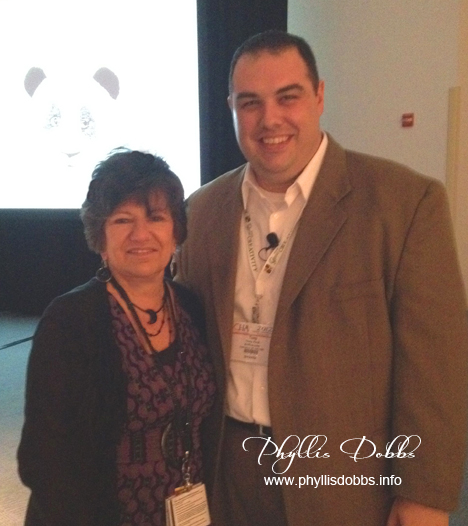
Tony Ford technology seminar at CHA

CHA has a lot of educational seminars. Tony Ford, the COO of ArtFire and CHA’s Emerging Technology Expert, conducted two classes. I attended both, which were outstanding. I attended a seminar by him at the CHA summer show last year and learned so much. So I made sure to be at both of his seminars this time as well.

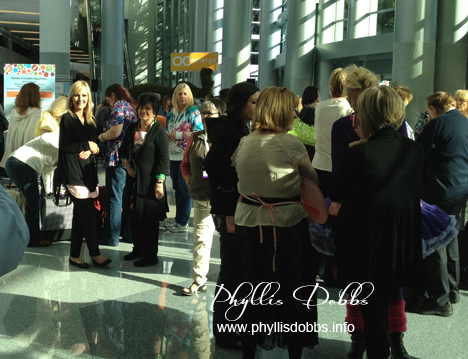
Karen Embry and Phyllis Dobbs before the flash mob at CHA


One of the fun things that took place at the CHA show was a flash mob dance before the show opened. We’re standing around above trying to blend in and look natural in the crowd before the flash mob.  All of us wore pink She’s Crafty aprons from Charity Wings and had to cover them up prior to the flash mob.

I’m looking forward to working with many of the fabulous products that I’ve shown you, so it will be a fun year!

Happy Crafting,

Phyllis

Great Products and Great Displays at Craft & Hobby (CHA) Winter Show

After spending several days in southern California for the Craft and Hobby Association (CHA) winter show, I came home inspired and excited. I took photos of the fabulous products and displays, so many photos that I will have to divide my CHA review into two parts. CHA is a huge show with such a variety of products in about all crafting cagtegories. The variety is one of the things I love about the show.

The trends that I noticed at the show included lots of paper sculpture as well as bead sculpture, glass mosaics, beads and needlework to include both embroidery (and Crewel) and felt. I’m sure I missed some other trends, but these caught my attention.

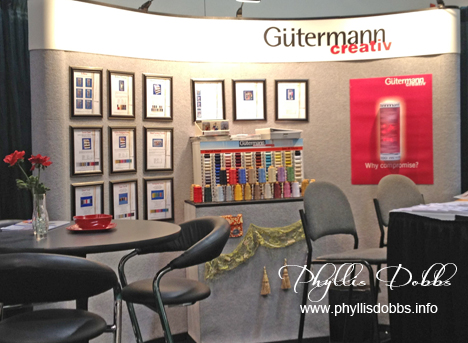
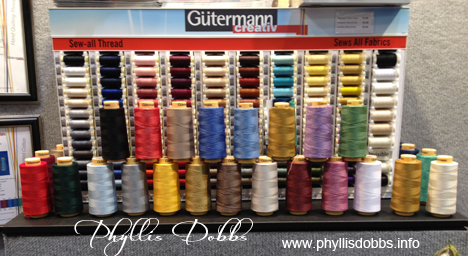
I was working in the Gutermann booth surrounded by the beautiful and high quality Gutermann threads.

Gutermann booth at CHA winter show

Gutermann threads display

I love the wide assortment of the in both cotton and silk.  Watch for designs and projects that I will be creating using their threads – comiong soon!

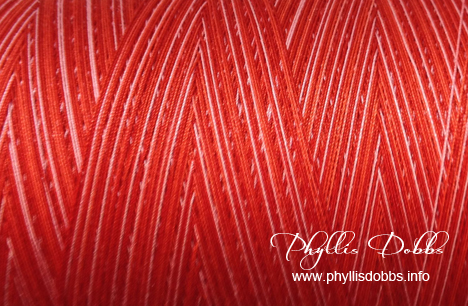
Gutermann thread patternI took a closeup of one spool of the varigated thread.  I loved the pattern created by the thread winding and the brilliant varigated color. Opening your eyes to things close  around you can give you beautiful patterns.

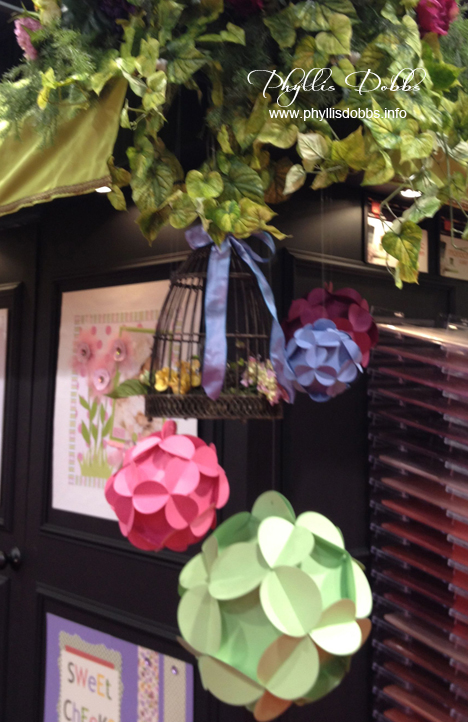
Brazzill Basic Papers sculpture

Brazzill Basic Papers had beautiful displays of sculptured flowers.  This display was hanging in a corner of the booth. A beautiful, larger display was in the center of the booth, but they were so busy and crowded with buyers, I could not get to it to take a photo.

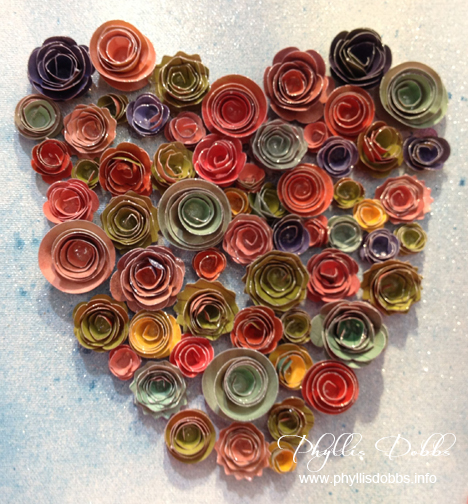
Therm-o-Web glittered sculpure heart

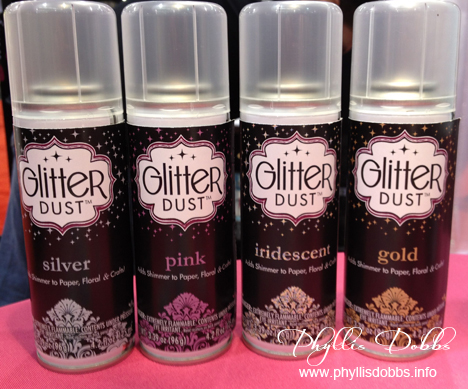
Therm O Web demonstrated a new glitter – Glitter Dust, that gives a light sprinkling of glitter by aerosol.  The paper sculptured heart consisted of various sizes of flowers, all with a light coating of Glitter Dust.

Therm O Web Glitter Dust

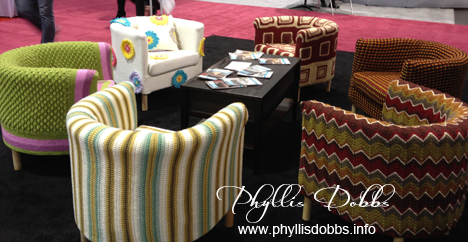
Knitting and crochet are so versatile, as can be seen by the display in the Bernat booth with these chairs.

Bernat knitted and crochet chair coverings at CHA

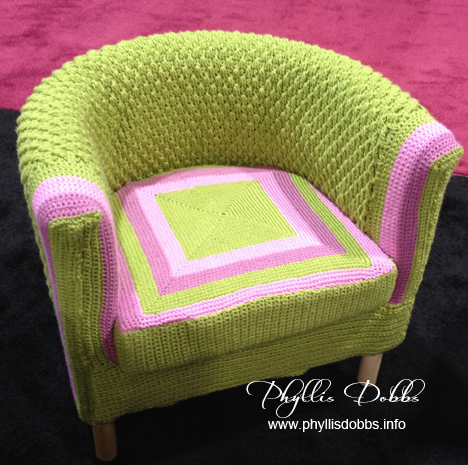
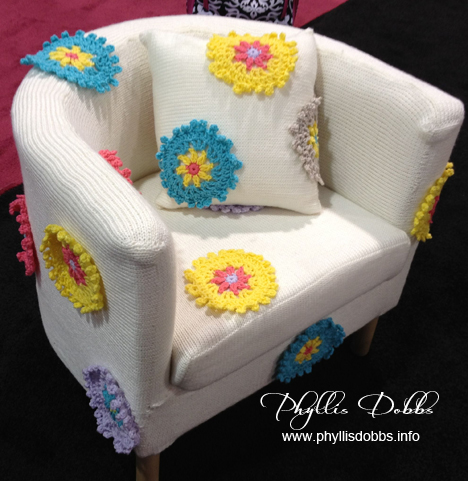
These chair covers were knitted and crocheted using Waverly for Bernat, based on 5 of Waverly’s popular patterns.  The yarns are in color collections based on the colors of the patterns. You can see my favorite 2 chairs below.

Bernat Green crocheted chair at CHA

Crochet and knit chair at winter CHA by Bernat

Aren’t they wonderful!!

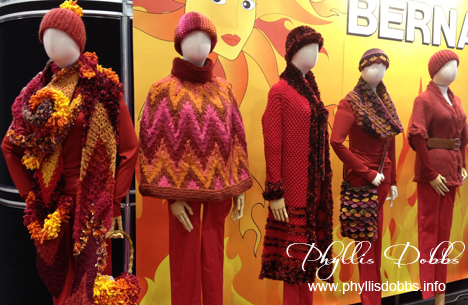
Bernat clothing and accessories at CHA

And I just love these sweaters and accessories also in the Bernat booth. I will take one of each! I really love the colors of this display.

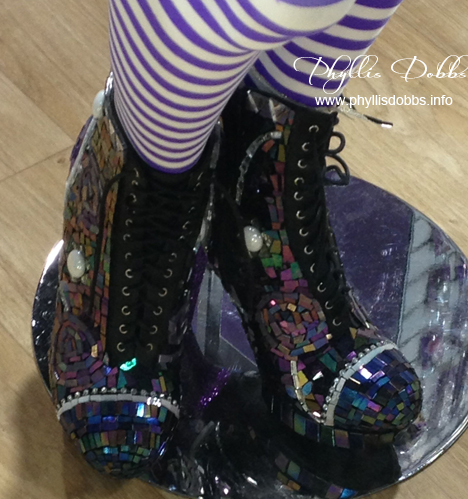
Glass mosaic boots by I Love to Create at CHA

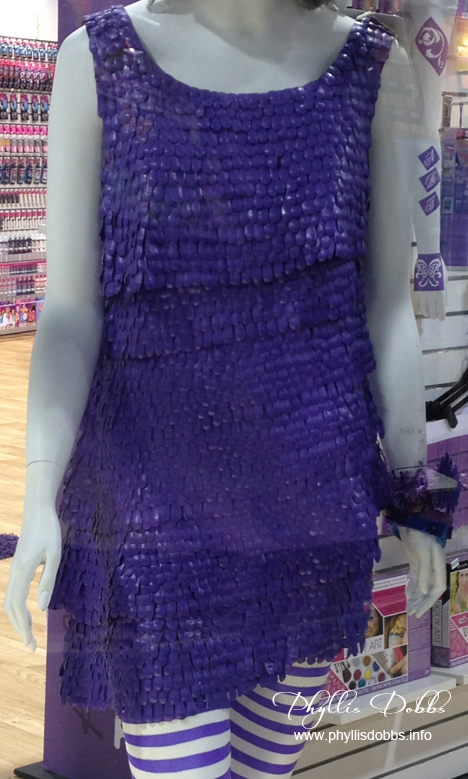
Dress made with paper plates by ILovetoCreate at CHA

The ILovetoCreate booth was filled with several wonderful displays created by EdoHeidi Borchers and Tiffany Windsor. Heidi created the mosaic boots using over 2000 pieces of mosaic tiles and buttons. They were gorgeous!  The dress was designed by Heidi and Tiffany with 90 paper plates hand cut into over 5000 petals, glued and painted to look like faux leather.  This was a stunning display to show the uses of Aleene’s glue.

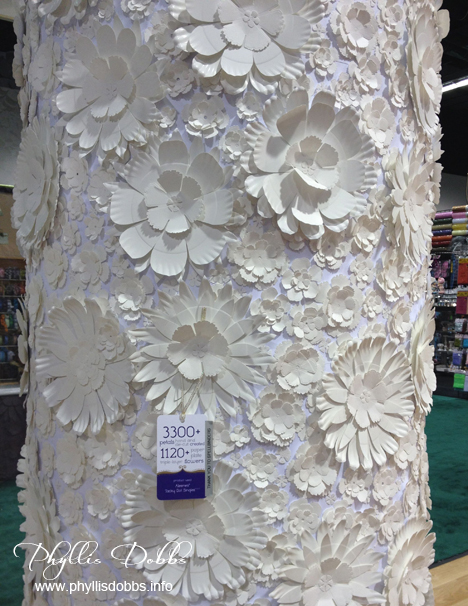
Decorated white column ILovetoCreate CHA

This large column, designed by Tiffany and Heidi, is decorated with 1200 paper plate hand and die cut into over 3300 pieces.

Mosaic skirt created with broken china in ILovetoCreate booth at CHA

Mosaic table by ILovetoCreate at CHA

Broken china mosaic chair by ILovetoCreate at CHA

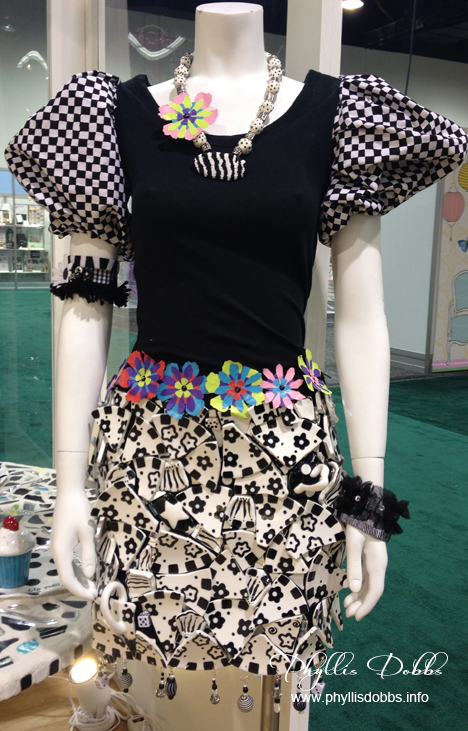
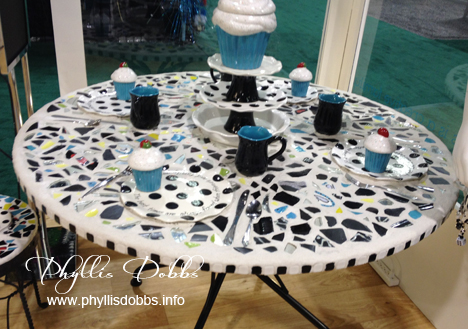
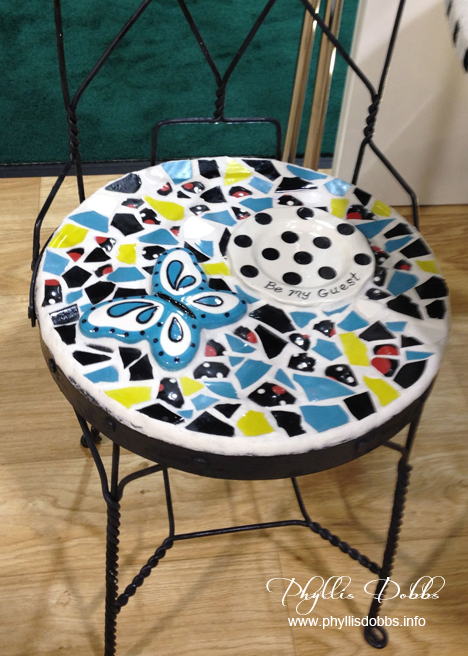
This display of mosaics was also designed by Heidi and Tiffany for ILovetoCreate. I love the skirt!  It’s made with broken china – cups and plates.  Its really a work of art! The table and chair are mosaics using broken china.  All three pieces created a beautiful setting.

Tulip body painting by IlovetoCreate at CHA

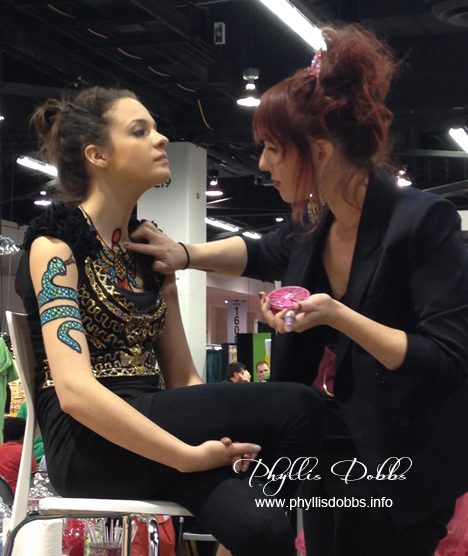
ILovetoCreate also has Tulip paints for body painting. A different design was painted each day.  The pretty model is Savannah Starr, Heidi’s granddaughter. I wonder if it tickles but it would be fun to paint and wear!

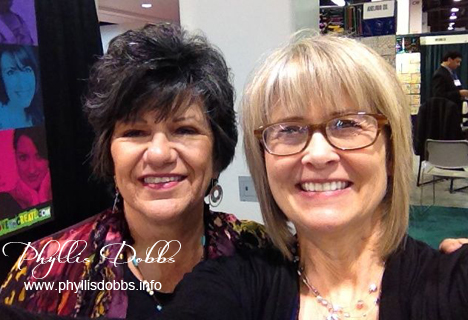
Phyllis Dobbs with Tiffany Windsor of ILovetoCreate at CHA

Tiffany is pictured here with me when I ran into her at the show. Besides being a great designer, Tiffany also hosts the Cool2Craft network.

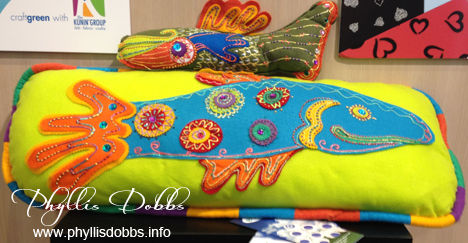
Felt fish pillows by Kunin Group at CHA

The Kunin Group had adorable projects in their booth with colorful felt, including the this fish pillow and the stuffed fish.

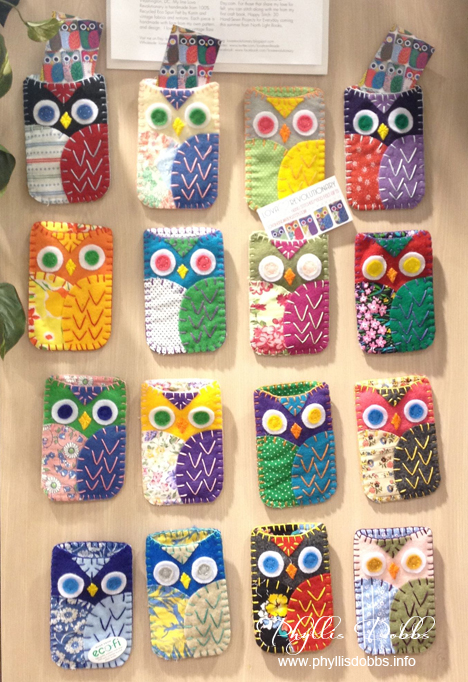
Cell phone cases made with Kunin felt at CHA

The cell phone cases were one of the displays in the Kunin Group booth.  They are just too cute and are by Jodie Haffa of Lova Revolutionary.

Bridal accessories by Darice at CHA

David Tutera at Darice booth at CHA

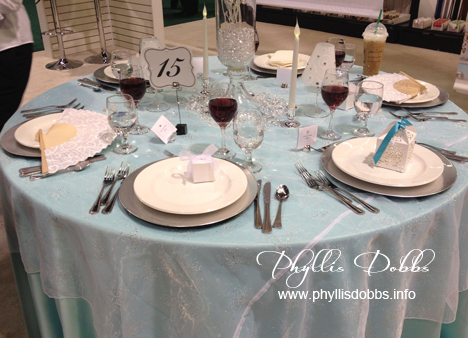
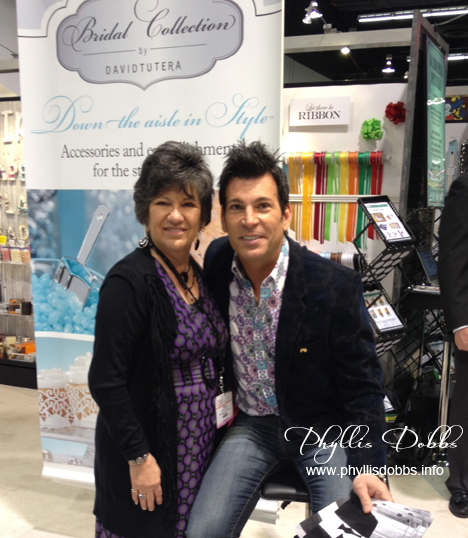
David Tutera, wedding expert and host of My Fair Wedding on WeTV, has a bridal accessory line with Darice. Some of the products are used for the beautiful table setting above. And as you can see, I got to get a picture taken with David.

Mich Turner of Little Venice Cakes at Darice CHA

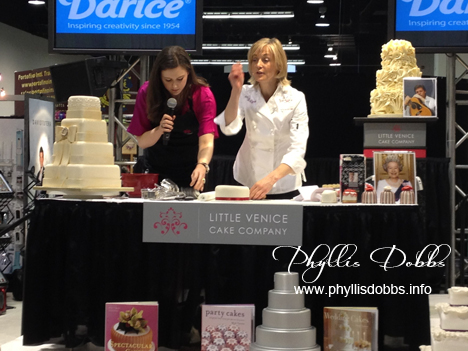
Mich Turner of Little Venice Cake Company, London, has a line of baking accessories also with Darice. Mich, the Queen of Couture Cakes, is demonstrating on the Darice stage.  Those cakes really look yummy!

Check back for part 2 of my review of CHA.  I have lots more to show you!

Phyllis

Quilt Works of Art – Exhibits at Houston Quilt Market

I wanted to end my review ot the Houston International Quilt Market, held in October, with photos I took of some of the most amazing and beautiful quilts on exhibit. Each quilt was a work of art and produced an “ahhhh”.  I loved reading the inspiration for the quilts and love the wonderful imagination of the creators in designing their quilts.
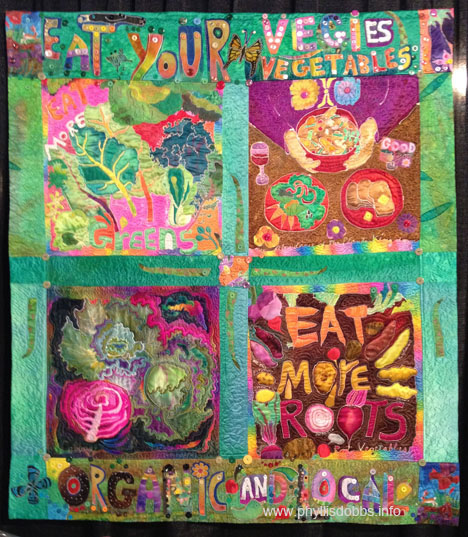
Eat Your Vegies Quilt from Houston Quilt Market

Eat Your Vegies was created by Judith Roderick of Placitas, New Mexico.  The techniques were hand-painted, machine quilted, pieced, fused and embellished. Judith firmly believes the Beatles’ lyrics from the 60’s – “you are what you eat you know”.
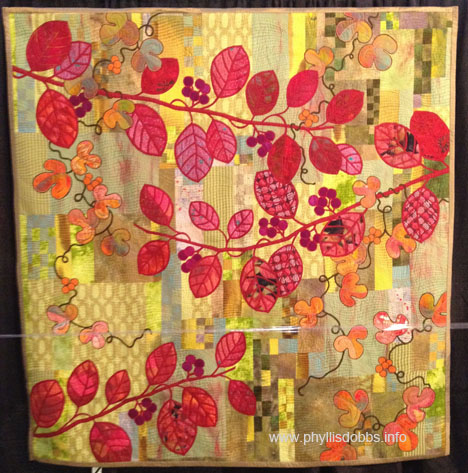
 

An Autumn Breeze quilt at Houston Quilt Market

An Autumn Breeze, created by Akiko Kawata, OIsake, Japan, features machine and hand piecing and is machine quilted. The quilt expresses the scene of an autumn mountain path in Japan.
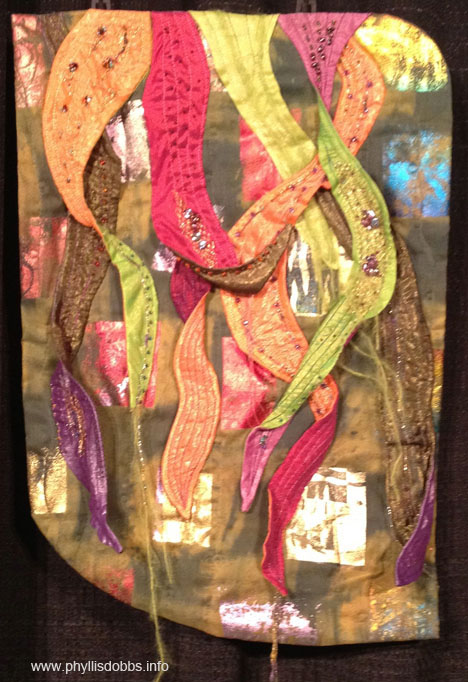
 

Leaves of Costa Rica quilt at Houston Quilt Market

Leaves of Costa Rica was created by Pam Berry of Lincoln, California.  The techniques include free-motion quilting, hand applique, with bead and yard embellishment. The leaves are two-sided with wire inserted to give form, and produced a beautiful dimension.
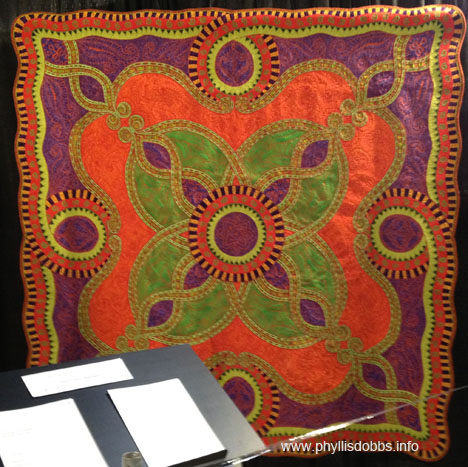
 

Serengeti at Twilight quilt at Houston Quilt Market

Serengeti At Twilight by Leona Harden, New Tazewell, Tennessee, used the techniques of raw edge applique, no piecing, and free motion quilting.  This quilt was featured on the cover of AQS’s American Quilter magazine, November 2010 issue. I wrote about this award winning quilt and Leona in a prior blog post. (Leona used a block that I designed in an earlier quilt that was her first awarding quilt).
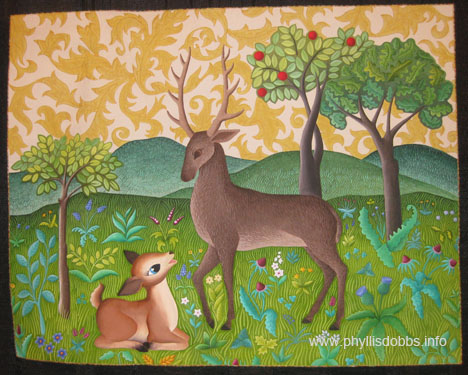
 

Quilt based on pastoral settings at Houston Quilt Market

Oh Deer, Look What’s Become of Me! was created by Judy Coates Perez, Chicago, Illinois. The technique is whole cloth painted with textile paints and machine quilted. This quilt was inspired by the Medieval hunting paintings of deer in pastoral settings. This also reminds me of the beautiful Medieval tapestries.
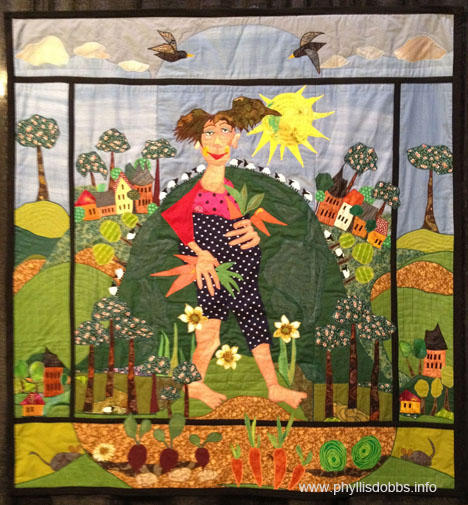
 

Quilt on exhibit at Internation Quilt Market, Organic is good for you

Organic is Good for You! Bodil Gardner of Lystrup, Denmark, was inspired by growing her own organic vegetables in creating this quilt. The techniques include applique and machine quilting.
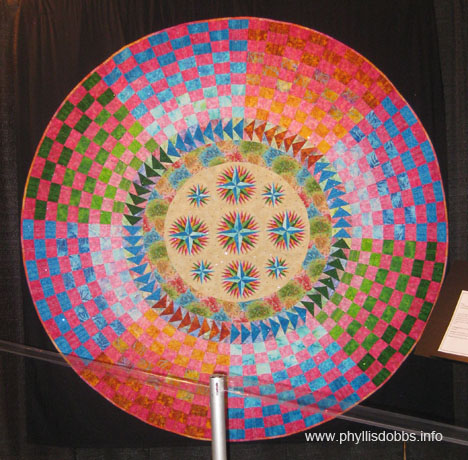
 

Hope Quilt by Ann Pigneri at Houston Quilt Market


Hope was created by Ann Pigneri of Louisville, KY. The techniques are paper piecing, machine quilt and bobbin stitching. This quilt is adorned by over 2500 crystals in 6 colors which, unfortunately, do not show up in the photo.
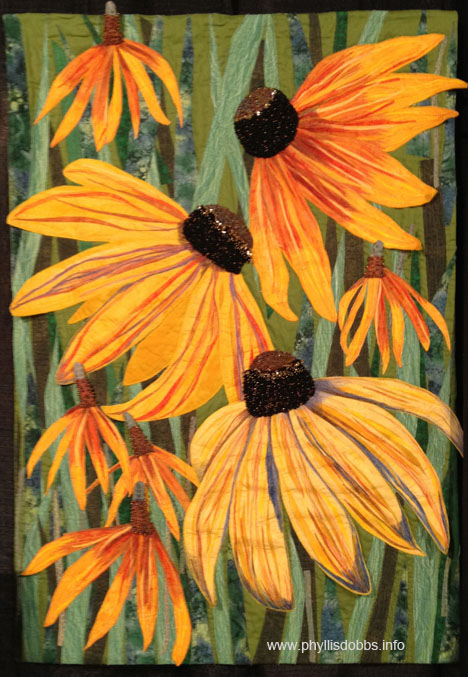
 

Quilt Black-Eyed Susans & Yellow Mexican Hats at Houston Quilt Market

Black-Eyed Susans & Yellow Mexican Hats was created by Mary Ann Vaca-Lambert, Austin, Texas. The techniques used were raw edge applique, thread painted, fused, beaded, and faced. Mary Ann was inspired to create this quilt from the flowers she sees on the way to work. The flower centers were very thick and dimensional and covered with beads.
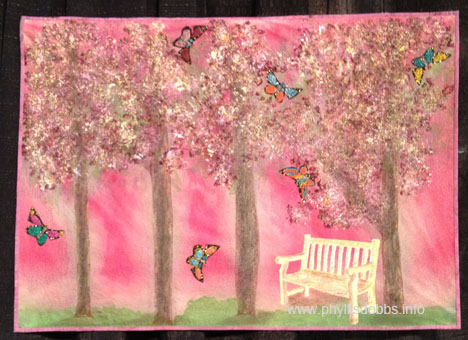
 

In Bloom Quilt on exhibit at Houston Quilt Market

In Bloom was created by Teresa Shippy, Santa Ana, California, based on the Cherry Blossom Festival of her dreams. Techniques used were hand-painting, stitching and painting. Sweet dreams!
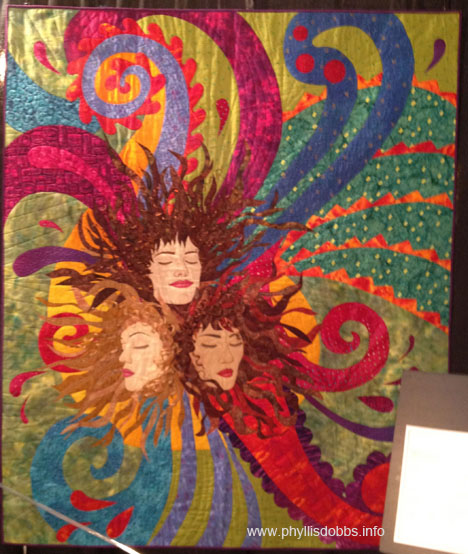
 

Big Bang Theory Quilt at Houston Quilt Market

Big Bang(s) Theory was created by Teresa Sherling, Denton, Texas and is a tribute to the bliss women feel on a good hair day. The techniques include turned-edge and raw-edge applique, hand painted and thread-painted faces, hand-crocheted human hair and free-motion machine quilting. Ah, I love those good-hair days!  Too bad they are matched by bad-hair days.
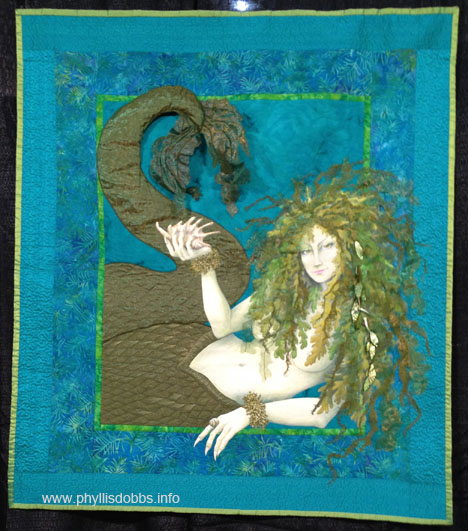
 

Sea Witch quilt at Houston Quilt Market

Sea Witch was created by Christine Alexiou, Unionville, Ontario, Canada. Techniques include fabric painting, applique, hand sewing, thread painting and beading and uses cotton, silk, organza, cheese cloth, glass beads, shell beads and fabric paint. Christine was inspired by The Little Mermaid to portray a physical beauty while hinting at her deranged creepiness.
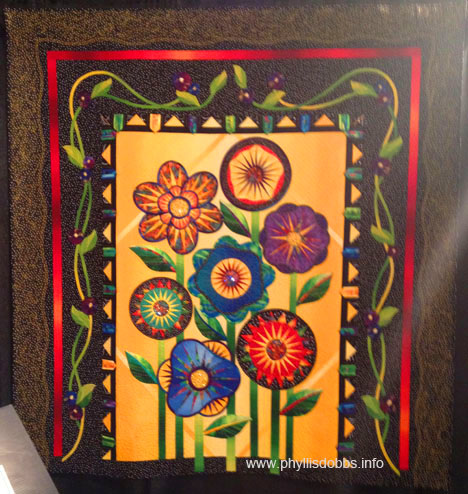
 

Really "Wild" Flowers Second Season quilt at Houston Quilt Market

Really “Wild” Flowers! Second Season was created by Sharon L. Schlotzhauer, Colorado Springs, Colorado. The techniques include machine piecing, paper piecing, hand applique, machine applique and machine quilting. This whimsical quilt features 7 colorful, dimensional “wild” flowers with Swarovski crystals in the centers.
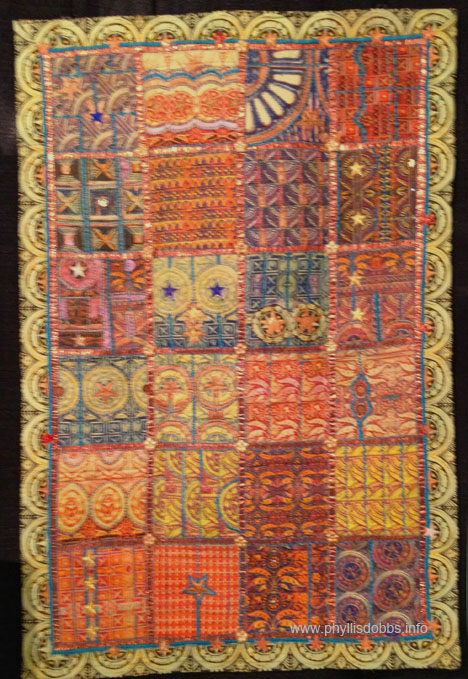
 

Capital Hardware Quilt by Frances Holliday Alford at Houston Quilt Market

Capital Hardware, by Frances Holliday Alford, Grafton, Vermont, is based on the beautiful Art Nouveau hinges and hardware of the Texas State Capital. She used the hardware details to print on Spoonflower fabrics for the blocks. Techniques include patching, free-motion quilting and decorative stitches.
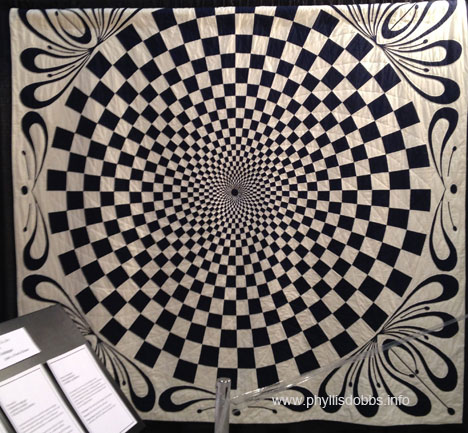
 

Vortex in Variation quilt at Houston Quilt Market

Vortex in Variation was created by Nora Ronningen, La Harbra, California. Nora was inspired by the Vortex Quilt exhibited in the American Folk Art Museum. She used Art Nouveau designs to draft her own applique pattern. Techniques include paper piecing, hand applique and hand quilting.

I’m about half way through my pictures and  have some work to finish so I will post the remaining photos shortly. Please check back as they are just as spectacular as the quilts posted here.

Phyllis

A Spider’s Delicate Embroidery Stitches!

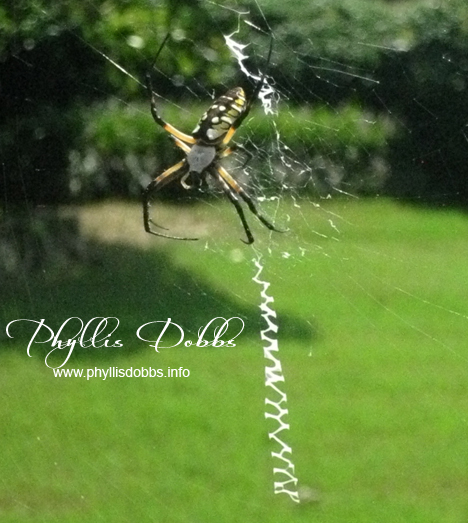
In a mad dash outside in the heat and humidity to quickly water some plants, I was stopped by the beauty of this spider and her (his?) web. The beautiful Chevron stitch down the center of the large web in my rose bush was spectacular.Black and yellow garden spider stitching a web
This spider knows needlework, so I’m assuming it’s a her (I know there are men who create gorgeous needlework and think Rosie Grier  and his needlepoint, but women do outnumber in this category). I know spiders can be terrifying, in spite of being such small creatures. But you have to admit that this one is a beauty with its yellow colors.

I did find this spider on the internet and its name is, are you ready?  “Black and Yellow Garden Spider”.  That’s not very imaginative and I think she deserves a much prettier name. Any suggestions for a name – please leave a comment if you do!

I wonder if she knows any other stitches….

Phyllis
Note, it has been almost a week since I posted this and the spider is still there.  But her body has doubled in size!