Kool Tak Fabulously-Fall Blog Hop – Felt Pumpkin Pillow

I am delighted to be a part of the Kool Tak Fabulously-Fall Blog Hop sponsored by Crafty KT.  With fall around the corner, I decided to make a pumpkin felt pillow. There are 12 of us in the hop, so hop to see all the really “Kool” projects.

Crafty KT is also offering a giveaway of an assortment of Kool Tak products. See the details below on the products in this giveaway as well as how to enter to win.

Felt Pumpkin no sew pillow Phyllis Dobbs


This 9″ square pumpkin pillow is a no-sew project, except for a few simple embroidery stitches, and is very easy to make.

Materials needed:

  • Felt – dark green, light green and orange (National Nonwovens felt).
  • Dark orange 6-strand embroidery floss (Sullivans)
  • Kool Tak™ 1 Layer Perfect Tool
  • Kool Tak™ 1 Shiny Transfer Foil Sheets (Earth Tones)
  • Kool Tak™ Clear Foam tape ¼ x ¼ x 1/32” thick
  • Kool Tak™ Clear Foam tape 3/16 x 1/16 thick by 1.6 yards
  • Kool Tak™ Premium EXTREME tape 2 ½ x 27 yards
  • Batting or fiberfil
  • Embroidery needle

Instructions:

1. Divide the 6 strands of embroidery floss and use 3 strands. Sew long running stitches for the vertical “pumpkin lines”.  (See the finished pillow – I forgot to stitch the lines until after step 4.  Its a lot easier to stitch before the adhesive tape is added!)

2. Cut the felt:  dark green – 2 pieces 9″ square; light green – 1 piece 6″ square; orange – a 4″ x 4″pumpkin (download Pumpkin applique pattern ).  From the dark green, cut a stem for the pumpkin.

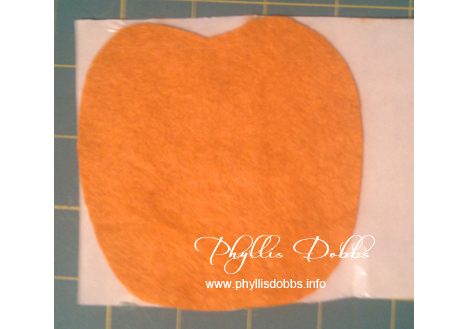
3.  Use the Premium EXTREME tape on backside of the pumpkin to attach it to the light green piece of felt. After adhering strips of the tape on the back of the pumpkin, trim the edges to align with the pumpkin.

Pumpkin with the tape on the back

4.  Remove the paper backing from the tape and use the Layer Perfect tool to align the pumpkin onto the light green felt. Place some of the Premium Extreme tape to the back of the pumpkin stem and trim to match the stem. Remove the paper backing and adhere the stem above the pumpkin center.

Centering the felt pumpkin to the light green felt background


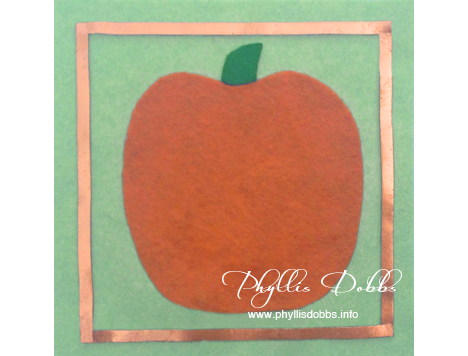
5.  Attach strips of the 1/16″ Clear Foam Tape 1/2″ from the edge of the green felt, forming a square going around the pumpkin.  Remove the liner from the tape and rub the gold Shiny Transfer Foil Sheet over the adhesive tape. Repeat to foil the foam tape square with the gold surface.

Pumpkin felt pillow with gold foil

6.  Attach the Premium Extreme tape to the back of the light green square. Remove paper backing and adhere the light green square centered to one of the dark green squares.

7.  Adhere a 1/4″ foam clear adhesive pad to the dark green square at the corners of the light green piece and half way between the corners. Remove the liner pieces from the foam squares and rub the gold Shiny Transfer Foil Sheet over the squares.

8.  Align the dark green pumpkin pillow top to the remaining green felt square and pin around 3 sides. Sew edges with a running stitch using 3 strands of the floss. Leave the 4th side open. Fill the pillow with fiberfil then finish sewing the pillow closed.

Click on the blue Designer Crafts button in my sidebar to hop back and forward to other blogs with fabulous projects in this hop!

Blog Hop Giveaway Crafty KT Kool Tac

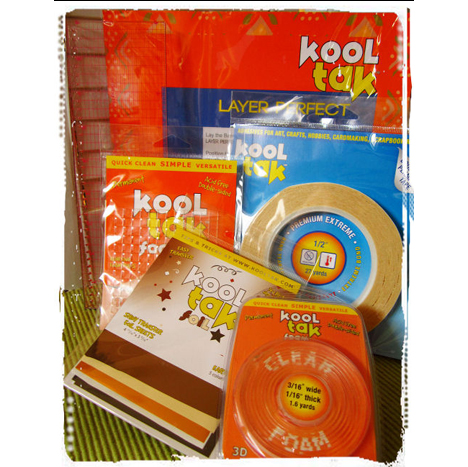
And be sure to sign up for the Crafty KT newsletter to be entered for the giveaway $70 in Kool Tak products including:

  • Kool Tak™ 1 Layer Perfect (Use it for centering, piercing, and edge stitching) Tool
  • Kool Tak™ 1 Shiny Transfer Foil Sheets (Earth Tones)
  • Kool Tak™ Clear Foam tape ¼ x ¼ x 1/32” thick
  • Kool Tak™ Clear Foam tape 3/16 x 1/16 thick by 1.6 yards
  • Kool Tak™ Premium EXTREME 2 ½ x 27 yards
  • *the giveaway is open only to the mainland residents of the US

Thanks for visiting and enjoy hopping to all the other crafty fall projects.

Phyllis

Sew a Pumpkin Placemat!

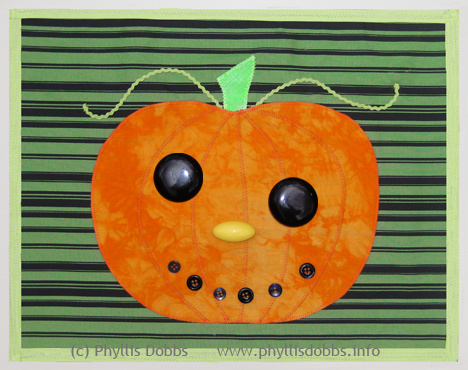
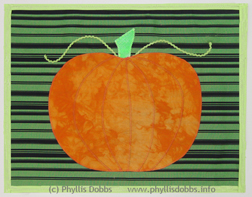
Halloween is almost here – next weekend!  I love pumpkins – they represent Fall, Halloween and Thanksgiving. Plus they are so delicious to eat in great desserts.  You can make this easy Pumpkin placemat in time for Halloween.  This free pattern will serve double duty as you can use it for a Thanksgiving table setting – just leave off the buttons.

Click to download the free pattern and instructions and start sewing.  All you need is the background fabric, orange fabric, green bias tape, baby rick rack, fusible web and if you are making it for Halloween, buttons.

I wish you a fun Halloween! My husband will be handing out our candy since I will be in Houston for the International Quilt Market.

Happy sewing!

Phyllis

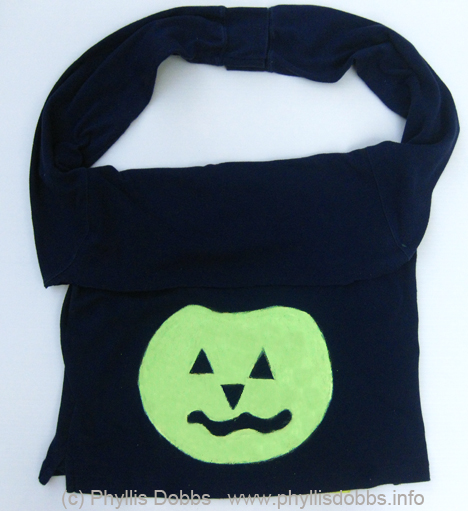
Repurpose (recycle) a tee shirt into a Halloween Treat Bag

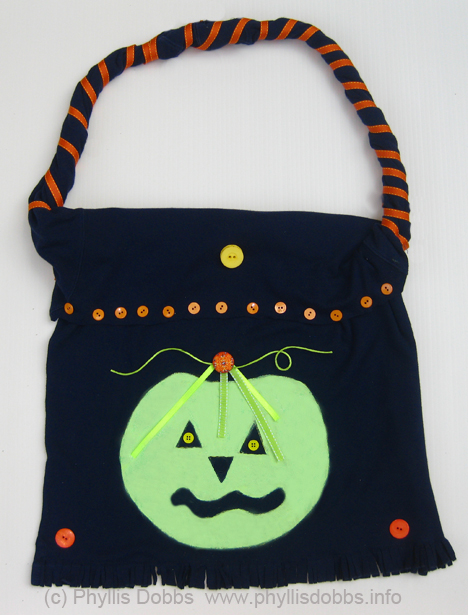
Repurpose one of your old tee shirts into a fun Halloween Trick-or-Treat bag for the kids (or for yourself to carry around for Halloween).  

To make this easy tote bag for Halloween, all you need is the following supplies –

Black long sleeve tee shirt

Green fabric paint (great if you use glow-in-the-dark paint)

2 pieces of green ribbon

Green rattail cording

Small orange buttons

2 large orange buttons

1 large orange decorative button brad

2 small yellow buttons

1 large yellow button

1/3″ wide orange ribbon

Needle and thread or glue

Piece of cardboard

Scissors

Instructions:

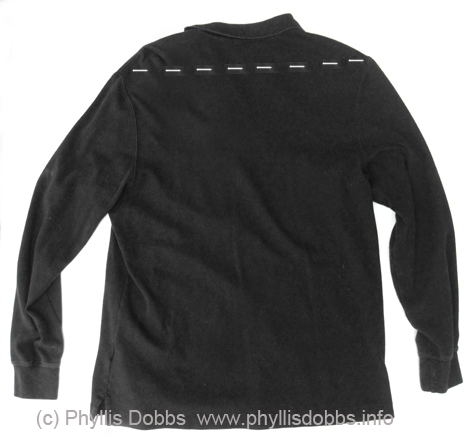
Lay tee shirt flat and cut the top of the tee shirt off above the top edge of the sleeves.  The cutting line is marked on the tee shirt below.

Fold the top of the tee shirt down over the front so that the bottom of the arm hole for the sleeve is at the top and the folded piece forms a flap.

Place the piece of cardboard between the 2 layers of the tee shirt and under where you will paint. Paint a pumpkin on the front of the tee shirt below the folded over edge and 2 to 3 inches above the bottom edge.

Sew the bottom front and back of the tee shirt together, sewing the seam 1 1/4″ above the bottom edge. Twist the sleeves and over lap the cuff edges by 1″ and sew together. Cut the bottom edge below the seam to form fringe.

Sew the end of the orange ribbon to the base of one sleeve “strap” and wrap around the strap until you reach the other end, cut the ribbon and sew the ribbon end to the strap. Fold 2 different lengths of ribbon together and stitch the fold to the tee shirt centered above the pumpkin.  Arrange the green rattail cording and sew loosely to the shirt as shown.  Glue or sew the orange brad on top of the ribbon at the fold.

Sew or glue buttons – 2 small yellow buttons in the eyes, 2 large orange buttons in the bottom corners, the yellow button centered on the folded over teeshirt area, and a row of small orange buttons to the edge of the fold over.

I hope you enjoy this project!  Be creative and paint a skull or any other Halloween design or use a different color shirt – let your imagination fly or enlist the help of the kids.  Your trick or treaters will love carrying this bag.

Phyllis

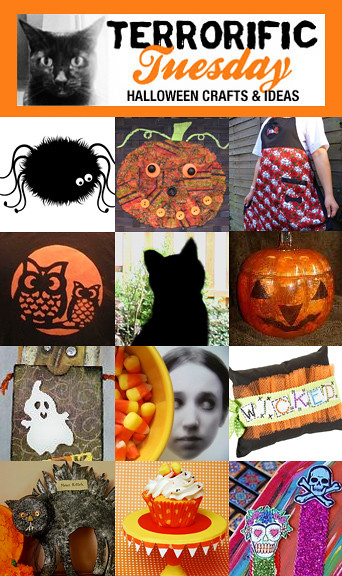
Terrorific Tuesday – Halloween DIY projects for each week!

terrorific tuesday 2010 week 1

Kate Pullen shares 3 cute digital stamps Free cute spider digital stamps.

Phyllis Dobbs makes an easy Halloween Decopauge Pumpkin Treat Basket.

Jenna Excell shares her super cute and spooky Bones Halloween Apron.

Korinne Zimmerman a.k.a. Crafterella makes a wonderful spray bleach shirt using an adorable Moon Owl Stencil.

Glory’s Mischief haunts her house with her Faux Cats in window.

Ann Butler makes this boo-tiful Reverse Collage Decopauge Jack-o-Lantern.

Eileen Hull tucks away Halloween cards in this fun Sizzix ScoreBoard notebook pocket.

Silvia Chenault and Patty Cappelluti share two super spooky projects on Silvia’s blog: Vampire Art and Creepy Mirrors!

Pattiewack shows you how to make this cute and Wicked Pillow.

Messy Missy brings the LOLs with her Mean Kitteh.

Alexa Westerfield a.k.a. Swelldesigner whips up a Cute Candy Corn CD Cupcake Stand .

Kathy Murillo a.k.a. Crafty Chica delights us with glittery Skull Bookmarks.

That’s it for this week! If you are interested in playing in Swelldesigner’s Terrorific Tuesday roundup, e-mail her at swelldesigner (at) gmail (dot) com and she’ll send you the details!

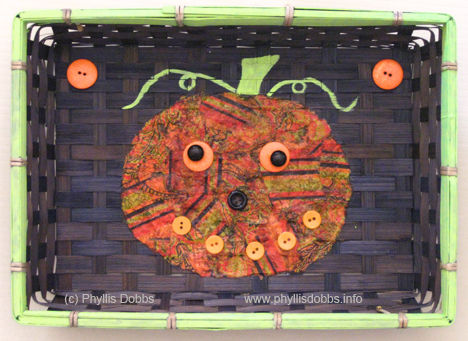
Halloween Craft – Decoupaged Pumpkin Treat Basket

Make an easy Halloween Basket to hold candy for trick-or-treaters.  All is takes is a basket to decorate (I found this one at Goodwill for $1) and a few supplies.

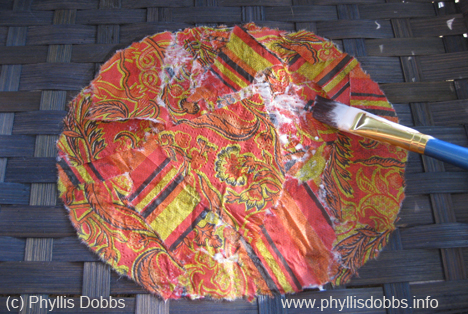
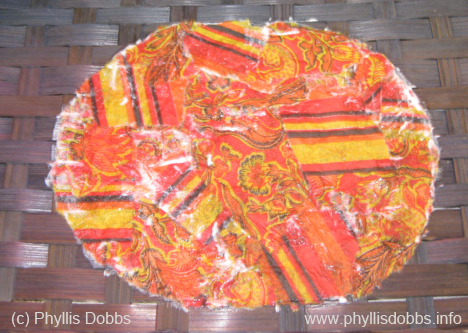
The pumpkin was created with a paper napkin torn into pieces then decoupaged with Mod Podge.

Supplies –

Basket

Mod Podge

Assorted orange and black buttons

Green Paint (Plaid Folk Art)

Paper Napkin or other orange pattern paper

Paint brushes

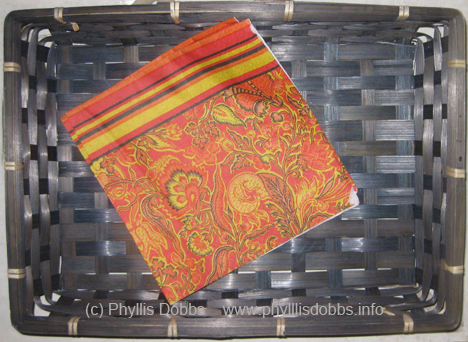
I found these gorgeous paper napkins at Tuesday Morning.  They are the perfect colors for Halloween and the fall season.

After drawing pumpkin shape on the basket, I tore the napkins into assorted sizes and shapes, with curved edges on some to loosely fit the curved edge of the pumpkin. Then I applied Mod Podge with a brush to the basket inside the pumpkin area, a section at a time.  I added the pieces of torn napkin on to the area with the Mod Podge, overlapping pieces and fitting the curved edges along the outside edge of the pumpkin.

After filing the pumpkin and I keep adding the paper pieces so that there were 2 layers of paper for the pumpkin.

When all the napkin pieces were in place, I applied a final coat of Mod Podge on the top of the pumpkin to seal the paper.

After the pumpkin dried, I painted the stem and vine as well as around the rim of the basket.  I glued buttons for eyes with smaller round black buttons on larger orange buttons.  A black button was used for the nose and a row of small orange buttons for the mouth.  A large orange button was glued in the top corners.

I wish you a boo-dashious Halloween.  Please check back – I’m working on several more crafty and sewing items for Halloween!

Phyllis