Hi Resolution – New Years Studio Meet and Greet!

Welcome to my studio! I am joining with 11 other artists on a hop through our studios. We are showing you where we spend the majority of our time, creating new art, designs, and other creative endeavors. I invite you to check out each of the fabulous studios of the other artists by clicking on the links below or the forward button.

New Years Artist Studio Visit

The artists participating in this hop are:

Aaron Christensen

Barbara Johansen-Newman

Beth Logan

Brenda Pinnick

J. Wecker-Frisch

Karen Embry

Paula Joerling

Phyllis Dobbs

Samantha Walker

Sharon Himes

Shelly Comiskey

Sue Zipkin

My studio is a work in progress and if I ever finish it, I will probably be starting over within a few weeks! I work best with everything completely organized (not that I stay organized) and have created distinct areas in my studio for the way I work. I keep striving for the perfect work flow to fit me and the various techniques that I use. After a recent big upheaval and reorganization of my studio, I think I have found the best arrangement for me, although I’m 100% sure I will continue to tweak it.

I am both and artist and designer.  My art is licensed for various products such as fabrics, garden flags, kitchen textiles and more. I also design quilt and sewing patterns and have a new quilt book debuting in April. In addition I work with textiles and mixed media.  So with working in all 3 of these mediums, I have have tons of “stuff” that I use.  So all of my supplies need to be where I can find them easily in addition to being close at hand.

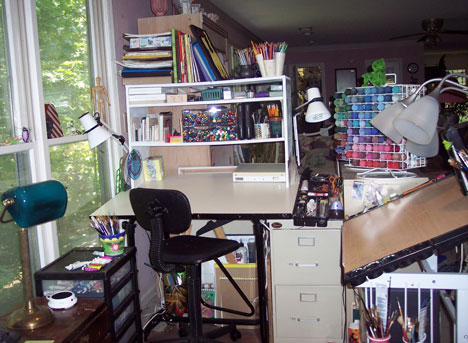
Pyllis Dobbs Studio Drawing and Painting Table

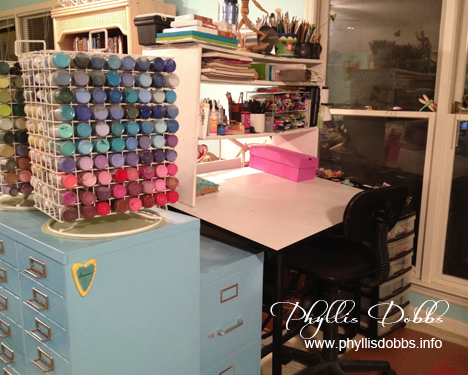
My drawing/painting table and supplies are located next to a set triple windows so I can catch the natural light. Sometimes it’s hard to keep my focus inside.  I have 2 plastic storage units with drawers to hold paints and painting supplies. They tuck neatly under the left edge of my table when not in use and are easy to pull out when I need them. I’ve been repainting a lot of my studio furnishings and have painted the filing cabinet and the multi-drawer cabinet turquoise. Both are great for holding additional supplies. The cabinet with the small drawers has 30 drawers and is my favorite for storage.

Studio View

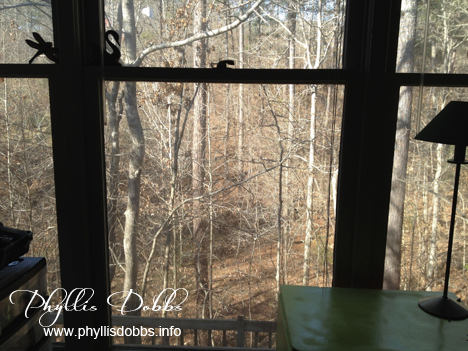
My studio is on the 2nd floor of my home but the view from my windows is like looking from a 5th floor window or a treehouse. Our backyard drops at a steep slant to a bubbly creek at the bottom.  Although I like the winter view, my favorite is the spring and summer with all the green. The fall is also beautiful with the golds, oranges and reds as the leaves turn. Like I said, sometimes its hard to keep my focus inside, especially when there is a woodpecker knocking away.

Studio cutting table

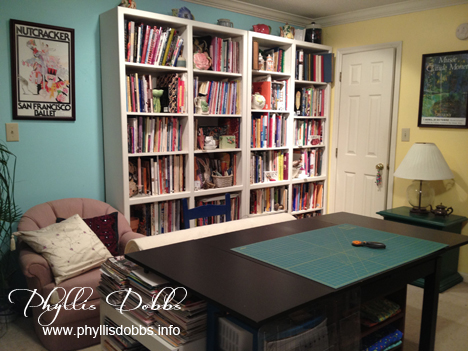
My fabric cutting table is set up in front of bookshelves filled with all my craft, needlework and quilting books. I love books as well as magazines (stacks of which are at one end of the cutting table). I use an antique chair that was my grandmothers to hold a large roll of batting behind the table making the batting easy to pull out as I need it. My cutting rulers are stored under the table and another plastic drawer unit and a low book shelf unit tucked under the table hold all my cutting tools and supplies.

Studio sewing area

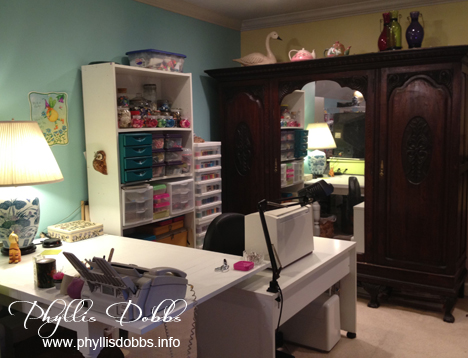
My sewing area is set up in one end of my studio with an antique pub table painted white and a low white table. I store fabrics in an antique triple armoire that I bought at an auction years ago. To keep all my threads, fibers, buttons and all things related to sewing handy, I use two plastic drawer units stacked together as well as a white bookcase loaded with smaller draw units. I save all sizes of jars to hold buttons, pins, and anything else that needs a home.

Studio crafting and work area

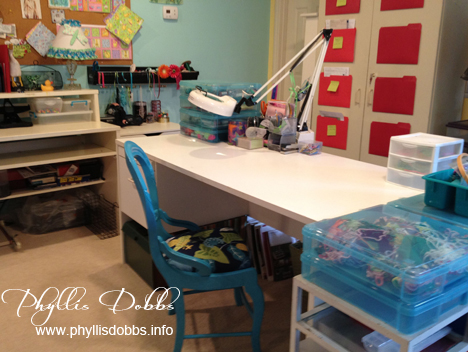
This table is my play space. I craft, draw, play with textiles, ribbons and beads, and create mixed media here. For a before and after makeover of the chair, visit my chair makeover post. You can’t see them all but I have lots of storage boxes filled with the supplies I use in this area. You can see a black ribbon storage rack on the wall and part of my 8 ft. cork idea board.  You may wonder what I do with all those red folders on the cabinet behind the table.

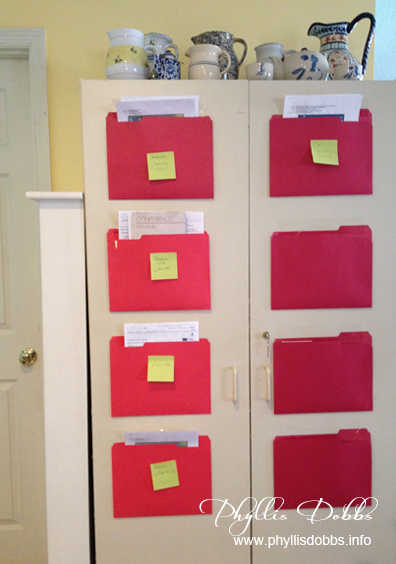
Red folders for organization

I travel a lot with my business and accumulate a lot of paper for each trip – hotel and airline reservations, badge and show information, and classes plus a multitude of other papers related to a trip. I used to have a horrible time keeping up with the papers for each trip, having to rush around at the last minute searching through stacks of  papers or files. So I came up with the “Red Folder Method of Keeping Travel Records Straight”. I taped red folders on the front of this cabinet and annotate each folder with a post it note for the trip. Then I put all my papers for that trip in the folder as I receive them. I keep the trips in order and move the information up after a trip. It works for me and has been a big help with my travel organization.

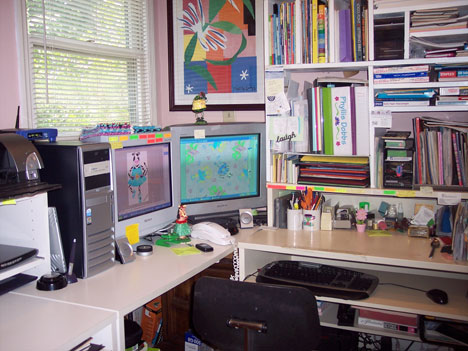
Computer area in the Phyllis Dobbs' studio

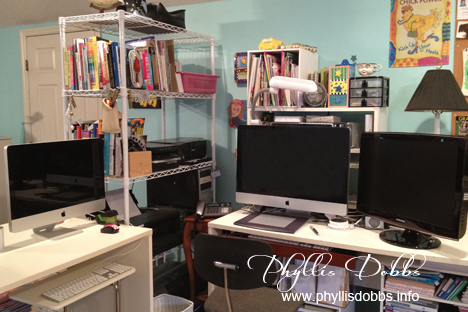
This area is the brain of my studio – the computers where I put it all together digitally. A shelf unit holds the printers and scanners close for easy access and so I don’t have to reach too far. All my papers for printing are stacked on a shelf unit under my desk. The desks with the computers plus the crafting work desk above form a large U shape area that works fabulously for me.

Phyllis Dobbs Studio Cat

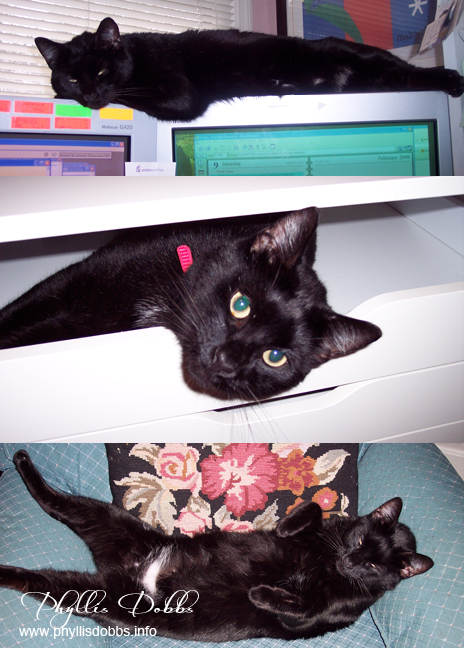
And, what studio is complete without a studio cat (or dog). I adopted Kitty Kat when he was about 6 months old and since he answered to Kitty, I kept that as his name. I should have named him Lucky because he lives a life of relaxation and luxury and thinks he’s boss of the house. He loved my old CRT monitors in the top picture, but didn’t like it much when I went to flat screens. He loves helping me put together things, such as this Ikea drawer unit – maybe its the supervising part he loves. But resting in a chair close by while I work is his favorite activity. I think he’s wishing for a hammock.

Thanks for visiting and please hop forward to visit the other artists studios!

New Years Blog Hop Forward

Phyllis

Studio Make-over, One Piece at a Time

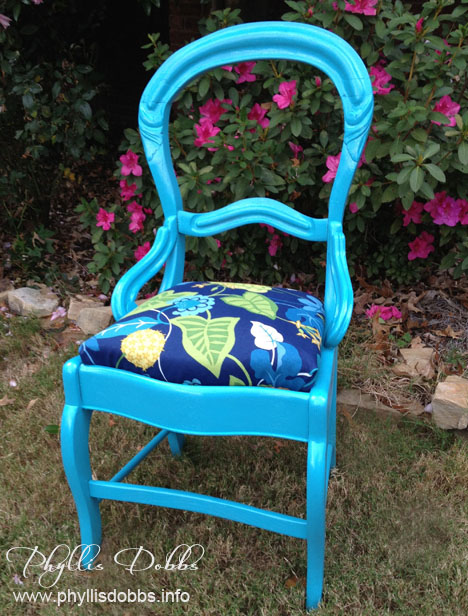
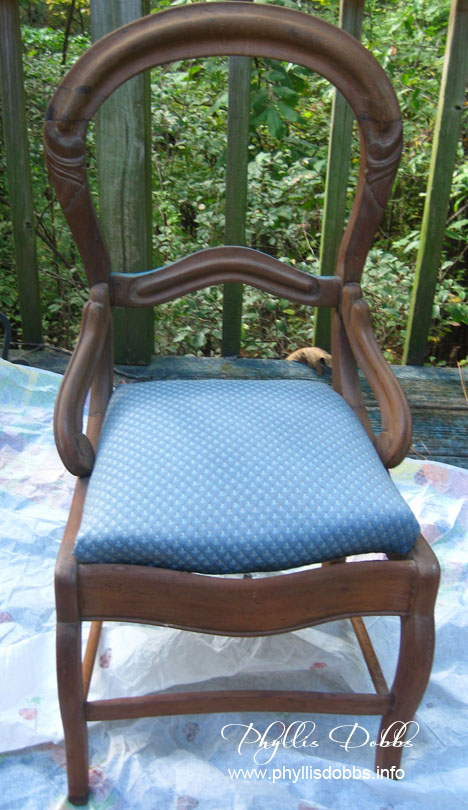
Making over my studio is progressing, but one piece at a time as I can work it in. After painting the file cabinets in my earlier post, I decided to use this poor lonely chair that had been hiding in a corner of my studio. I bought it stripped and unfinished years ago at an auction. I had intentions of doing something with it but had not. So it sat in a corner of my studio, lonely, unloved, unused, and neglected. After a re-do, this chair now shines brightly and sits prominently in front of a desk.

Turquoise painted chair

Hancock Fabrics had a sale on upholstery fabric so I got the amount I needed at 50% off the $17.99 price for around $6. I loved the print and colors, especially the turquoise. Actually, this fabric is an outdoor fabric, which is even better for studio use. I then went to Lowes with fabric in hand and found a great shade of turquoise spray paint. Its a few shades darker than my filing cabinets.

This project was pretty quick and easy. I just sprayed the chair with a few light coats of paint, then wrapped the seat with the fabric, tucked it under the bottom and stapled. And the total cost of the re-do was around $10. Not bad! I think it looks much better than the “before” version below.

Unfinish chair for Phyllis Dobbs studio

I’m so glad I bought this chair all those years ago. And since I also have a boring wing back chair that I use in my studio, also bought at an auction, I went back and bought more fabric for another makeover.  I just have to jump in and try my hand at upholstery which will be much more work than the chair seat. I’m mentally working it out with the help of a couple of books.

Here’s to success with all our little (and big) projects.

Phyllis

A Coat of Paint can do Wonders for the Studio Furnishings

When I get the urge to redecorate or rearrange things, nothing can stop me.  When I start focusing on a room, the ideas just hit me and I have to do something. My husband hates it when I’m siting quietly and my eyes and head are in a constant state of turning and looking (not quite like in The Exorcist because my head doesn’t turn all the way around). It usually means something is going to change

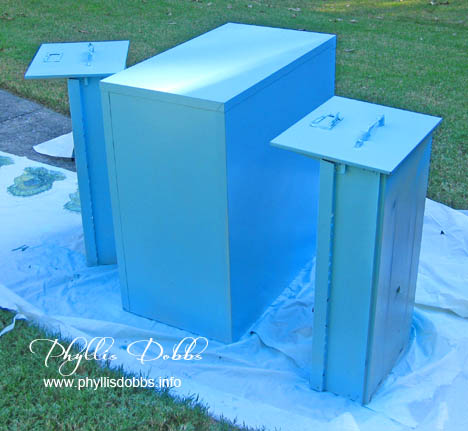
Since I spend most of my time in my studio, I tend to frequently move things around, repaint the walls and so on.  OK, I’m really tired of putty colored filing cabinets.  They are so blah!  So after hitting the stores looking for a good color, I decided on just the right shade of light aqua by Rustoleum, my favorite color.  I couldn’t wait to get home to start spraying this beautiful color on this 2-drawer filing cabinet  which is outside drying.  The color in the photo is more intense and darker than the aqua actually is because its in the late day shadows but take my word for it, it’s great! I have a couple more cabinets to finish and am excited at the way this one turned out. But I have to space myself and get some work done in between painting them.

Phyllis Dobbs painting filing cabinet turquoise

Go ahead and make some changes in your space. Even the smallest changes can make a difference.

Phyllis

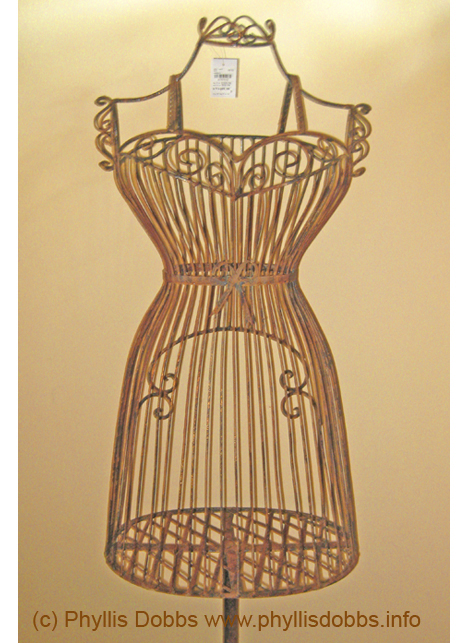
An unexpected treasure – a wonderful metal dress form.

Sometimes the unexpected happens – you find something that you didn’t know you were looking for until you see it! Look at this fabulous dress form I found in, of all places, Tuesday Morning.  I was shopping with my friend Brenda Pinnick for unique items to craft with when I spotted this dress form.  Its perfect for displaying aprons (I have several patterns mentally designed so I could “justify” buying it!)

A few months ago, I scoured the internet looking for the perfect dress form to display aprons and found a wicker one that I liked.  Now my wicker gal has a little sister joining her in my studio.

The only downside is that I was at the beach and had to convince my husband that I could pack around it for our trip home – not an easy task with either the convincing or the packing! I know its not the typical beach purchase, but a treasure is a treasure!

Please check back for a Halloween apron that I’m working on as well as for some other special arts and crafts that were created while beaching.

Phyllis

Ribbon organizing made easy.

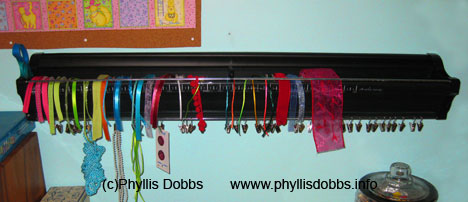
I’m excited to show you a new addition to my studio – a ribbon organizer.  Clip it Up was a new  exhibiting company at the Houston Quilt Market and Festival last month.  They had a supper display in their booth of wonderful organizers for ribbons, scrapbook supplies and just about anything you have in your stash!

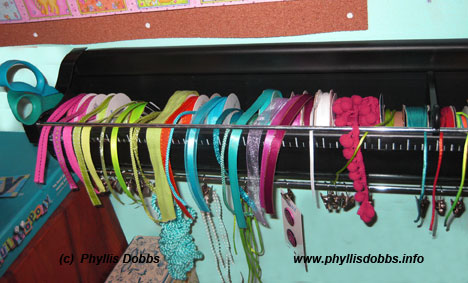
I loved all of the organizers, but especially fell in love with the Ribbon Organizer.  I chose the one that is 36″ long.  It has 40 clips to hang remnants below the organizer and has storage on each end to hold scissors. It also comes with a tape measure decal that applies to the organizer for easy hands free measuring.

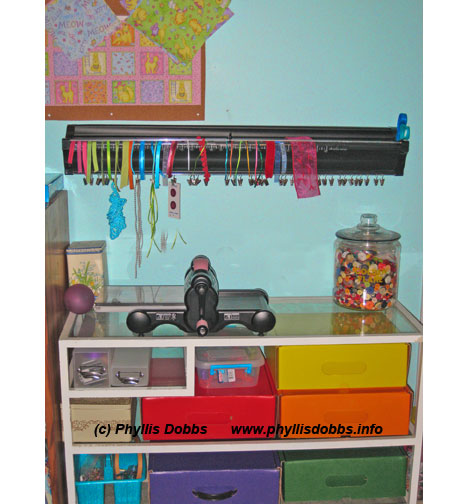
I hung the ribbon organizer over this table in my sewing area, behind my sewing machine, so that the ribbons and trims will be in easy view and reach.  I have boxes of ribbons, but only put my favorite ones in the organizer.  I didn’t fill it up so that I will have space for new ribbons that I have my eyes on for immediate purchase.  You may also notice my Sizzix Big Shot die cutting machine.  I have it close as well for cutting fabric dies for applique as well as paper cuts.  I love color so I have color coded boxes to hold supplies.  (I can’t remember numbers, but I can definitely associate colors with the contents of each box.)  And I also keep my button stash close at hand in a huge jar that is not nearly big enough.

I love attending Quilt Market and look forward to the Spring Market.  There are always fabulous finds at each show and I am treasuring my ribbon organizer.

Enjoy and display your stash!

Phyllis
PS, I just found out this news after emailing ClipItUp to let them know that I loved the ribbon organizer and blogged about it.  It will be on sale the weekend after Thanksgiving Nov 27-30 for almost half price!

Daily life in my studio

Recently, an email group that I’m a member of has been having a lot of discussion on our studios.  The members of this email group are all professional designers and artists, so our studios represent were we work. In other words, a major portion of our lives – almost all of our waking hours, is spend in this one room, our studio. As most of us work in multiple mediums, its very important that our supplies and materials are all organized which, of course, helps us be more organized in our work. 

However, in these discussions, I have found that most of us “right” brainers are not always organized with neat studios. As a result, we’ve had a lot of email discussions on organizational techniques.  And one artist is even hosting a “messy studio” contest. 

The state of my studio varies depending on what I am working on and my time limitations. Things can get piled up and disorganized (although I know where everything is in the disorganization).  Then between jobs, I “try” to get things back in order for it to get all messed up again with the next job. 

Phyllis Dobbs artist studioSince I spend most of my waking hours in my studio, I thought I would give you a peep, especially while its currently in an organized mode. I spend the majority of my time at my computer work station. All of my work seems to start and end here, with side trips to my drawing tables or sewing area.studio-drawing-tables.jpg I don’t have a picture of my sewing area as I just rearranged it to make it more effecient. Actually, I love to rearrange and do this frequently.  I call it making making my studio more efficient, or maybe its just to confuse my cat. My favorite part of my studio is the windows.studio-view.jpg Since my studio is upstairs, I have a great view of the trees behind my house. Sometimes I wish I could be like Tarzan, or maybe Jane, and swing through them.