Redux – Sew a Spider Apron for Halloween

Halloween is rapidly approaching. It always gets here before I’m ready and I have to make a mad dash the day before to stock up on candy for the trick or treaters. Thinking that I would be more prepared this year, I decided to repost my apron pattern for this Spider Halloween apron in advance to give you plenty of time to sew one.

This pattern is available at Etsy WhimsyColor.

Spider Halloween Apron Free Pattern

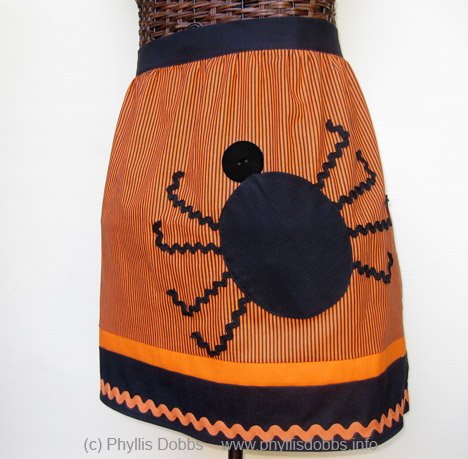
The body is the spider is a pocket and rick rack is used for the legs. Jumbo orange rick rack embellishes the bottom edge. The apron is easy to make and can be sewn in just a couple of hours (you can even make it Halloween morning or the day before). You can wear it if you are helping your kids with Halloween festivities at school or elsewhere or just as an accent while walking with your own trick or treaters.

Have a creative day!

Phyllis

Sizzix Triple Play Blog Hop Week 2 – Spot of Color Twist Box

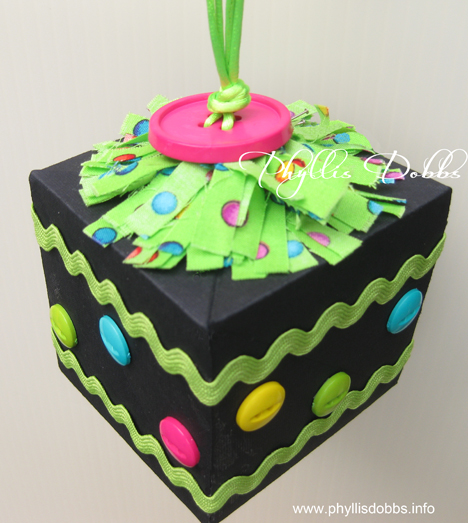
A Spot of Color Twist BlockWhat a fun project – the twist box created with Sizzix’s die by Karen Burniston can be decorated so many ways.  I decided to create a colorful ornament that would also make a fun addition to a birthday card.
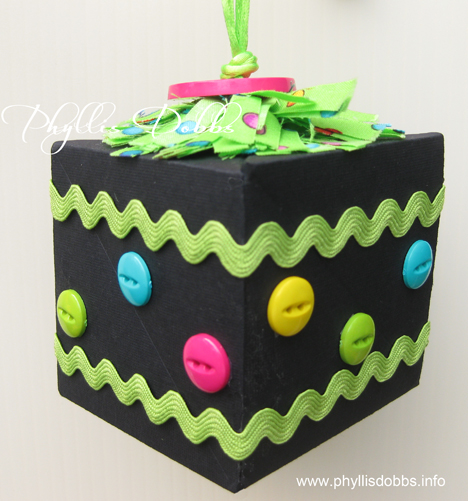
Twist Box created with Sizzix die

This was easy to make with a few embellishment items.

Materials:

Sizzix Twist Cube Die

DCWV black card stock

Large 1 1/4″ button

Assorted multi-color buttons

Rick rack

Rat tail cording – 2 pieces 14″

Beacon Paper Tac glue

Fabric – 1-1/2″ x 24″ strip

Instructions:

1. Cut and make box from black heavyweight paper.

2. Thread one piece of cording through 2 holes on the large button so that the ends of the cords are on the back side of the button. Thread the other piece of cording through the remaining 2 holes. Pull ends so that they are even and insert through hole in the top of the box by 1/2″. Glue the ends to the top inside of the box.

3. Sew a gathering stitch on one long edge of the fabric 1/4″ from edge. Cut to fringe on the opposite side edge. Do not cut through the stitches. Pull gathers to 6″ and tie off.

4. Wrap the gathered edge on the top of the box around the opening with the cords. Glue as you wrap. After the glue dries thoroughly, slide the button down the cording to sit on top of the fringe. Tie an overhand knot with the cord on top of the button.

5. Glue 2 rows of rick rack around the box, 1/2″ from the top and bottom edges. Glue buttons around box.

There are 60 designers participating in this Sizzix Triple Play Blog Hop. Please check out their projects – they were all amazing last week and I know they be amazing again this week. Just click on the Sizzix blog button in the side bar to go back or forward.

Enjoy the hopping! (and check back next week).

Phyllis

Sew a Pumpkin Placemat!

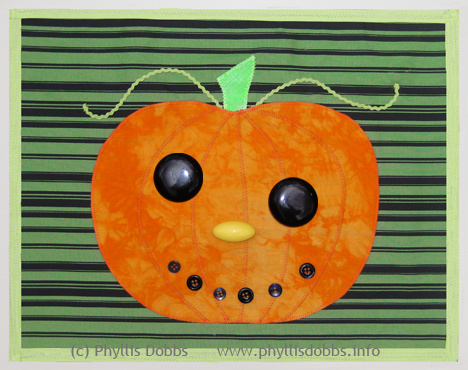
Halloween is almost here – next weekend!  I love pumpkins – they represent Fall, Halloween and Thanksgiving. Plus they are so delicious to eat in great desserts.  You can make this easy Pumpkin placemat in time for Halloween.  This free pattern will serve double duty as you can use it for a Thanksgiving table setting – just leave off the buttons.

Click to download the free pattern and instructions and start sewing.  All you need is the background fabric, orange fabric, green bias tape, baby rick rack, fusible web and if you are making it for Halloween, buttons.

I wish you a fun Halloween! My husband will be handing out our candy since I will be in Houston for the International Quilt Market.

Happy sewing!

Phyllis

Create a fun apron for Halloween

I love sewing aprons and just created this Halloween apron with a spider pocket.

I used orange and black stripe fabric along with orange and black solids. Rick Rack is used for embellishment. The spider is the pocket and has rick rack for the legs and a large button for a head.

This apron pattern and others can be found at Etsy WhimsyColor.

Its so easy to make and you can sew it in a couple of hours or less. I would love to see the aprons that all you creative sewers make using this pattern so please send me pictures or comment!

Happy sewing!

Phyllis

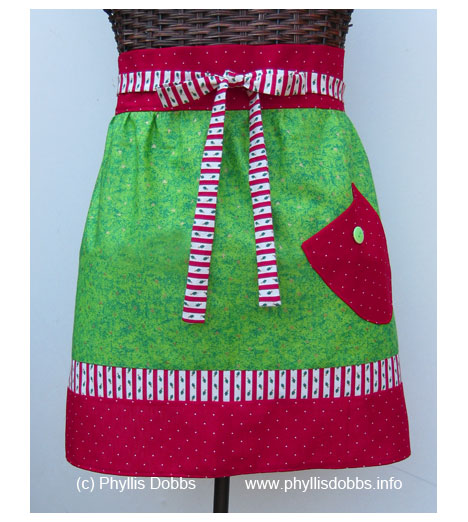
Sew a Christmas apron with this easy pattern.

Cooking and entertaining goes with the holidays, so I designed and sewed this Christmas apron for a festive addition to kitchen chores.

The first step was to hit my fabric stash to find red and green fabrics.  I found the perfect combination of  red, green and red and white stripe fabrics.  I created a simple pattern that can be made in less than 2 hours and is easy enough for a beginner at sewing. The ties are long enough that you can tie in the front for a fresh look.  This pattern and other apron patterns can be found in Etsy WhimsyColor.

I would love to see pictures of aprons you make using this pattern.  Enjoy and have a fun Christmas as you whiz through the kitchen wearing your new apron!

Happy sewing!

Phyllis

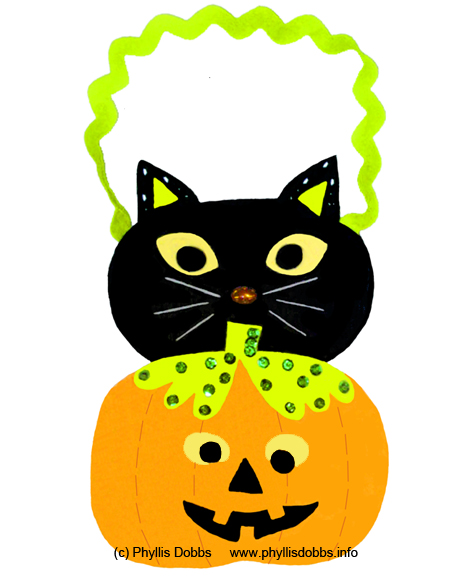
Halloween pumpkin and cat felt treat bag or wall hanging

Halloween!! Yes, its almost here and my candy is already bought (if I can just keep from eating it!)  To celebrate Halloween, I designed this pumpkin and cat combo using felt and  a few embellishments.  Its quick and easy to make and can be made as either a  treat bag, wall hanging or a door hanger.

Click for the free pattern and instructions to download.

Happy haunting!

Phyllis


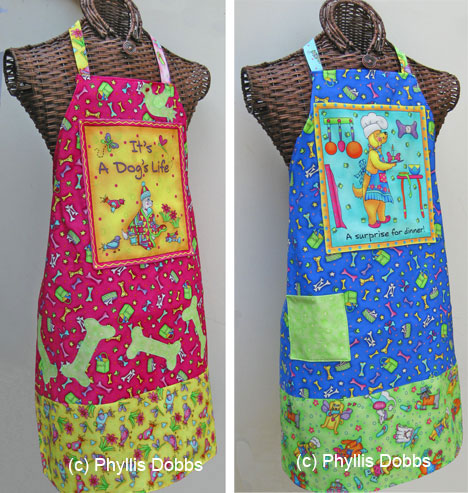
Apron pattern made with whimsy dog fabrics

Note:  This pattern is no longer available.  Similar apron patterns can be found in my Etsy store.  Please check there for other apron patterns.

I am showing 2 aprons in different color combinations with different accent embellishments.  Both aprons are accented with large dog block pockets on the top part of the apron.  One apron has an additional small pocket and the other is appliqued with a bird and dog bones. The aprons are easy to make and can be completed in 2-3 hours tops.

The fabrics that the aprons are made with are the Its a Dog’s Life collection that I designed for Quilting Treasures by Cranston Printworks.

I just love aprons and am delighted that they are so popular.  I remember when my grandmother and aunts wore aprons daily and seeing all the aprons now brings back wonderful fond memories.

For products to coordinate with “It’s A Dog’s Life fabrics, please visit my Zazzle store.

I hope you enjoy the patterns and sew away.  I would love to see a picture of your finished apron.

“Bone” appetit!

Phyllis


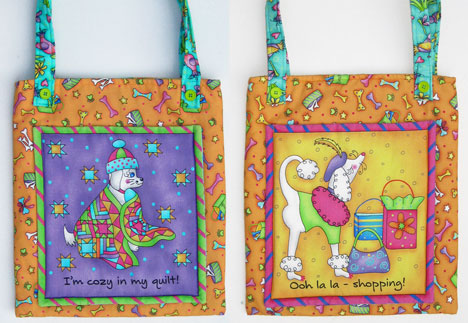
Free pattern for a tote bag made with whimsy dog fabrics

I have created a free pattern for you to make this tote bag.  I designed it with my fabric collection “It’s a Dog’s Life” for Quilting Treasures by Cranston Printworks.  As you can see, the fabric collection features very whimsical dogs and will generate plenty of smiles.  The tote is easy to make and can be finished in a couple of hours. The tote has large pockets on each side made with different dog blocks. The bag is lightly quilted with stipple quilting.

Enjoy! And I would love to see a photo of any totes that you make with this pattern.

Phyllis


Free quilt pattern for “It’s A Dog’s Life” quilt.

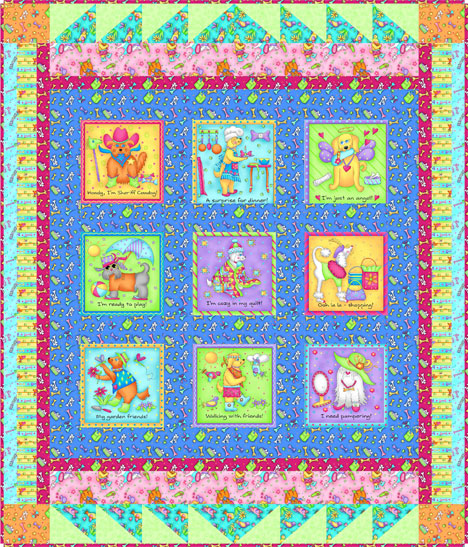
My life has been going to the dogs recently, but in a good way.  I’ve been sewing and quilting with the whimsical dog fabrics that I designed.  The collection, It’s a Dog’s Life, is available from VIP by Cranston Printworks.  I recently designed and made this quilt, which will be featured on a segment of Martha Pullen’s Sewing Room on PBS.

The pattern is available on Quilting Treasures website for downloading the free pattern in PDF format.

Happy quilting, or woof, woof!

Phyllis


Free apron pattern using Meow Meow cat fabrics

Apron made with cat fabric

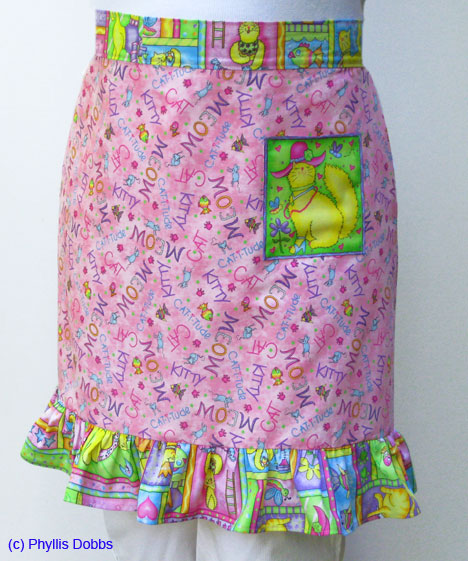
Are you feeling a little catty? I just finished this easy-to-make and fun-to-wear apron using the Meow Meow cat fabric collection that I designed for Quilting Treasures. This free pattern is for you to use and enjoy.

I’ve also given instructions on how you can adjust the size of the apron pattern.  Sewing the apron is so easy, you can sew it then wear it in a couple of hours.   If you want to purchase any of the Meow Meow cat fabrics, check out these links for online stores.  Click for a link to download the insructions.

Enjoy and I would love to see what you make!