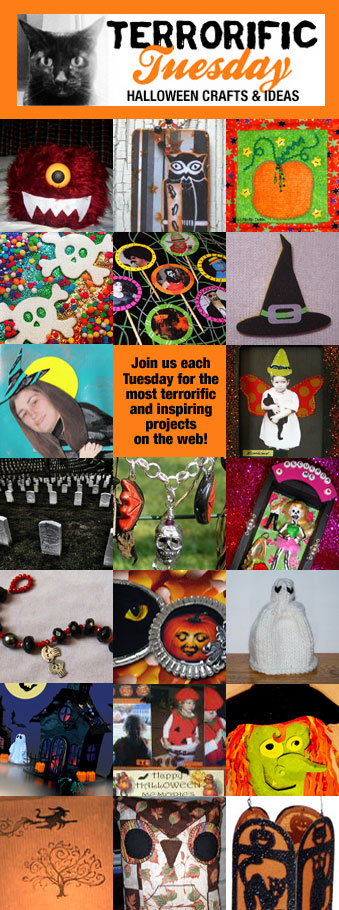
Terrorific Tuesday – Halloween DIY projects for each week!

terrorific tuesday 2010 week 1

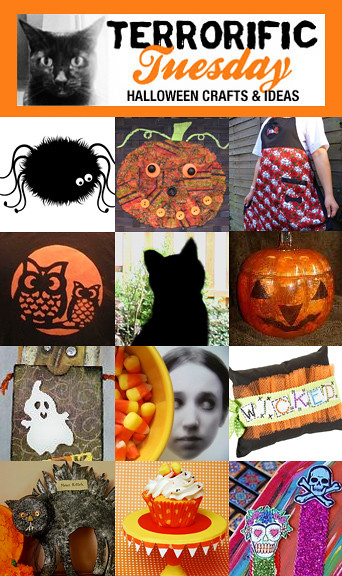
Kate Pullen shares 3 cute digital stamps Free cute spider digital stamps.

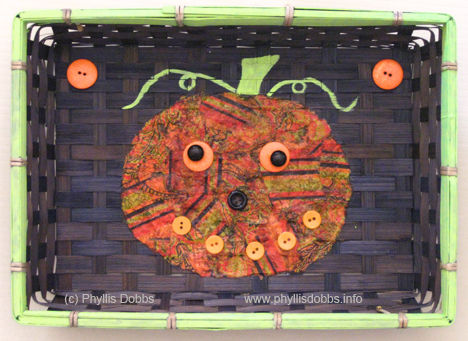
Phyllis Dobbs makes an easy Halloween Decopauge Pumpkin Treat Basket.

Jenna Excell shares her super cute and spooky Bones Halloween Apron.

Korinne Zimmerman a.k.a. Crafterella makes a wonderful spray bleach shirt using an adorable Moon Owl Stencil.

Glory’s Mischief haunts her house with her Faux Cats in window.

Ann Butler makes this boo-tiful Reverse Collage Decopauge Jack-o-Lantern.

Eileen Hull tucks away Halloween cards in this fun Sizzix ScoreBoard notebook pocket.

Silvia Chenault and Patty Cappelluti share two super spooky projects on Silvia’s blog: Vampire Art and Creepy Mirrors!

Pattiewack shows you how to make this cute and Wicked Pillow.

Messy Missy brings the LOLs with her Mean Kitteh.

Alexa Westerfield a.k.a. Swelldesigner whips up a Cute Candy Corn CD Cupcake Stand .

Kathy Murillo a.k.a. Crafty Chica delights us with glittery Skull Bookmarks.

That’s it for this week! If you are interested in playing in Swelldesigner’s Terrorific Tuesday roundup, e-mail her at swelldesigner (at) gmail (dot) com and she’ll send you the details!

Halloween Craft – Decoupaged Pumpkin Treat Basket

Make an easy Halloween Basket to hold candy for trick-or-treaters.  All is takes is a basket to decorate (I found this one at Goodwill for $1) and a few supplies.

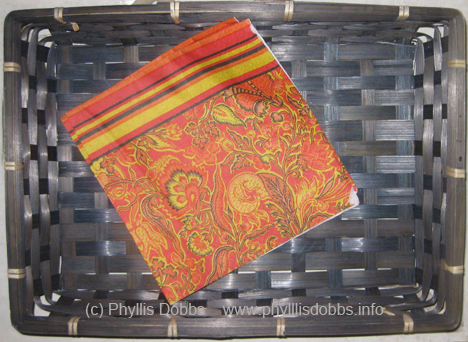
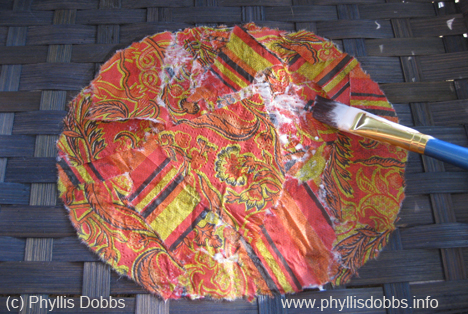
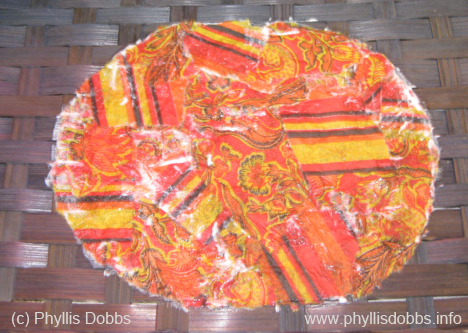
The pumpkin was created with a paper napkin torn into pieces then decoupaged with Mod Podge.

Supplies –

Basket

Mod Podge

Assorted orange and black buttons

Green Paint (Plaid Folk Art)

Paper Napkin or other orange pattern paper

Paint brushes

I found these gorgeous paper napkins at Tuesday Morning.  They are the perfect colors for Halloween and the fall season.

After drawing pumpkin shape on the basket, I tore the napkins into assorted sizes and shapes, with curved edges on some to loosely fit the curved edge of the pumpkin. Then I applied Mod Podge with a brush to the basket inside the pumpkin area, a section at a time.  I added the pieces of torn napkin on to the area with the Mod Podge, overlapping pieces and fitting the curved edges along the outside edge of the pumpkin.

After filing the pumpkin and I keep adding the paper pieces so that there were 2 layers of paper for the pumpkin.

When all the napkin pieces were in place, I applied a final coat of Mod Podge on the top of the pumpkin to seal the paper.

After the pumpkin dried, I painted the stem and vine as well as around the rim of the basket.  I glued buttons for eyes with smaller round black buttons on larger orange buttons.  A black button was used for the nose and a row of small orange buttons for the mouth.  A large orange button was glued in the top corners.

I wish you a boo-dashious Halloween.  Please check back – I’m working on several more crafty and sewing items for Halloween!

Phyllis

Make an easy Halloween mask

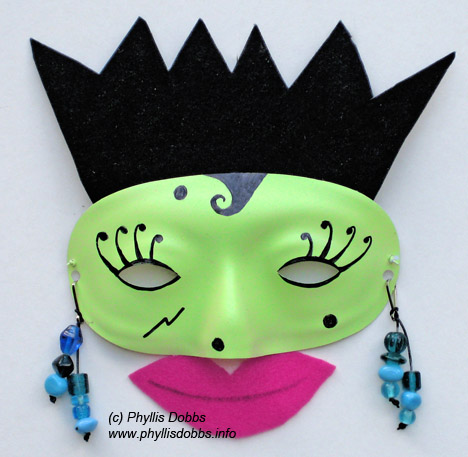
This Halloween mask is so quick and easy to make.  Make one for a Halloween party or just to wear when opening the door for trick-or-treating.  Make masks for the kids and let them help or make their own.

I bought a pack of 3 plain white masks (very cheap – $2) at a craft store this week.  I used green spray paint to cover the mask, then used a black Sharpie to draw the features.  This is where you or the kids can get really creative in painting the mask since Sharpies and spray paint come in lots of colors.  After everything dried, I cut the black hair from stiff felt and glued it to the back.  I cut the lips out of bright pink felt, and cut 2 tabs on the top edges.  I glued the tabs behind the mask so that the lips would dangle down.  After punching holes in the side edges, I tried some of my regular earrings but decided they weren’t chunky enough.  I made some with large beads.  If you don’t want dangling earrings, you can use large O rings to make hoop earrings.

Let your imagination be your guide to making your mask.  Go through your stash (or junk drawer) and find fun things to decorate your mask. You can make it as fun, spooky or scary as you like and you can be sure it will be an original one-of-a-kind.

Happy Haunting,

Phyllis


Halloween pumpkin and cat felt treat bag or wall hanging

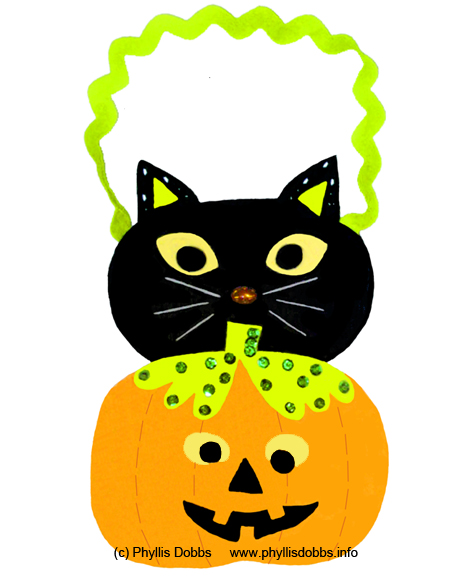
Halloween!! Yes, its almost here and my candy is already bought (if I can just keep from eating it!)  To celebrate Halloween, I designed this pumpkin and cat combo using felt and  a few embellishments.  Its quick and easy to make and can be made as either a  treat bag, wall hanging or a door hanger.

Click for the free pattern and instructions to download.

Happy haunting!

Phyllis


Terrorific Tuesday – Halloween Crafts

terrorific-tuesday-week-4

This month has flown by as fast as a witch on her broom! Can you believe that Halloween is almost here?? Well, unfortunately this is the last Terrorific Tuesday of the year, so whip out that glue gun and scissors and get to work on one of these great ideas that will be sure to delight ghosts and goblins of all ages!

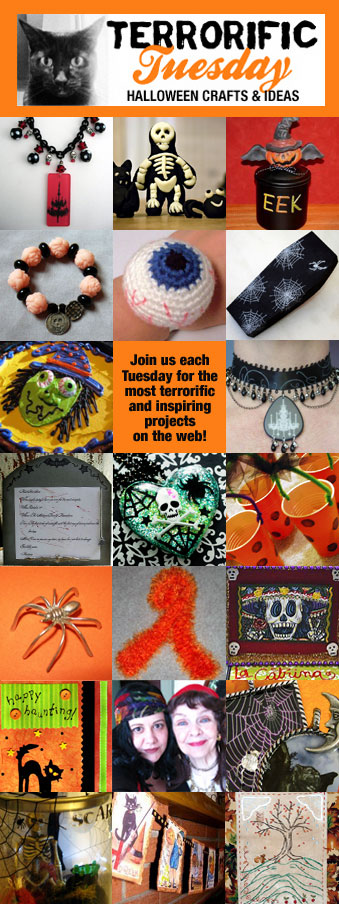
Spooky Jewels Katie Hacker strings this red and black set using a Fresh resin pendant, polka dots, and metal skulls.

Fangtastic figurines Retta a.k.a. Attercat breaks out the polymer clay and whips up some glow-in-the-dark figurines.

Cool canister Serena the Crafty Mom revamps a bargain bin canister into an awesome Halloween decoration!

Gothic Pink Melissa J. Lee explores the spooky side of one of her favorite pastel colors.

“Eye”gor pin cushion Kiki of Kiki’s Craft World knits up this eye-catching pin cushion bracelet.

Stamped paper coffin Kate Pullen, the Rubber Stamping Guide at about.com folds and stamps up this little coffin box that Dracula would envy!

Fun party food ideas Amy at Living Locurto threw a Halloween party and came up with tons of great ideas for the food table including this adorable witch cake!

Double the goodness from Margot! The Impatient Crafter™’s final Terrorific Tuesday offering is a two part story of friendship, Goth Style. Here are links to see Morticia Invites Miss Havisham to Tea and The Invitation.

Spiderman pendant (but not the Spiderman you’re thinking) Kim Ripley a.k.a. Stoopidgerl pours up a glittery sweet skull and crossbones resin necklace.

Quick & easy polka dot treat cups Alexa Westerfield a.k.a. Swelldesigner shows you how to make quick and easy Halloween treat cups sure to wow your guests!

3 brand new Halloween jewelry projects! Tammy Powley, the Jewelry Guide at About.com does an all-nighter (almost) as she pushes for a few more Halloween jewelry projects, including a super cool sterling silver spider, a glass framed mixed-media Halloween-themed pendant, and to top it off, a silver headless skeleton charm.

Fast & Fun Halloween Boa Sarah E. White, About.com’s Knitting Guide knits up this super cute boa perfect for those chilly fall nights!

Dia De Los Muertos Cigar Box Shrine Kathy Cano-Murillo a.k.a. The Crafty Chica honors the Day of the Dead with this beautiful shrine.

Happy Haunting Greeting Card Phyllis Dobbs treats us once again with this cute Halloween card, perfect for all your favorite goblins!

Gypsy Traditions Lorilyn Hurley of the Dream Life shares a touching story of her family’s love for Halloween & their passion for playing dress up at their annual party!

More spooky pendants Rebecca Hull for HHH Enterprises does it again with these ultra fabulous pendants!

Boo Bucket Michelle McGee crafts up a spooky and scary bucket that will leave goose bumps on all your guests!

Vintage Postcard Banner
Kris Tuey aka: the Collage Contessa
has made it official. Now you know exactly what time it is when you walk into her house. It’s HALLOWEEN time! This vintage project using fun Halloween postcards is so simple you can even entice the kids to help as well!

Fall Wall Hanging
Kim of Sew Sugary Sweet
stitches this wonderful and whimsical wall hanging for her Fall Swap partner.

Happy Haunting – Halloween greeting card


Halloween greeting card

Halloween greeting card

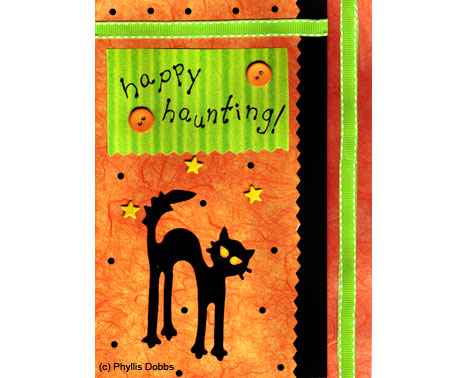
Happy Haunting!  Send your spooky greetings with this black cat card.  The cat die cut was designed by Brenda Pinnick for Sizzix.  Since my own kitty cat is black, this greeting has special meaning.

To make this card, you will need the following materials:

  • Orange, black and green striped cardstock
  • Curvy edged scissors
  • Green ribbon
  • Star brads
  • orange buttons
  • hole punch
  • glue
  • black pen

Fold the card so that the top side edge is 1 1/2 inches from the side edge of the card bottom.  Trim top side edge with curvy scissors.   Arrange and glue items in place.  Punch holes randomally.  Cut a black piece to match the top with the side edge extended  3/4″ beyond the curvy edge.  Glue to the back side of the card top.


(c) Phyllis Dobbs.  This is for your personal enjoyment.  It may not be used commercially without written permission of Phyllis Dobbs.

Terrorific Tuesday – Halloween craft projects

terrorific-tuesday-week-3

Another week has gone in October and you know what that means! It’s Terrorific Tuesday! This week, we are featuring 20! fabulous projects and inspirations! This roundup features jewelry, scrapbooking, party ideas, knitting, sewing projects, mixed media art, photography, and so much more! So sit a spell (or cast one) and enjoy this hearty helping of haunting Halloween projects!

Furry Monster Bucket Kiki of Kiki’s Craft World shows how to make a clever project that you’ll have to keep an eye on!

Hooty the Hoot Owl Retro Jewelry Set Margot Potter, The Impatient Crafter tried her patience making a paper crafted jewelry set for this week’s Terrorific Tuesday.

Mini Pumpkin Quilt Phyllis Dobbs shares a spectacularly whimsical quilt!

Sugary Sweet Skull Coasters Stoopidgerl makes some awesome resin coasters packed with candy, rainbows, and skulls!

Halloween Party Pics/Picks Swelldesigner a.k.a. Alexa Westerfield gets nostalgic with cupcake pics inspired by Halloween’s of yesteryear.

Witch?s Hat Pin Tammy Powley of About.com has a super simple witch?s hat pin project for you that is so quick you?ll want to make up lots of these to give to other Halloween witch?s.

Witchy Woman Angela of Angela?s Art Diary gets in the spirit when she puts herself in her own bewitched portrait!

Fairy Witch Frame Lorilyn Hurley of the Dream Life piles on the glitter and vintage charm in this inspired frame.

Spooky and Kooky photos Chris Garris a.k.a. Universal Stopping point puts his photography skills to the test and creates a set of haunting images to get you inspired.

Halloween Charm Bracelet Jean Yates charms us with this gothic and glam skull bracelet.

Easy Dia de Los Muertos Story Box Kathy Cano-Murillo a.k.a. Craft Chica uses toys, a mini box, and lots of glitter to tell a beautiful tale.

Double Skully Bracelet Melissa J. Lee creates this red and black dazzler strung with double the skull goodness!

Bootiful Belt Buckles Rebecca Hull at HHH Enterprises makes an awesome Halloween accessory out of ordinary belt buckles!

Knitted Ghost Sarah E. White whips up this little ghost, perfect for haunting your house!

Spooky Photoshop Tutorial Amy Locurto of Living Locurto shows you how to create your own Photoshop still life to use on a custom invite!

Pumpkin Scrapbook Pages Michelle McGee scraps up some adorable memories of her little pumpkin!

Wicked Witch Brenda Pinnick’s witch is a bit scary, a bit fun andoh so colorful. She is made using heavy weight watercolor paper and acrylic paint. The paper sculpture techniques bring this gal to life!

Rubber Stamp a Luminary Kate Pullen
shows you how to use your rubber stamps to create a paper bag luminary
for Halloween on her About.com Rubber
Stamping Blog
.

Fall Owl Pillow Kim of Sew Sugary Sweet gives a hoot with this cute owl pillow perfect for fall!

Silhouetted Paper Lanterns Robin of Urban Debris gets super spooky with vintage paper lantern patterns.

Paper craft a Halloween gift bag or trick-or-treat bag

Halloween Gift Bag or Trick-or-treat Bag

Halloween Gift Bag or Trick-or-treat Bag

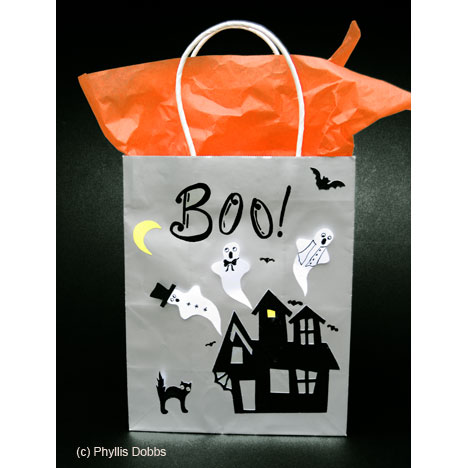
Booooo!   Halloween is rapidly approaching and I am posting a Halloween craft each week as part of Terrorific Tuesday.  This week,  I want to share with you this paper bag that I decorated to use as a Halloween gift bag or a trick-or-treat bag.  In addition, this will make a cute Halloween lunch bag for you or your children.

  1. I started with a plain gray gift bag.  The spooky haunted house and the bat are die cuts using Halloween dies by Brenda Pinnick for Sizzix (available currently in craft stores).  Other supplies needed are  – black Sharpie pens(felt tip and thin tip),  glue stick and black, white and yellow cardstock.  Optional – I used crystals heat set with a wand for the cat eyes.
  2. Draw ghosts and cut out.   Draw and cut out black top hat and cat from black cardstock and a moon and window light from yellow cardstock.
  3. Arrange haunted house, cat, moon, bat, and ghosts and glue.  For the ghosts, glue the bottom point areas so that the tops can stand out from the bag.  Glue the cat except for the tail.
  4. Draw the word Boo and small bats.

If you are carrying a bottle of wine to a Halloween party, you can use the same design on a wine bottle bag, just spread the design elements more vertical.

I hope each of you is enjoying a nice fall and your preparations for  Halloween festivities.

(C)Phyllis Dobbs.  This design is for your personal use and enjoyment.  It may not be used for commercial purposes without the written permission of Phyllis Dobbs

Terrorific Tuesday – Halloween Crafting

terrorific mosaic

Yep, it’s that time. It’s the first official post of Terrorific Tuesday!!! Eleven artists posted projects over the past week on their blogs in celebration of their love for all things Halloween. The pics above are in order with the links below, so check out these spooky and inspiring projects by some of the most inspired crafters on the “web”.

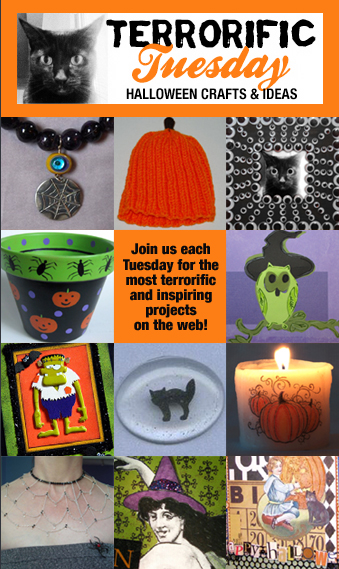
Eye of Newt Necklace Melissa J. Lee treats us to this stunning necklace filled to the brim with lots of texture and gothic appeal!

Halloween Knitting Patterns Sarah E. White whips up some insanely fun knitting patterns on her About.com Knitting Blog. Learn how to knit a ghost, pumpkin hat, Halloween bag and more!

Spooky Googly Eyed Crafts Alexa Westerfield a.k.a. Swelldesigner creates 6 projects which includes a frame, pumpkin, and fashion accessories with her crafty stash of googly eyes.

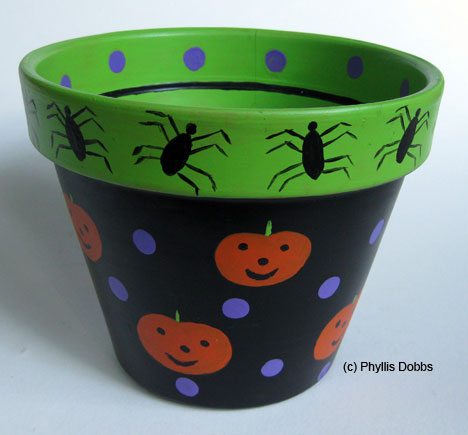
Trick-or-Treat Candy Pot Phyllis Dobbs paints up an adorable pot that will make all the little ghosts and goblins smile.

Owl & Witch Halloween Cards Brenda Pinnick uses her Sizzix dies to craft these totally spooky cards. So swell!

Franky Halloween Card Marice Rodriguez crafts up this adorable glittery and colorful Halloween concoction on her Flickr page.

Resin Halloween Cabochons Tammy Powley’s experiment with resin turns out to be a success! Check out her adorable cabochons and ideas for using them on her About.com Jewelry Making Blog.

Pumpkins & Swirls Halloween Candle Kate Pullen shows you how to make this beautifully-inspired candle using simple rubber stamping techniques on her About.com Rubber Stamping Blog.

Crystal Web Necklace Margot Potter a.k.a. The Impatient Crafter wins the webby award with this dramatic necklace using CRYSTALLIZED™-Swarovski elements and Beadalon silver plated wire.

Happy Haunting Collage Lorilyn Hurley of the Dream Life creates this collage filled with vintage goodness and an oh-so-risque flying witch!

Halloween Ephemera Collage Christina Tuey a.k.a. the Collage Contessa shares her artful wall hanging filled with all kinds of whimsical Halloween goodness.

If you’d like to participate, please read more about it here. It’s open to all bloggers out there who want to join in! So join back here next Tuesday for another helping of inspired ideas!

Trick or Treat – Paint this terra cotta pot to serve candy for your trick or treaters.

Halloween painted terra cotta pot

Charm your Halloween trick or treaters by serving candy from this terra cotta flower pot that you can paint in time for Halloween.

  1. All you need to complete this project is a terra cotta flower pot the size of your choice (I used an 8″ wide pot). a 3″ piece of card stock, paint brushes and 4 colors of DecoArt Patio paints, Wrought Iron Black, Citrus Green, Petunia Purple, and Tiger Lily Orange.
  2. Paint the inside of your pot and the outside rim with the green.  Draw a black line around the inside bottom edge of the rim, then paint purple dots spaced on the inside rim.
  3. Paint the the remainder of the outside pot black.  Paint spiders as shown spaced around the rim with black paint.
  4. On card stock, draw a 2″ wide pumpkin and cut out to create a pumpkin shaped hole in the card stock.  Use the pumpkin opening as a stencil and paint the pumpkins on the pot with orange.  Paint the mouth, nose and eyes with black paint and a stem with green paint.  Paint purple dots randomly between the pumpkins.

Fill with candy or fruit and have a fun, spooky Halloween.

Copyright Phyllis Dobbs – This design is created for your personal use.  It can not be used for commercial use without the written permission by Phyllis Dobbs.