International Quilt Market (Houston) – Part 1

As I think all quilters know, Quilt Market and Quilt Festival were just held in Houston the end of October through early November. I attended Quilt Market, which is open to the trade only, although I wish I had the time to stay over for Festival. I will give you some of Market from from my viewpoint now and will show some of the gorgeous and spectacular quilts exhibited in Part 2.

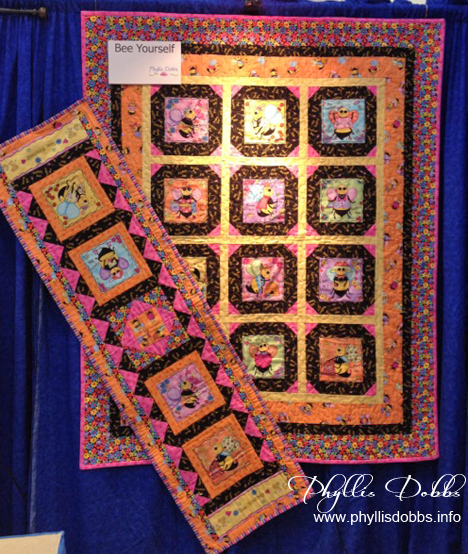
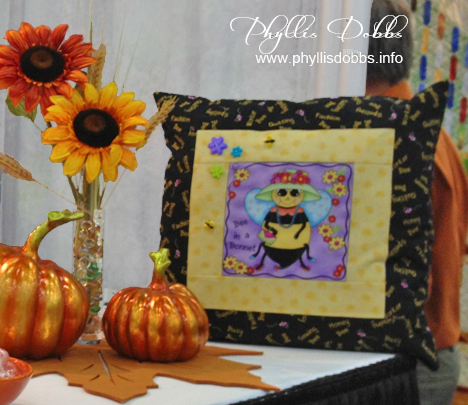
Bee Yourself Quilt and Table runner by Phyllis Dobbs for Quilting Treasures

I was really excited at market at the debut of my new fabric collection with Quilting Treasures, “Bee Yourself” (you can see pictures of the fabrics in my earlier post). This “Bee Yourself” Quilt and Tablerunner were displayed in Quilting Treasures booth. (The fabrics will be available December 2012).

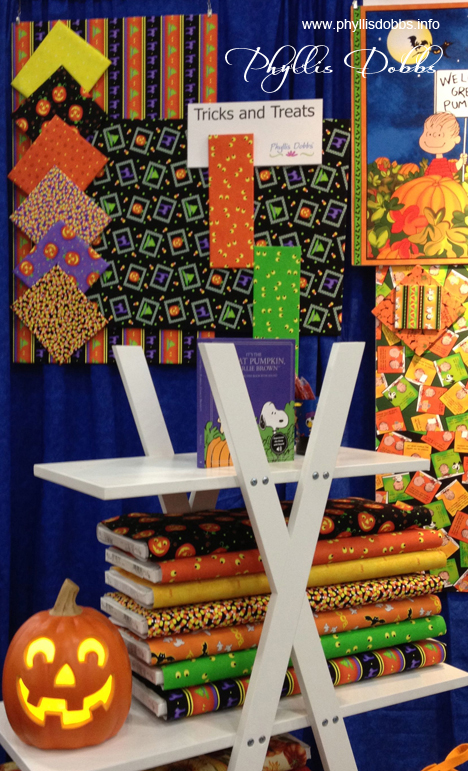
In addition, a preview of my next fabric collection “Tricks and Treats” was also shown in Quilting Treasures’ booth.  I know we just had fun with Halloween since Market, but its never too soon to start planning for the next one. This fabric will ship early next year so that it can be in the stores in time for your Halloween sewing.

Halloween fabric Trick or Treat

Market started for me with a Schoolhouse presentation held Friday before Market opened. I discussed and showed wonderful projects that you can create with printed fabric blocks, whether they are “leftover” from your quilt project or bought just to make some of these projects. They all make great gifts. Since “Bee Yourself” has 12 blocks, I created several models using them.

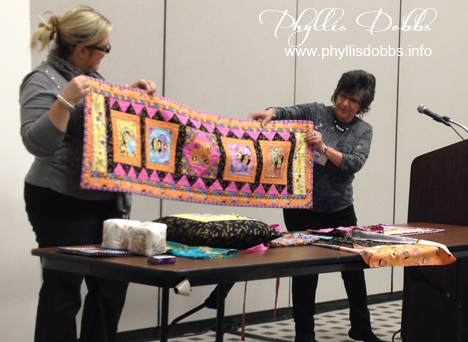
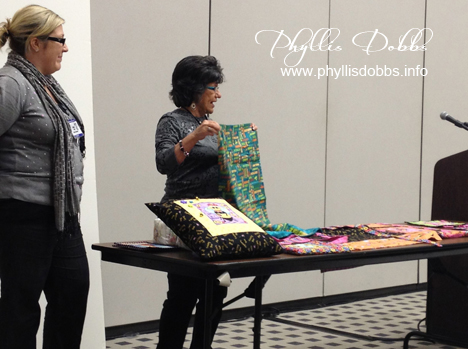
Schoolhouse Quilt Market Bee Yourself Tablerunner

Andrea Rekrut of Quilting Treasures was my lovely assistant in helping show the models. This project is a tablerunner using 4 blocks.

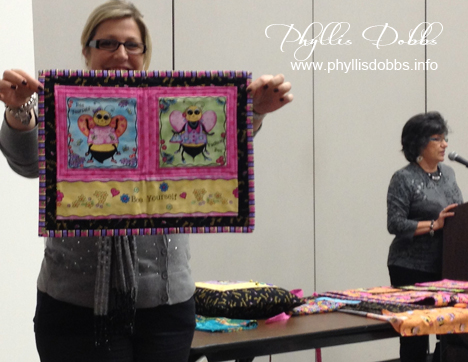
Schoolhouse Quilt Market Bee Yourself Placemat

A placemat uses 2 blocks.

Schoolhouse Pillowcase Hide and Seek with Buddy Dinosaur Train

A pillowcase uses fabric and blocks from Quilting Treasures’ Dinosaur Train fabric, which is in fabulous colors.

The patterns for all of these projects, including the quilt, will be available on either Quilting Treasures website or here on my blog sometime in December when the fabric ships to stores. I will announce when they are available and will provide links.

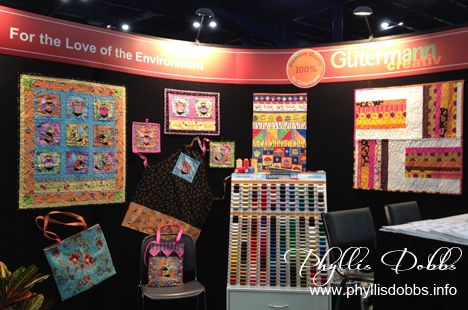
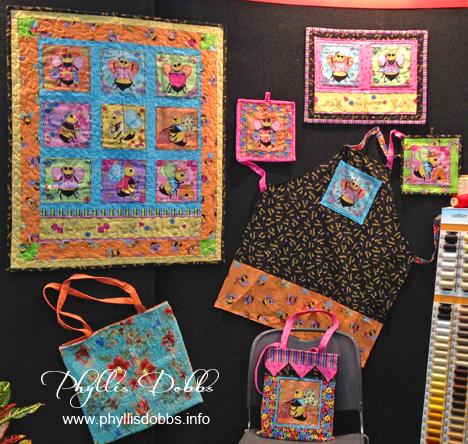
I was in Gutermann of America’s booth during part of the show. Some of my Schoolhouse projects decorated the booth walls.  In addition, other quilts and projects I made were also on the walls. The quilt above the thread cabinet is from the “Celebrate” fabrics that I also designed for Quilting Treasures that debuted in May. They are great to create projects for birthday celebrations for both boys and girls, young and mature (I don’t like the word old).

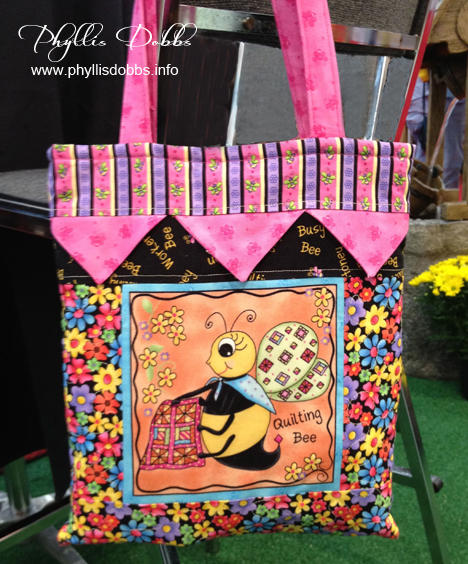
Bee Yourself projects at Quilt Market


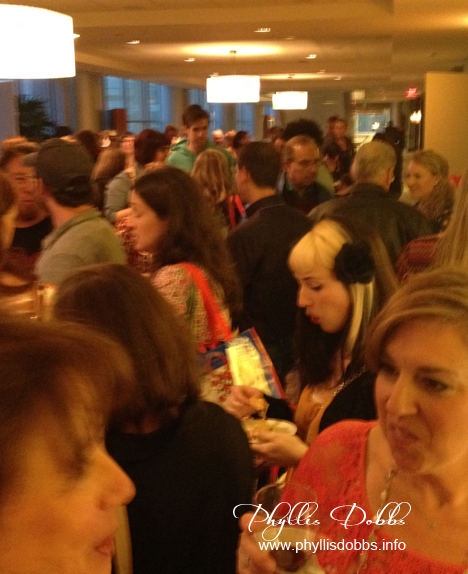
After Schoolhouse, I attended a meet and greet, Fabric 2.0.  It was packed. I was standing in the middle and this is the view from one direction. Melissa Schulz of Kathy Davis Studios is standing at the front of the picture in the orange dress.

As I walked the show, I saw some fabulous new products that I want to share with you.

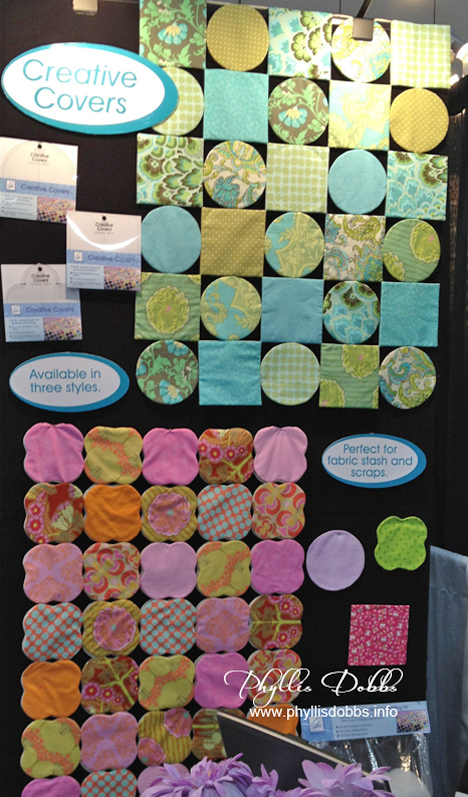
I can always count on June Tailor to have some great new products and that held true again this year. The Creative Covers come in 3 style shapes and can be used to create stand along blocks or use for applique.  I love the look of an open block quilt like these.

June Tailor Creative Covers at Quilt Market

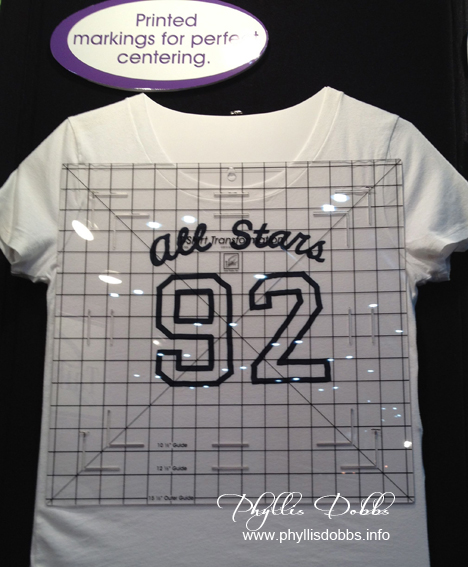
Another new cutting ruler from June Tailor is great for centering designs for cutting for tee shirt quilts. I have a bunch of tee shirts that I want to make into an quilt and this ruler will be a great aid. Also, a lot of fabrics have designs that you may want to center when cutting. I do.

June Tailor Centering Cutting Ruler at Quilt Market

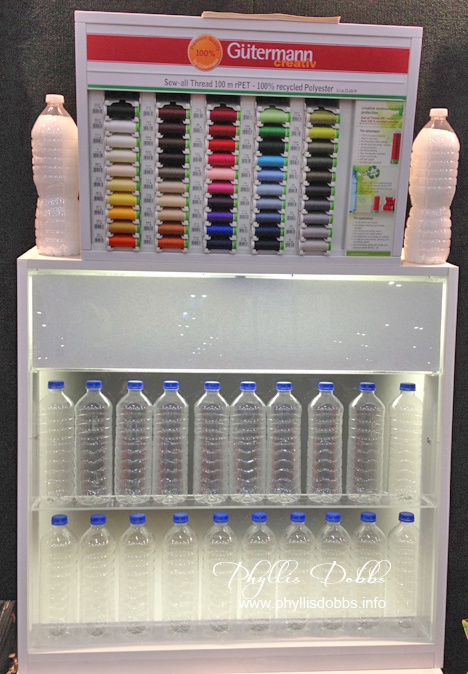
Gutermann of America has some wonderful new treads, recycled polyester from water bottles.  It amazes me how you can take a water bottle and recycle it into something wonderful. It’s really treasures from trash and a great way to recycle and eliminate all the water bottle waste. 10 spools of thread can be created from one water bottle. I sewed with it and love the way it sews.

Gutermann Recycled Polyester thread at Houston Quilt Market

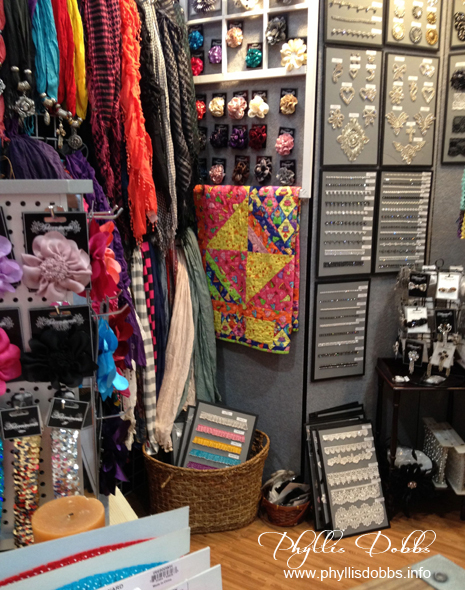
Expo International is always a fun and fabulous booth to visit with all their trims and embellishments. It would be so boring if we didn’t have trims to embellish our projects with. I was extra happy this year as they used some of my quilts to decorate their booth.

Expo International booth at Houston Quilt Market

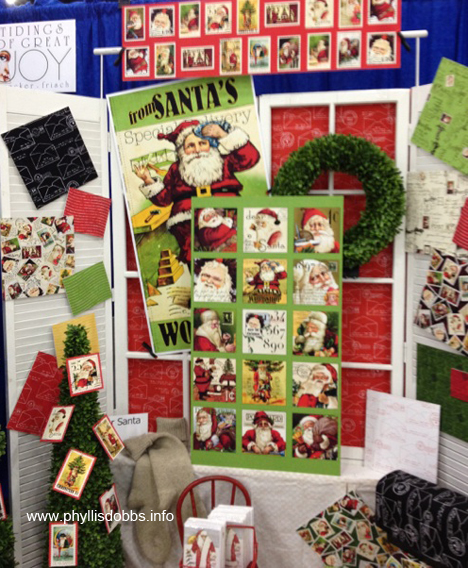
Before I leave you, I want to show off another fabric collection that will be out early 2013. “Letters to Santa” is by Janet Wecker Frisch of Tidings of Great Joy for Quilting Treasures. Its pure vintage Santa and is beautiful!

Letters to Santa Christmas fabric by J Wecker Frisch for Quilting Treasures

Quilt Market is always such an inspirational show and this year was no exception. As you can see, exciting colors of fabrics, threads, buttons, trim, etc were everywhere. Check back as I’m working on another post to show you some really beautiful and amazing quilts in the exhibits.  They were just spectacular!!

And, there will be a “Bee Yourself” fat quarter giveaway shortly, so be sure to check back and enter!

Have a colorful day!

Phyllis

Upcycle – Create a Decorative Pillow from Pants or Other Clothing!

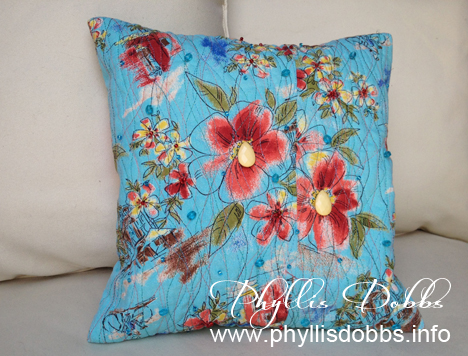
If you are like me, you have a lot of clothing hanging in your closet that you no longer wear. But there is something you still love about these pieces – the color, fabric design, etc. Repurpose or upcycle it to give it a new life. I repurposed a pair of capri pants made with fabric that I loved into a decorative pillow for a guest blog post on FaveCrafts for Earth Week. I had never worn these pants and think that I bought them just for the fabric.

Upcycled decorative pillow by Phyllis Dobbs
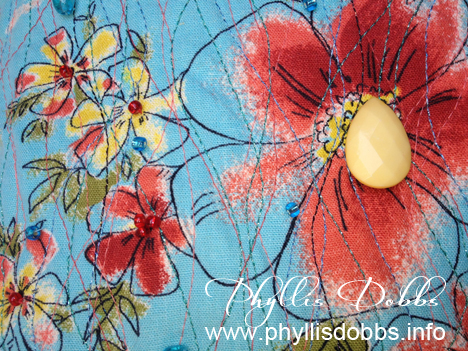
Although I chose to make a decorative pillow, you can make many different type projects using this technique. I added detail to the pillow top by sewing multiple wavy lines of both non-metallic and metallic Gutermann threads vertically to quilt the fabric to a piece of cotton batting.  I used different shades of both turquoise and coral threads in addition to a black thread. I also sewed turquoise, red and yellow beads randomly and to the flowers. Please visit the FaveCrafts blog post for full tutorial instructions as well as additional photos.

Close up detail of upcycled pillow by Phyllis Dobbs
In addition to your closet, you can locate fabulous finds at thrift stores or yard sales to repurpose. I’m a fabric junkie so I always keep my eyes peeled for fabrics, as well as sweaters and other items I can sew into something else or use in other type of crafts.

Phyllis
 

Repurpose (recycle) a tee shirt into a Halloween Treat Bag

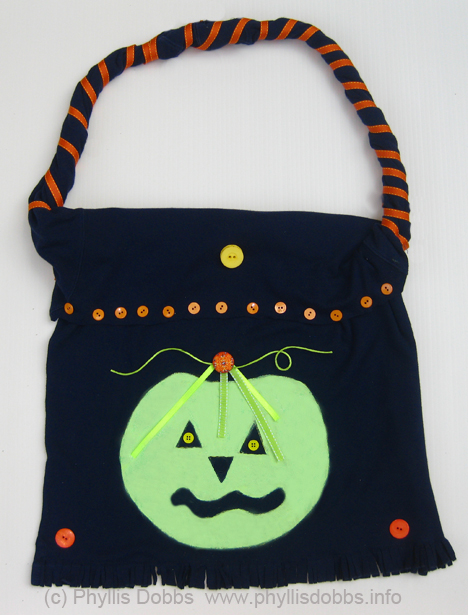
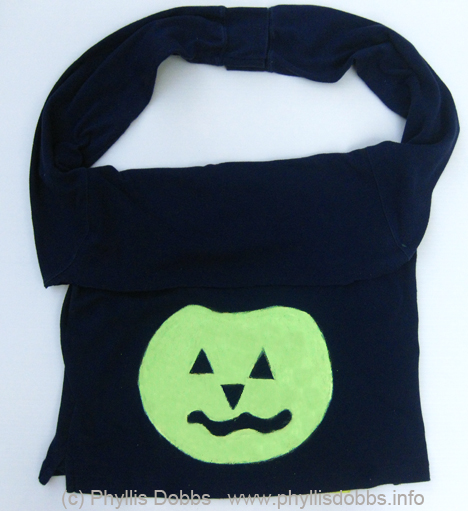
Repurpose one of your old tee shirts into a fun Halloween Trick-or-Treat bag for the kids (or for yourself to carry around for Halloween).  

To make this easy tote bag for Halloween, all you need is the following supplies –

Black long sleeve tee shirt

Green fabric paint (great if you use glow-in-the-dark paint)

2 pieces of green ribbon

Green rattail cording

Small orange buttons

2 large orange buttons

1 large orange decorative button brad

2 small yellow buttons

1 large yellow button

1/3″ wide orange ribbon

Needle and thread or glue

Piece of cardboard

Scissors

Instructions:

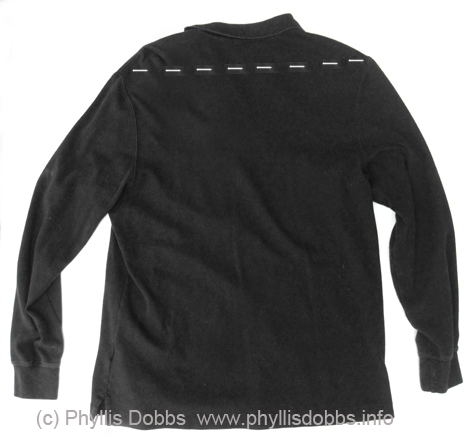
Lay tee shirt flat and cut the top of the tee shirt off above the top edge of the sleeves.  The cutting line is marked on the tee shirt below.

Fold the top of the tee shirt down over the front so that the bottom of the arm hole for the sleeve is at the top and the folded piece forms a flap.

Place the piece of cardboard between the 2 layers of the tee shirt and under where you will paint. Paint a pumpkin on the front of the tee shirt below the folded over edge and 2 to 3 inches above the bottom edge.

Sew the bottom front and back of the tee shirt together, sewing the seam 1 1/4″ above the bottom edge. Twist the sleeves and over lap the cuff edges by 1″ and sew together. Cut the bottom edge below the seam to form fringe.

Sew the end of the orange ribbon to the base of one sleeve “strap” and wrap around the strap until you reach the other end, cut the ribbon and sew the ribbon end to the strap. Fold 2 different lengths of ribbon together and stitch the fold to the tee shirt centered above the pumpkin.  Arrange the green rattail cording and sew loosely to the shirt as shown.  Glue or sew the orange brad on top of the ribbon at the fold.

Sew or glue buttons – 2 small yellow buttons in the eyes, 2 large orange buttons in the bottom corners, the yellow button centered on the folded over teeshirt area, and a row of small orange buttons to the edge of the fold over.

I hope you enjoy this project!  Be creative and paint a skull or any other Halloween design or use a different color shirt – let your imagination fly or enlist the help of the kids.  Your trick or treaters will love carrying this bag.

Phyllis
“Keep it Green” ecology art on new products.

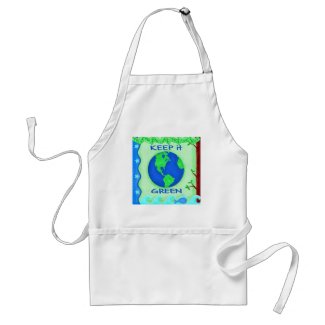
Keep It Green” art is a fun and whimsical way to show your love of the earth and in protecting it.  The elements of earth are incorporated into this art, with the sky, stars, seas, and forests all represented in borders that surround the earth.  A small blue whale adds a charming touch to the seas. The image is available on products in my Zazzle store.

The products available include the apron above (aprons aren’t just for cooking but can be used for crafts and gardening as well).  Other items include tees and other clothing, totes, stationery items, stamps, and much more.  There’s even a dog sweater so that your dog can match what you wear as well as help get the message out to Keep it Green!

Check out all the other products to show your support of keeping the earth clean and alive for generations to come as well as to support Mother Earth and Earth Day.

Have a great week and remember to help “Keep It Green”.

Phyllis
Recycle those old sweaters! Don’t toss them.

Its that time of year again to pull out your fall and winter clothing.  Its still pretty warm here in the south, so I haven’t started sorting through my winter clothing, yet.

If you have sweathers you don’t wear any more but just can’t part with them, or just haven’t gotten around to discarding them, stop! Before you toss, think of ways to give them new life. They can be recycled into really fabulous gems – unique one-of-a-kind items for a decorative touch to your home or for a wardrobe accent.

sweater_pillow-st.jpg

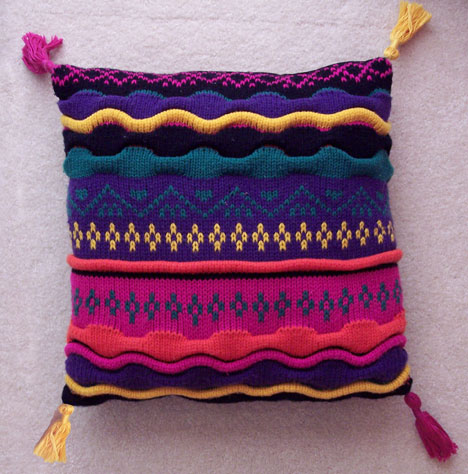
This is a pillow that I made from a gorgeous brightly colored striped sweather that I just didn’t want to part with. (As you get to know me, you will find that I’m addicted to color!) Just cut a square or rectangle from the front or back of your sweater and use a nice coordinating fabric for the pillow back. If you have a good front and back to your sweather, you can make two pillows for a matching pair, or use one as a gift.sweater-pillow.jpg This pillow was made from a fisherman’s knit sweather. Add trims, tassels, or other embellishments to put your own personal touch to all the items you create with sweathers.

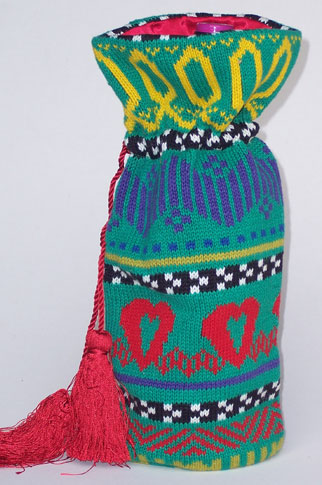
Here’s a bottle bag I made from another sweather.bottle-bag.jpg

You can create all kinds of fun things – decorative gift bags, purses, totes or a lingerie bags. Use the smaller, irregular areas to create small sachet pillows .  Use the sleeve to make a storage holder for plastic bags. The list is endless of what you can create. Just use your imagination!