Upcycle – Create a Decorative Pillow from Pants or Other Clothing!

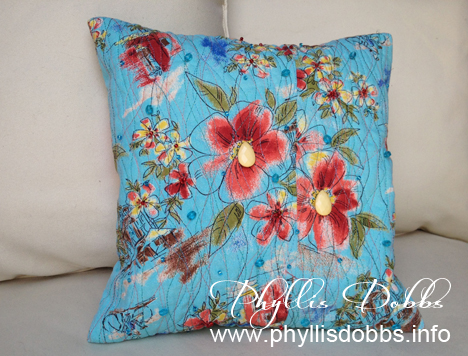
If you are like me, you have a lot of clothing hanging in your closet that you no longer wear. But there is something you still love about these pieces – the color, fabric design, etc. Repurpose or upcycle it to give it a new life. I repurposed a pair of capri pants made with fabric that I loved into a decorative pillow for a guest blog post on FaveCrafts for Earth Week. I had never worn these pants and think that I bought them just for the fabric.

Upcycled decorative pillow by Phyllis Dobbs

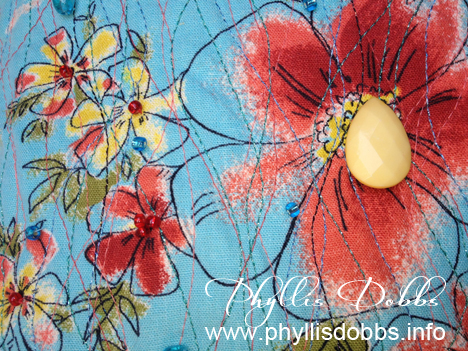
Although I chose to make a decorative pillow, you can make many different type projects using this technique. I added detail to the pillow top by sewing multiple wavy lines of both non-metallic and metallic Gutermann threads vertically to quilt the fabric to a piece of cotton batting.  I used different shades of both turquoise and coral threads in addition to a black thread. I also sewed turquoise, red and yellow beads randomly and to the flowers. Please visit the FaveCrafts blog post for full tutorial instructions as well as additional photos.

Close up detail of upcycled pillow by Phyllis Dobbs

In addition to your closet, you can locate fabulous finds at thrift stores or yard sales to repurpose. I’m a fabric junkie so I always keep my eyes peeled for fabrics, as well as sweaters and other items I can sew into something else or use in other type of crafts.

Phyllis


Decoupaging Red Poppies to Embellish a Table

Does a crafter/artist/quilter/sewer ever get away from creating? Even if you are away from all your stashes of products, the mind is still buzzing away on new ideas and projects to work on.

A few weeks ago, I was  work-cationing (working while on vacation, with emphasis on working).  My friend Brenda Pinnick visited for a few days, which lead our brainstorming on craft projects we loved creating. Since we didn’t have our product stashes with us, we visited local craft stores to pick up a few suppies.

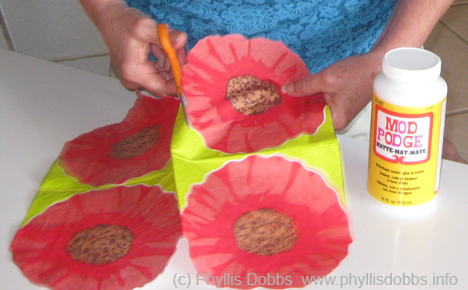
We detoured by Tuesday Morning were we found a fabulous selection of paper napkins.  Hummmmm, there are so many uses for paper napkins other than the normal wiping of hands and decoupaging heads the list.  After buying a bottle of Mod Podge, we were set.

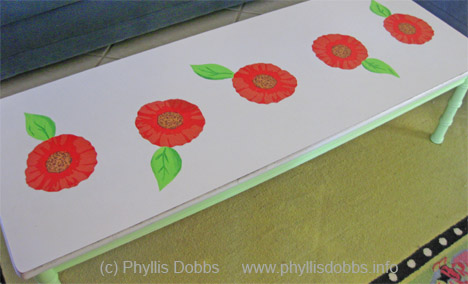
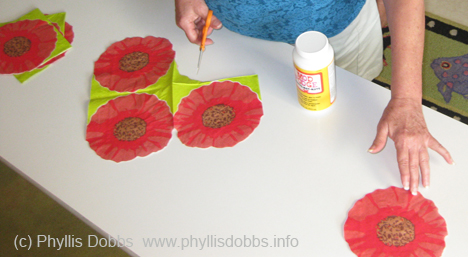
I have previously painted the legs of this coffee table a light apple green and thought the top would look great with flowers. My napkin selection included a package of red poppy shaped napkins, perfect for my project.

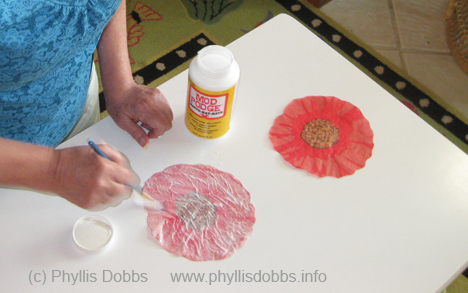
First, I cut the flowers and  arranged 5 down the center of the table. I painted Mod Podge to the back of the flowers to glue them to the table. After the flowers dried on the table, I added several coats of Mod Podge to the top to seal the flowers, allowing drying time between each coat of Mod Podge.

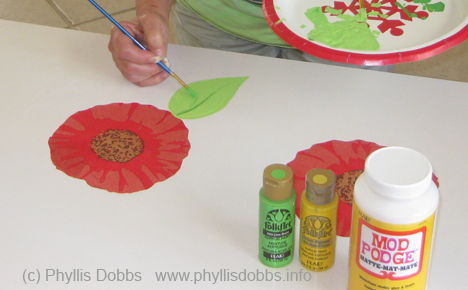
After the Mod Podge dried, I painted a leaf to each flower.

Since red poppies have always been one of my favorite flowers, I’m excited that I can enjoy them on the table for years to come.

Look around and if you have a table or other items that has gotten stale, think decoupage with fun prints.

Have a great craft day,

Phyllis
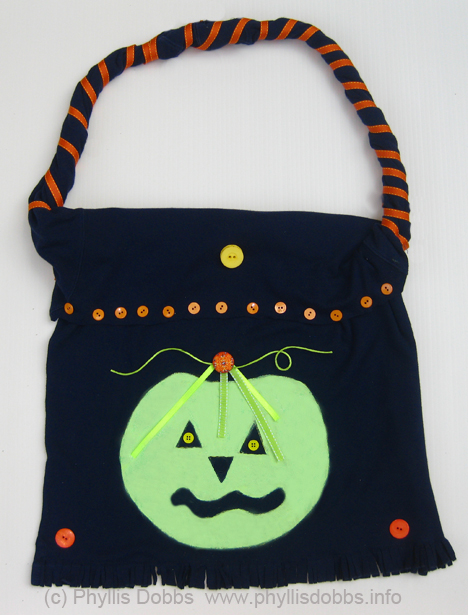
Repurpose (recycle) a tee shirt into a Halloween Treat Bag

Repurpose one of your old tee shirts into a fun Halloween Trick-or-Treat bag for the kids (or for yourself to carry around for Halloween).  

To make this easy tote bag for Halloween, all you need is the following supplies –

Black long sleeve tee shirt

Green fabric paint (great if you use glow-in-the-dark paint)

2 pieces of green ribbon

Green rattail cording

Small orange buttons

2 large orange buttons

1 large orange decorative button brad

2 small yellow buttons

1 large yellow button

1/3″ wide orange ribbon

Needle and thread or glue

Piece of cardboard

Scissors

Instructions:

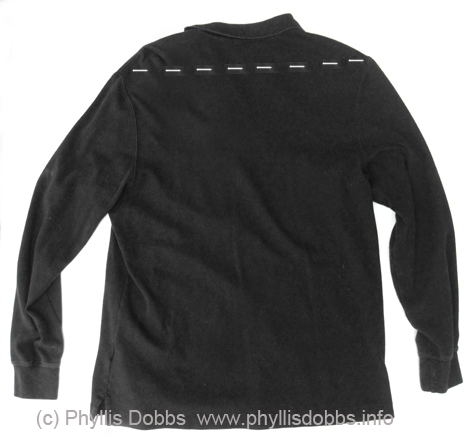
Lay tee shirt flat and cut the top of the tee shirt off above the top edge of the sleeves.  The cutting line is marked on the tee shirt below.

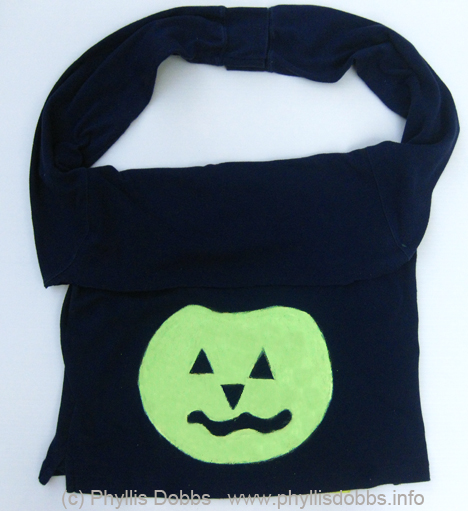
Fold the top of the tee shirt down over the front so that the bottom of the arm hole for the sleeve is at the top and the folded piece forms a flap.

Place the piece of cardboard between the 2 layers of the tee shirt and under where you will paint. Paint a pumpkin on the front of the tee shirt below the folded over edge and 2 to 3 inches above the bottom edge.

Sew the bottom front and back of the tee shirt together, sewing the seam 1 1/4″ above the bottom edge. Twist the sleeves and over lap the cuff edges by 1″ and sew together. Cut the bottom edge below the seam to form fringe.

Sew the end of the orange ribbon to the base of one sleeve “strap” and wrap around the strap until you reach the other end, cut the ribbon and sew the ribbon end to the strap. Fold 2 different lengths of ribbon together and stitch the fold to the tee shirt centered above the pumpkin.  Arrange the green rattail cording and sew loosely to the shirt as shown.  Glue or sew the orange brad on top of the ribbon at the fold.

Sew or glue buttons – 2 small yellow buttons in the eyes, 2 large orange buttons in the bottom corners, the yellow button centered on the folded over teeshirt area, and a row of small orange buttons to the edge of the fold over.

I hope you enjoy this project!  Be creative and paint a skull or any other Halloween design or use a different color shirt – let your imagination fly or enlist the help of the kids.  Your trick or treaters will love carrying this bag.

Phyllis