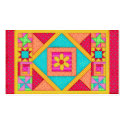
Sizzix Triple Play Blog Hop Week 4 – Christmas Journal

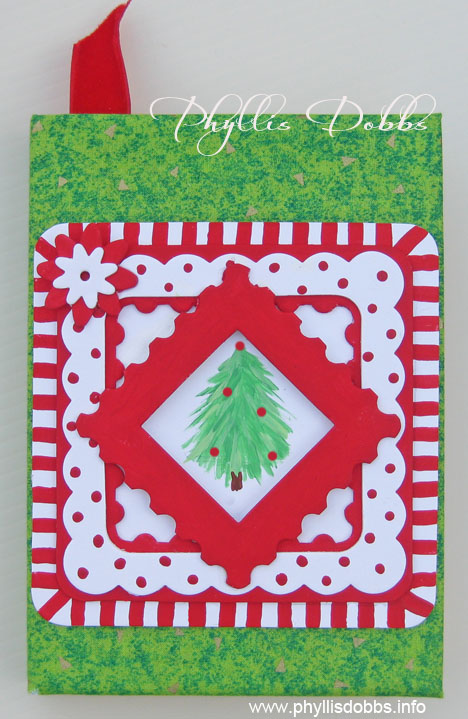
Christmas journal

Christmas is such a special time of the year with all the activities and gatherings of family and friends. Keep the memories of your Chistmas holiday each year by journaling in a Christmas journal.

Our 4th week of the Sizzix Triple Play blog hop is the Frame and Frame back die by Eileen Hull. There are so many uses for this die, especially this time of the year for Christmas photos.  I chose to use it to create and decorate a Christmas journal.

To make the journal, you will need the following materials:

Frame and Frame Back, 3D Pro Scoreboards Die #656835 by Eileen Hull

Heavy card stock

Journal

Green fabric

Red and green acrylic paints

Adhesive – Zip Dry by Beacon

Instructions:

Cut the fabric 2″ larger than the opened journal on all sides.  Center the journal and fold the fabric edges to the inside the cover, fold the raw edge back and glue. Cut fabric pieces out along the edge of the spine.

Paint the frame pieces solid red, red stripes and red dots.

Paint a Christmas tree or other motif centered on the bottom frame.  Align the frame pieces and glue them together.  Turn the small red frame turned catercorner. Glue the completed frame centered on the journal.

Be sure to hop to the other blogs to see an assortment of outstanding and unique uses for this die.  Just click on the Sizzix button in the sidebar and hop forward to the next blog.

Thanks for visiting and enjoy the hop!

Phyllis

Sizzix Triple Play Blog Hop Week 3- Floral Gift Box

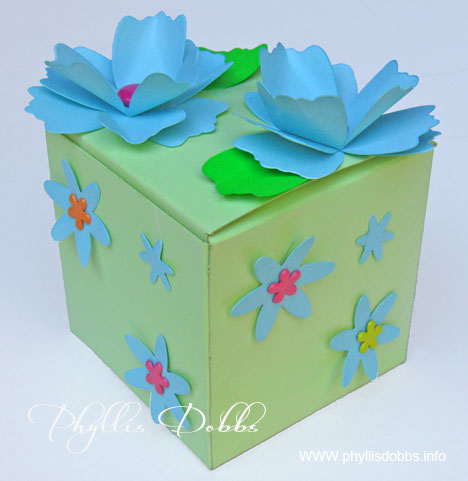
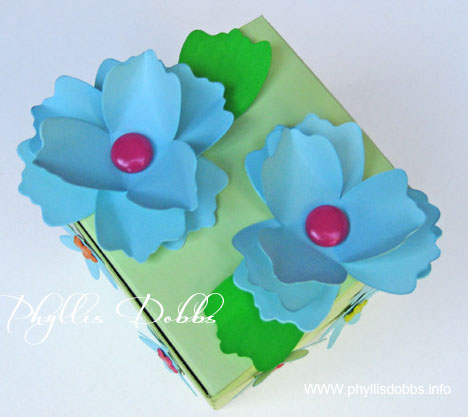
Giftbox decorated with flowers and paintThis week, we used Brenda Pinnick’s Flower, Beauty Bloom Sizzix dies for our Blog Hop project. I really love flowers so I enjoyed using flowers to decorate a gift box – a great way to add a special touch to gift giving.

Gift box painted and decorated with flowers

The materials used were:

Sixxiz die #655455 by Brenda Pinnick

Card stock

Spray paint – aqua and green by Krylon

Green acrylic paint

Gift box

Brads – round and floral designs

Hole punch

Glue – Beacon Zip Dry for paper

Instructions:

I spray painted the box with green paint and all the flower pieces with aqua paint.  2 petal sections were painted a darker green to use as leaves.

After the paint dried, I punched holes in the center of the flower pieces.  2 flowers were created by assembling 3 large flower pieces for each flower and putting a round brad through holes.  I turned up the petals of the top 2 pieces. After punching holes in the box top I attached the flowers with the brads.

Flower shaped brads were ued to attach the large flat flowers to the sides of the box and glue was used to attach the small flowers.

Be sure to hop to the other blogs in the blog hop by clicking on the links in the Sizzix badge in my sidebar!  There are some amazing designs.

All I need to do now is add the gift!

Happy Crafting!

Phyllis

The Gift of a Special Mermaid!

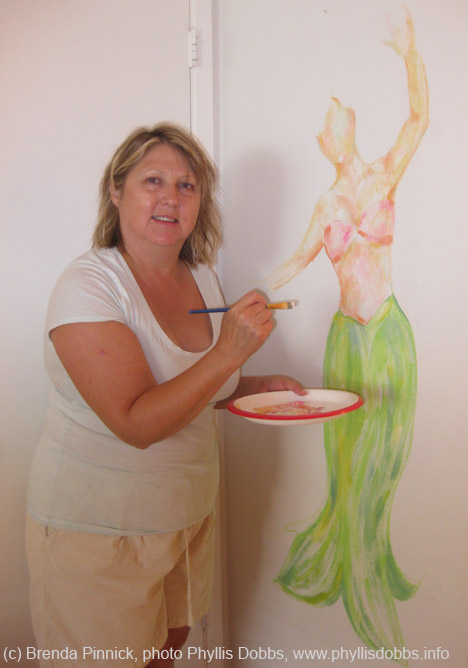
When I was on a work-cation at the beach a few weeks ago with my husband who was vacationing, my talented friend Brenda Pinnick visited (see my prior blog post on one of the craft projects resulting from our craft brainstorming). After we talked crafts, bought some craft supplies and then crafted a while, Brenda asked if she could paint something on one of my walls. Of course, I said yes immediately (Brenda is a well known artist and an expert at painting murals).

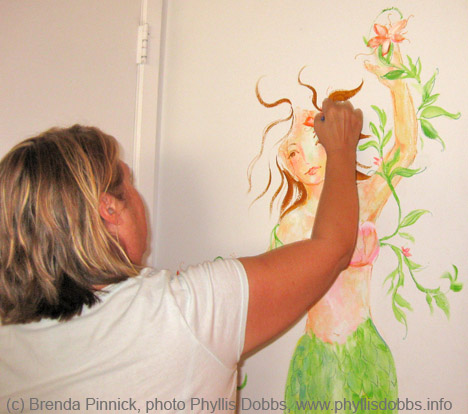
Brenda selected a wall, made a quick sketch and started painting. A gorgeous mermaid emerged from her paint brush. I have always loved mermaids as they are so romantic and whimsical, so I was more than thrilled to have one on my wall, especially since it was painted by a wonderful friend.

Here’s a closeup of her face,  isn’t she beautiful!

Now, is there such a thing as a MerMAN?

Phyllis
Sizzix Triple Play Blog Hop Week 2 – Spot of Color Twist Box

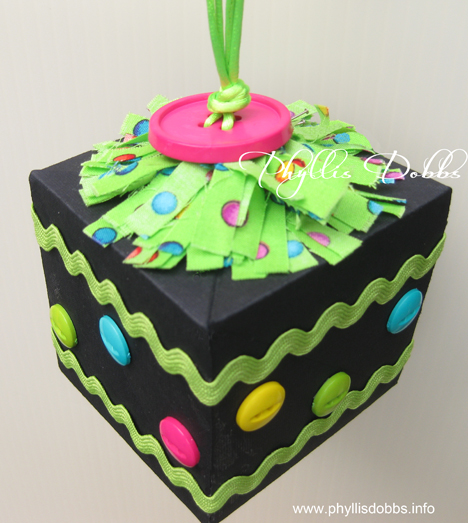
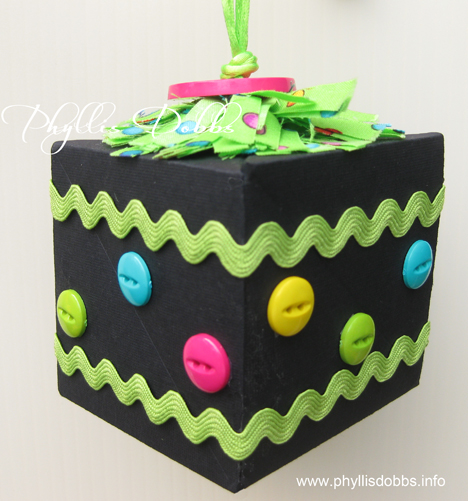
A Spot of Color Twist BlockWhat a fun project – the twist box created with Sizzix’s die by Karen Burniston can be decorated so many ways.  I decided to create a colorful ornament that would also make a fun addition to a birthday card.

Twist Box created with Sizzix die

This was easy to make with a few embellishment items.

Materials:

Sizzix Twist Cube Die

DCWV black card stock

Large 1 1/4″ button

Assorted multi-color buttons

Rick rack

Rat tail cording – 2 pieces 14″

Beacon Paper Tac glue

Fabric – 1-1/2″ x 24″ strip

Instructions:

1. Cut and make box from black heavyweight paper.

2. Thread one piece of cording through 2 holes on the large button so that the ends of the cords are on the back side of the button. Thread the other piece of cording through the remaining 2 holes. Pull ends so that they are even and insert through hole in the top of the box by 1/2″. Glue the ends to the top inside of the box.

3. Sew a gathering stitch on one long edge of the fabric 1/4″ from edge. Cut to fringe on the opposite side edge. Do not cut through the stitches. Pull gathers to 6″ and tie off.

4. Wrap the gathered edge on the top of the box around the opening with the cords. Glue as you wrap. After the glue dries thoroughly, slide the button down the cording to sit on top of the fringe. Tie an overhand knot with the cord on top of the button.

5. Glue 2 rows of rick rack around the box, 1/2″ from the top and bottom edges. Glue buttons around box.

There are 60 designers participating in this Sizzix Triple Play Blog Hop. Please check out their projects – they were all amazing last week and I know they be amazing again this week. Just click on the Sizzix blog button in the side bar to go back or forward.

Enjoy the hopping! (and check back next week).

Phyllis
Sizzix Triple Play Blog Hop Week 1 – Peppermint Candy House

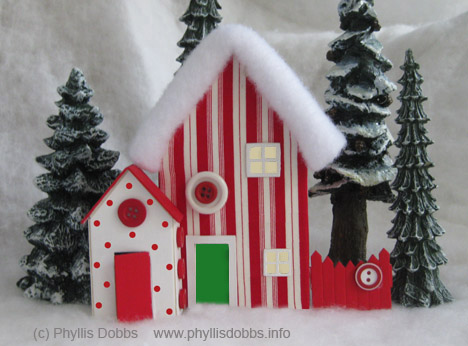
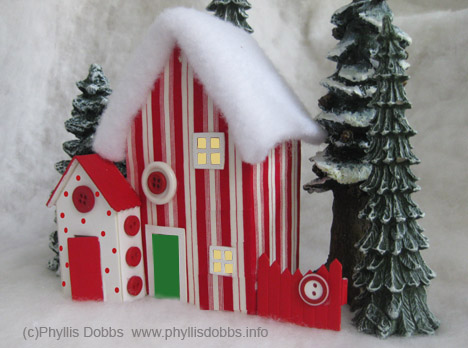
Christmas Candy Cane House from Sizzix diePeppermint Candy Christmas House from Sizzix die

I’m delighted to be part of the Sizzix Triple Play Blog Hop featuring 60 designers. That’s 60 designs with instructions each week.

Christmas is just 7 weeks away!  Can you believe it? I chose to make a Peppermint Candy house since the season is so close.

It was really fun to make so here are the materials you need as well as the instructions.

Materials:

#656836; Sizzix Scoreboards Pro Die – House, 3D, by Eileen Hull

Sizzix 12×12 matboard, white

Sizzix Big Shot Pro die cutting machine

1/4 yard red/white stripe fabric

Beacon Fabric-Tac Glue

White batting

Red acrylic paint

Paint brush

Yellow and green card stock

Assorted red and white buttons

Pencil

Instructions –

1.  Fold tabs areas of the house back and trace the outline of the house on the back side of the stripe fabric with a pencil. Cut out adding 1/4″ all the way around the house outline.

2.  Lay the fabric right side  down and glue the house to the back side of the fabric.   Cut an X in the window and door areas, cutting from corner to corner.  Fold the pieces back and glue to the back side of the house.  Fold edges around the house back and glue to the back of the house.  Cut pieces for the door and windows from the card stock and glue to the back side of the house. Fold house and glue together following instructions with the die.

3.  Fold batting in half and cut a piece of batting the width of the roof and adding 1/2″ to the depth.  Lightly glue the batting together between the layers.  Align raw edges of the batting to the back edge so that the fold is over the front edge of the roof.  Glue the batting to the roof.  Put a line of glue on the front edge of the roof and press the batting over the edge. Glue the window and door frames in place.

4.  Paint the roof and door of the small house red and paint red dots on the front. Paint the fence red. Fold house together and glue on the roof. Glue the small house to the larger house, overlapping by 1/3″. Glue buttons to house. Glue fence to attach to house.

Please click on the Sizzix badge in the sidebar to visit the other blogs in the blog hop.  You will see some fabulous houses!

Phyllis

Decoupaging Red Poppies to Embellish a Table

Does a crafter/artist/quilter/sewer ever get away from creating? Even if you are away from all your stashes of products, the mind is still buzzing away on new ideas and projects to work on.

A few weeks ago, I was  work-cationing (working while on vacation, with emphasis on working).  My friend Brenda Pinnick visited for a few days, which lead our brainstorming on craft projects we loved creating. Since we didn’t have our product stashes with us, we visited local craft stores to pick up a few suppies.

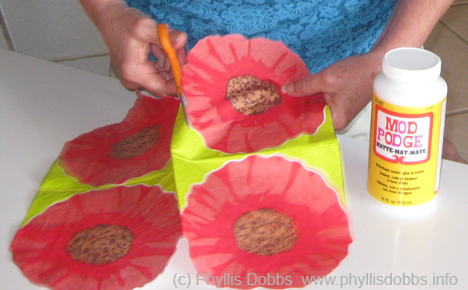
We detoured by Tuesday Morning were we found a fabulous selection of paper napkins.  Hummmmm, there are so many uses for paper napkins other than the normal wiping of hands and decoupaging heads the list.  After buying a bottle of Mod Podge, we were set.

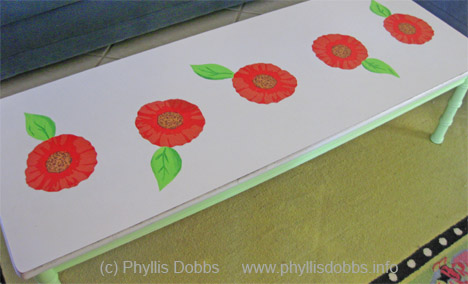
I have previously painted the legs of this coffee table a light apple green and thought the top would look great with flowers. My napkin selection included a package of red poppy shaped napkins, perfect for my project.

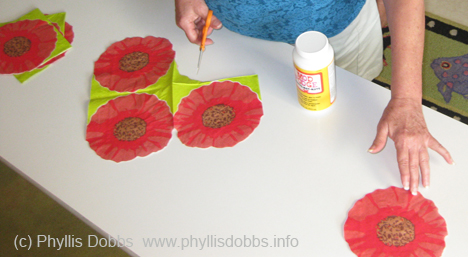
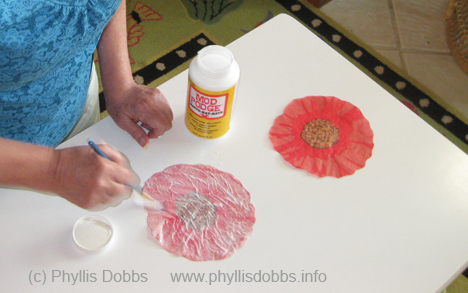
First, I cut the flowers and  arranged 5 down the center of the table. I painted Mod Podge to the back of the flowers to glue them to the table. After the flowers dried on the table, I added several coats of Mod Podge to the top to seal the flowers, allowing drying time between each coat of Mod Podge.

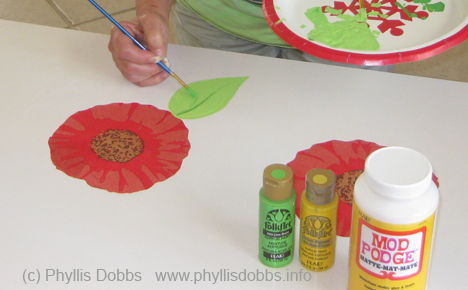
After the Mod Podge dried, I painted a leaf to each flower.

Since red poppies have always been one of my favorite flowers, I’m excited that I can enjoy them on the table for years to come.

Look around and if you have a table or other items that has gotten stale, think decoupage with fun prints.

Have a great craft day,

Phyllis

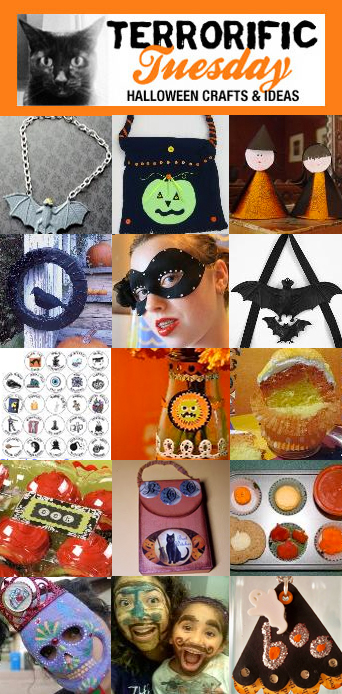
Terrorific Tuesday – Week 4 of free Halloween DIY’s

TT Week 4 2010

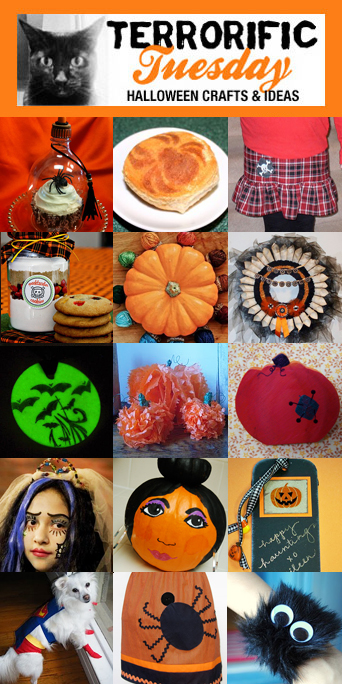
Vanessa shows us how to make a Cute Felt Pumpkin in just a few minutes!

Get creative with Eileen Hull with her Pop Up Bat card. Super festive!

Glory makes a beautiful Autumn Wreath to hang on your door or wall.

Erika shares with us her cute Halloween bandana that her dog Sebastian loves wearing!

Cheryl Ball wows us with an adorable Jack-o-lantern Pin perfect for the season!

Sew a sweet Pumpkin Placement with Phyllis Dobbs!

Crafty Chica gets her glow on with this Sci Fi Senorita Head that is totally spooky!

Crafterella offers up some downloadable custom labels that are super spooky and fun!

Make a spooky Undead Terrorarium with Silvia Chenault.

Whip up some cute and quirky Moss Monsters with Missy at Marvelously Messy!

Kate Pullen offers up a fun Pumpkin Favor Box perfect to hand out at Halloween parties!

Get into the fall spirit with this Pretty Fabric Flower from Ann Butler.

Pattiewack crafts up some Mummy Barbies perfect for a haunting Halloween display!

Alexa a.k.a. Swelldesigner makes a bold Orange and black Mary Jane candy wreath, perfect for hanging or eating!

Terrorific Tuesday – Week 3 of Halloween DIY Crafts

terrorific tuesday 2010 week 3
Use a 2-liter bottle to make a super cute Halloween cupcake dome with Pattiewack!

Glory shows you how to make Creepy Spider Biscuits with spider Halloween stencils and edible color spray!

Make a funky and functional Plaid Skull&Crossbones Skirt with Excell Crafts!

Vanessa and Erin team up to make Awesome Halloween Cookies in a Jar Crafts complete with free easy to download sticker and label printables!

Cheryl Ball shares her beautiful Embroidery Floss Acorns – the perfect fall accent.

Korinne whips up a spectacular Vintage Style Halloween Wreath on her Crafterella blog.

Make Glow in the Dark Jewelry Using Polymer Clay and Rubber Stamps with Kate at the Rubberstamping About.com page!

Learn how to make festive Pom Pom Pumpkins on the Marvelously Messy blog!

Paint a super easy Pumpkin Pin with Ann Butler to accent your fall wardrobe!

Be a hit at the costume contest with this Corpse Bride Costume by the Crafty Chica!

Alexa Westerfield a.k.a. Swelldesigner shows you how to make a Snooki Painted Pumpkin inspired by the popular Jersey Shore Guidette!

Eileen Hull shares a Cute Halloween Bookmark project that will melt your Halloween heart!

Sebastian is faster than a speeding bullet in his Superman Costume featured on the Sew DoggyStyle blog!

Phyllis Dobbs wows us with this festive Spider Apron perfect for Halloween baking!

Silvia shows you how to make a No-Sew Fuzzy Monster Cuff – the perfect craft project for all ages!

That’s it for this week! If you are interested in playing in my fun Terrorific Tuesday roundup, e-mail Alexa at swelldesigner (at) gmail (dot) com and she’ll send you the details!

Terrorific Tuesday – Week 2 of Halloween DIY Crafts

terrorific tuesday 2010 week 2

Silvia Chenault turns a toy bat into an instant neckpiece (but will it bite your neck?)

Phyllis Dobbs shows us how to recycle a t-shirt into a really cool Halloween trick-or-treat bag!

Kate Pullen brews up adorable Paper Cone Witches!

Messy Missy makes a super spooky wreath with Duct tape!

Avalon Potter goes glam with her Halloween Masquerade Ball mask!

Patty Cappelluti goes bat crazy making this spooky bat door decoration!

Crafterella is a ghoul gone wild in her Ghoul Scout Costume. Download the custom patches she made for her costume!

Alexa Westerfield a.k.a. Swelldesigner upcycles a Starbucks bottle into a swell Halloween vase!

Cheryl Ball delights us with yummy candy corn cupcakes!

Pattiewack upcycles an apple tray into a festive cupcake carrier. So inexpensive and easy!

Ann Butler crafts up a boo-tiful holder for your ATCs complete with a black cat!

Glory whips up a super fun and healthy pumpkin-inspired muffin meal for her kids. Love it!

Crafty Chica makes the perfect mask to celebrate Dia de los Muertos.

Maya in the Moment has some face painting fun with her little cousin and of course, hilarity ensues!

Eileen Hull has a ghostly good time creating this cute diecut necklace!

That’s it for this week! If you are interested in playing in the fun Terrorific Tuesday roundup, e-mail Alexa at swelldesigner (at) gmail (dot) com and she’ll send you the details!

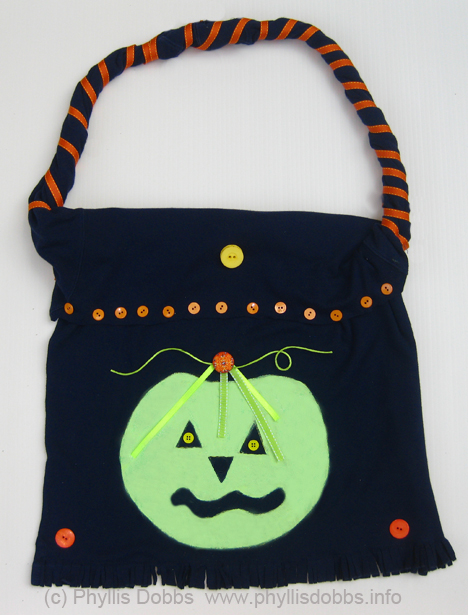
Repurpose (recycle) a tee shirt into a Halloween Treat Bag

Repurpose one of your old tee shirts into a fun Halloween Trick-or-Treat bag for the kids (or for yourself to carry around for Halloween).  

To make this easy tote bag for Halloween, all you need is the following supplies –

Black long sleeve tee shirt

Green fabric paint (great if you use glow-in-the-dark paint)

2 pieces of green ribbon

Green rattail cording

Small orange buttons

2 large orange buttons

1 large orange decorative button brad

2 small yellow buttons

1 large yellow button

1/3″ wide orange ribbon

Needle and thread or glue

Piece of cardboard

Scissors

Instructions:

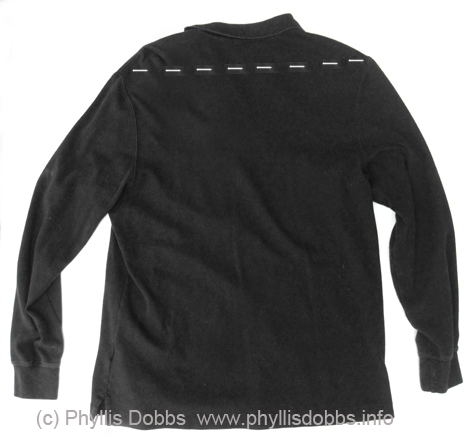
Lay tee shirt flat and cut the top of the tee shirt off above the top edge of the sleeves.  The cutting line is marked on the tee shirt below.

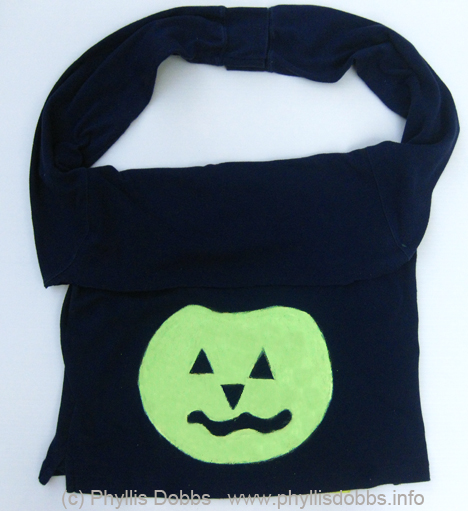
Fold the top of the tee shirt down over the front so that the bottom of the arm hole for the sleeve is at the top and the folded piece forms a flap.

Place the piece of cardboard between the 2 layers of the tee shirt and under where you will paint. Paint a pumpkin on the front of the tee shirt below the folded over edge and 2 to 3 inches above the bottom edge.

Sew the bottom front and back of the tee shirt together, sewing the seam 1 1/4″ above the bottom edge. Twist the sleeves and over lap the cuff edges by 1″ and sew together. Cut the bottom edge below the seam to form fringe.

Sew the end of the orange ribbon to the base of one sleeve “strap” and wrap around the strap until you reach the other end, cut the ribbon and sew the ribbon end to the strap. Fold 2 different lengths of ribbon together and stitch the fold to the tee shirt centered above the pumpkin.  Arrange the green rattail cording and sew loosely to the shirt as shown.  Glue or sew the orange brad on top of the ribbon at the fold.

Sew or glue buttons – 2 small yellow buttons in the eyes, 2 large orange buttons in the bottom corners, the yellow button centered on the folded over teeshirt area, and a row of small orange buttons to the edge of the fold over.

I hope you enjoy this project!  Be creative and paint a skull or any other Halloween design or use a different color shirt – let your imagination fly or enlist the help of the kids.  Your trick or treaters will love carrying this bag.

Phyllis