Making a “Crazy” Mask with Scraps

I save all my fabric scraps! Don’t you? There is so much you can use them for. They are beautiful pieces of fabric I just can’t throw away unless they’re really tiny.
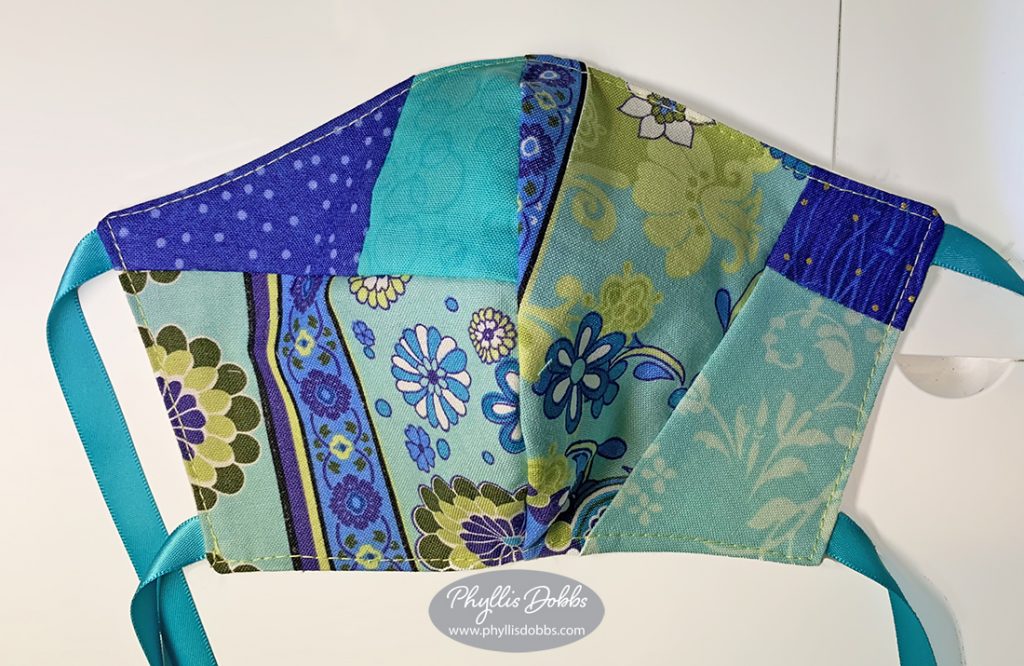
My friend, Kim Green, has been making masks for over a month for those who are working with the public during this shutdown. She showed a beautiful heart that she made with her scraps. That gave me the idea to use some of my scraps to make a mask in a “crazy quilt” style.
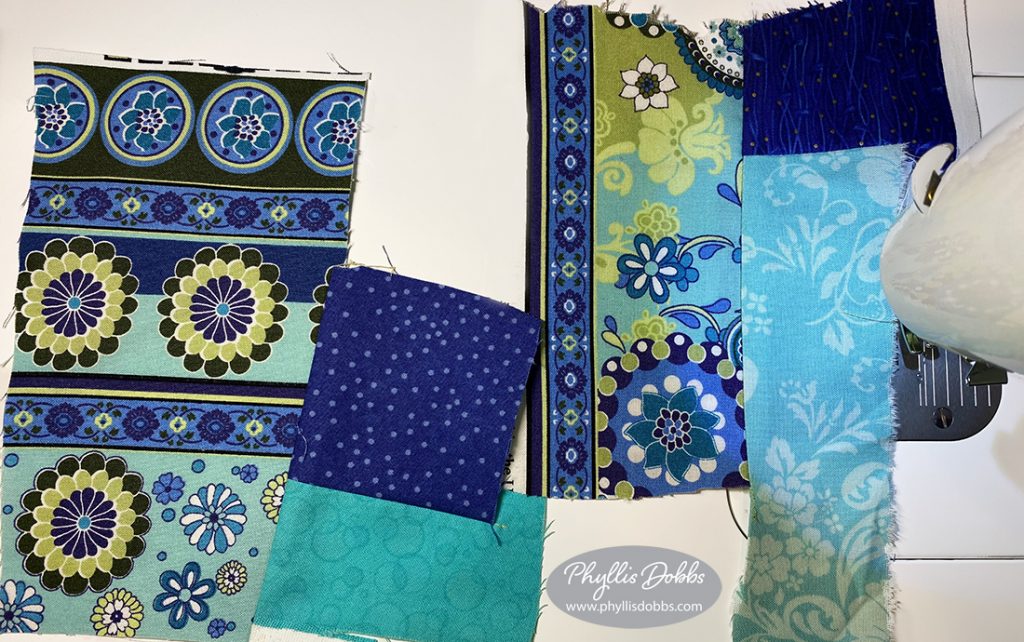
The first step is to gather scraps and sew them together with random fabrics such as above. I chose fabrics in a turquoise and purplish color range. I made 2, one each for each mask side so I could position each side of the pattern when cutting.

Then I cut the pieces out using this pattern. I sewed the pieces and lining to make my mask. You may want to make your “crazy quilt” mask for yourself or a gift. If you are bulk mask making, I don’t recommend this “crazy quilt” method as it’s much more time consuming and cuts down on production. I also didn’t add embroidery stitches as I figured that the added texture may hold any virus, plus they will be washed a lot. I turned the ends of the ribbon under and stitched back and forth so they would not ravel when washed.

And while in the stitching-scraps-together mode, I decided to make another one in a different color combination. I chose pink, orange and green for this one.
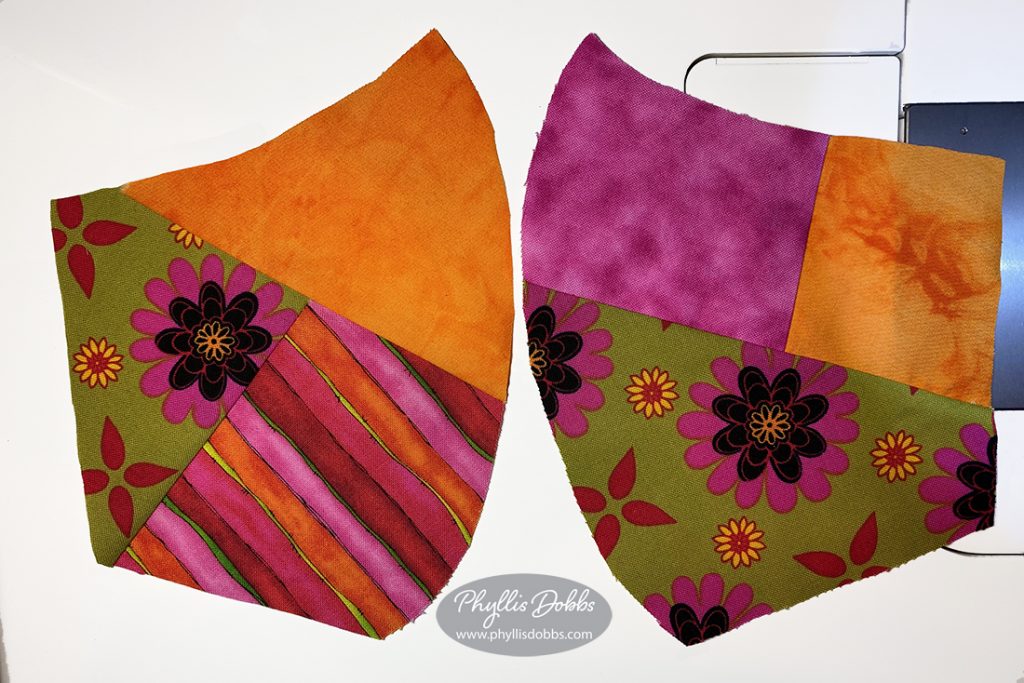
I have always loved crazy quilting and love applying it to more modern type products. It works great for masks. I have many other crazy quilt projects that I have been working on the past several months – I just need to add the finishing touches.

I hope you are finding ways to stay productive and creative during the shut down. At first, it was hard to focus and saw that this was the case for just about everybody. Then, my need to stay busy with my hands and mind kicked in. So the result has been sewing masks, embroidery, creating new art, creating content for ArtBizJam Abundance (with Lori Siebert) and taking some creative online classes, mostly with Procreate. But I really, really miss being with family and friends.

I hope you are all staying safe and well. It has been a struggle with all of us as life goes on and we feel that aren’t fully participating like we have always done. Maybe we will be getting back to that soon.

Phyllis

Upcycle – Create a Decorative Pillow from Pants or Other Clothing!

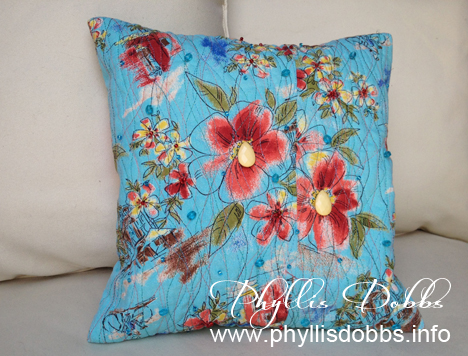
If you are like me, you have a lot of clothing hanging in your closet that you no longer wear. But there is something you still love about these pieces – the color, fabric design, etc. Repurpose or upcycle it to give it a new life. I repurposed a pair of capri pants made with fabric that I loved into a decorative pillow for a guest blog post on FaveCrafts for Earth Week. I had never worn these pants and think that I bought them just for the fabric.

Upcycled decorative pillow by Phyllis Dobbs

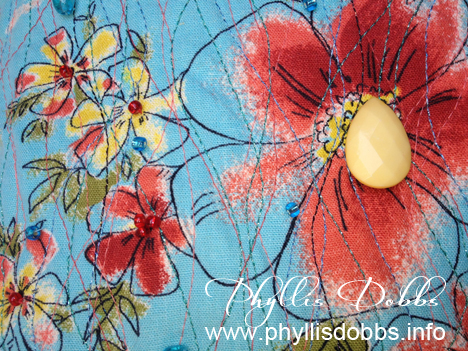
Although I chose to make a decorative pillow, you can make many different type projects using this technique. I added detail to the pillow top by sewing multiple wavy lines of both non-metallic and metallic Gutermann threads vertically to quilt the fabric to a piece of cotton batting.  I used different shades of both turquoise and coral threads in addition to a black thread. I also sewed turquoise, red and yellow beads randomly and to the flowers. Please visit the FaveCrafts blog post for full tutorial instructions as well as additional photos.

Close up detail of upcycled pillow by Phyllis Dobbs

In addition to your closet, you can locate fabulous finds at thrift stores or yard sales to repurpose. I’m a fabric junkie so I always keep my eyes peeled for fabrics, as well as sweaters and other items I can sew into something else or use in other type of crafts.

Phyllis


Redux – Paint a Flower Pot for Holiday Entertaining or Decorating

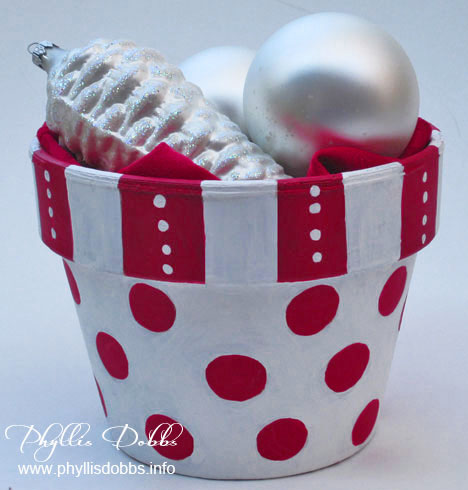
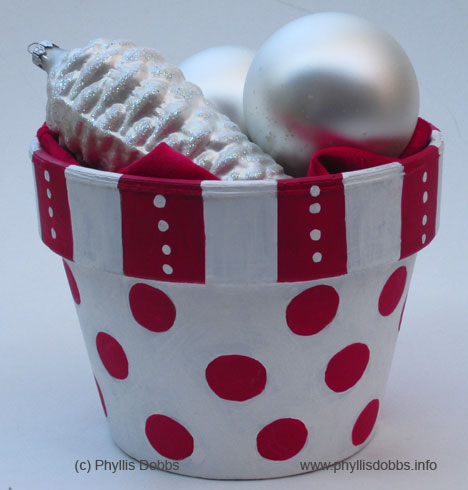
The holidays are rapidly approaching but there’s still time to create some great craft projects to help with decorating and entertaining. I want to share one of my earlier Christmas craft projects that is so quick and easy to make and has so many uses – the versatile terra cotta flower pot painted in holiday colors.

Christmas flower pot for entertaining

This painted flower pot can be used to hold food like cookies and candy (line the pot with a napkin first so that the food doesn’t touch the paint). For decorating use, it can hold ornaments or a plant. The size of pot that you use can also determine the use. A small 3 or 4 inch pot can be filled with food or small gift and given as a gift, or placed by the plates at a dinner party as a favor. Simply line with cellophane, tissue paper or fabric, add a food item or other small gift, bunch at the top and tie with a ribbon. Let your imagination come up with many more uses.

I used red and white for Christmas (which can also double as my school colors), but you can use other colors for different holidays – red, white and blue for the 4th of July, shades of green for St. Patrick’s Day, bright fun colors for a birthday, pastels for Easter, and so on. I also painted a flower pot for Halloween.

Easy peasy! I used a very simple design that is very easy to draw.

Wash the flower pot and go over it with alcohol to disinfect it.  With a pencil draw the lines for the stripes around the rim and draw 1/2″ circles randomly below the rim (or create your own design). Paint as shown in the photo.  I recommend painting one color at a time, allowing it to dry before painting with the second color. The white dots on the stripe were added last, after all drying. When all the paint is dry, seal with a coat of clear satin acrylic.

Enjoy!

Phyllis
Organization Tips for Sewing and Craft Rooms and Repurposing Thrift Finds!

I love comments you readers post to my blog or email me. Today, I want to feature one of my readers, Dee Fox of Cedar City, UT who had a prior business of helping people organize their homes. She posted a comment on my recent blog post on spray painting my filing cabinets for my studio redecorating.  I emailed her and she mentioned that she loved finding unique thrift items to refinish for her sewing room and  how she had it organized. I asked if she would mind sharing some of her finds and tips with you.

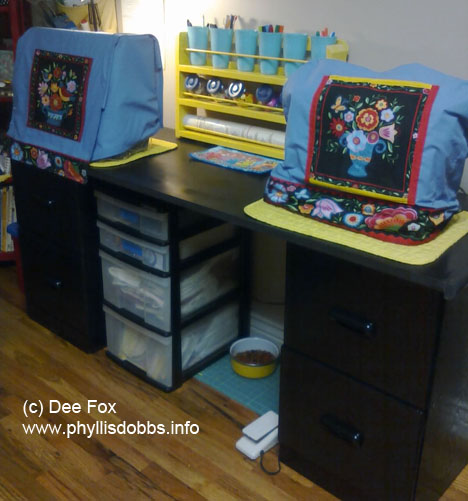
Dee lucked up when she found two filing cabinets in a thrift store for $7 each. What a find!! She immediately spray painted them and added another salvage of an old lid from a fish tank.  The result – a new desk. (Tip from Dee, light a vanilla candle to lesson the temporary smell of spray paint. I just love the smell of vanilla!)  I also love the rack with blue holders for markers and the button jars that she placed on the desk. Dee also keeps a dish of cat food handy for her cats, Fancy and Coco Bear.

Dee Fox painted filing cabinets

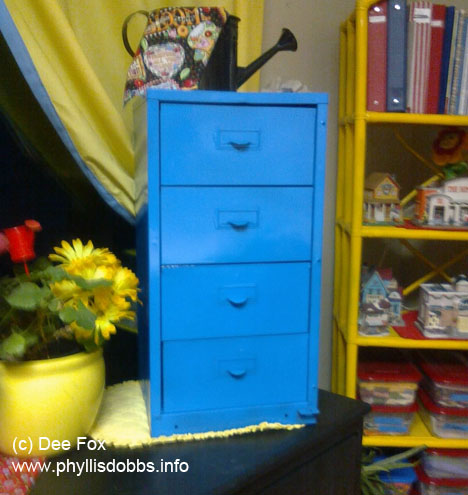
Dee found this small cabinet in her father-in-law’s garage and spray painted it blue. His loss, her gain! Its the perfect size for storing her fat quarters.

Old cabinet used to store fat quarters

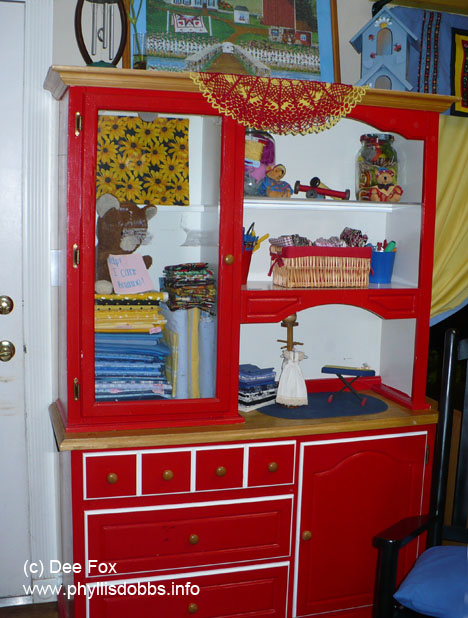
She found this old cabinet for $40 at a yard sale.  Again, Dee painted it using a cheery red and uses it to store more sewing supplies.

Red storage cabinet for sewing supplies

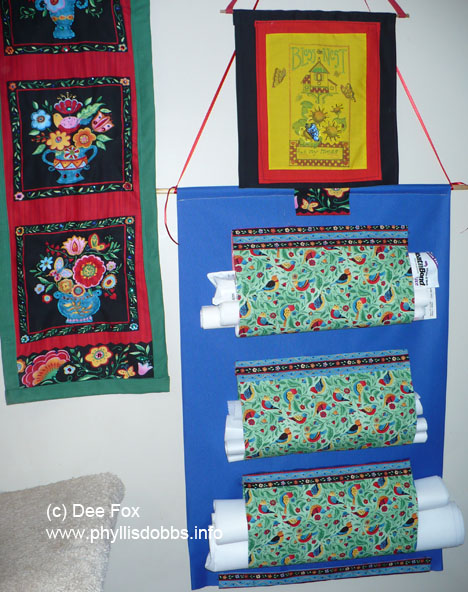
Dee’s favorite organizing tip for craft or sewing areas is to group like things together. She keeps everything she needs at arm’s reach for her sewing area as well as her cutting table and other areas. Keeping scissors, rotary cutters, rulers and other needed items close by prevents needless interruptions for trips to locate them as well as prevents time lost while searching for them.  A great example of keeping like things together is Dee’s stablizer holder that she sewed to hang close by.

Stabilizer holder made by Dee Fox

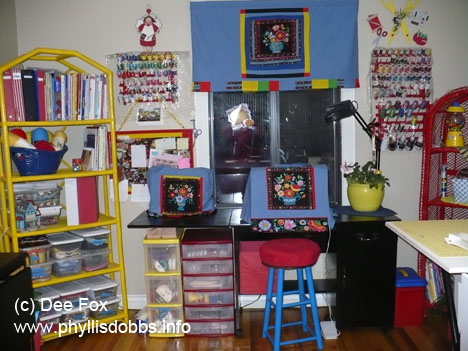
You can see from this photo that Dee is well organized and well stocked with her sewing supplies. I doubt she has to stop in the middle of a project and run to the store. You can also see that she makes great use of plastic containers and carts, which are ideal for storing craft and sewing supplies.

Dee Fox's organized sewing room

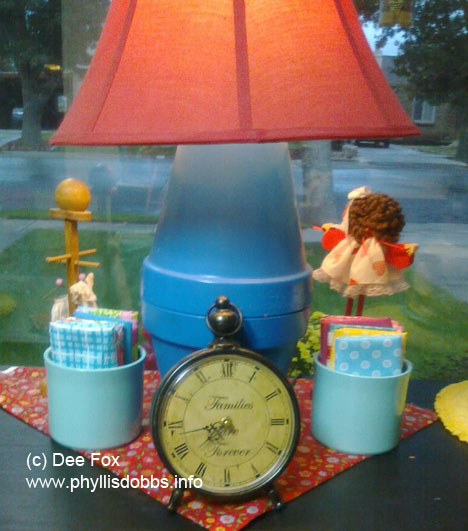
Dee also recommends that you make your space happy!  Doing so will make you want to spend more time in it.  I love this happy and decorative setting below where she uses little pots to hold fat quarters and a colorful lamp made with terra cotta pots.

Pots to hold fat quarters and lamp made with flower pots

When starting a project, Dee gathers everything for that project and keeps them togehter in a clear container.  She says the way she stays on track is to make lists for everything she needs to do.  She got away from making lists temporarily then realized she was not getting anything done. Being able to mark things off of a list also gives you a feeling of accomplishment.  Another tip is to always straighten your studio or work space at the end of the day so you don’t have to face a mess the next day.

Dee also shows that you don’t have to spend a fortune to have a great craft or sewing space or room. Repurposing old furniture or belongings, found or thrift store items is inexpensive as well as giving them a new life and giving you some unique items.

I love repainting things and am delighted at seeing Dee’s repainted treasures. Paint is inexpensive yet gives you such dynamic results and a quick makeover as well as create a mood. So keep your eyes peeled and imagine what something would look like with a make-over.

Thanks, Dee, for allowing me to feature your amazing and very well organized studio!  I love seeing studios and yours is a real treat!

Phyllis
T’is the Season for gift wrapping – 2 books for unique wrapping!

I love books and while browsing through books, I found these 2 that are fabulous for creating spectacular gift wrapping. The books have different methods of creating wraps and I fell in love with both of them. And they offer fantastic wrapping techniques that can be used right now during “the wrapping season”.

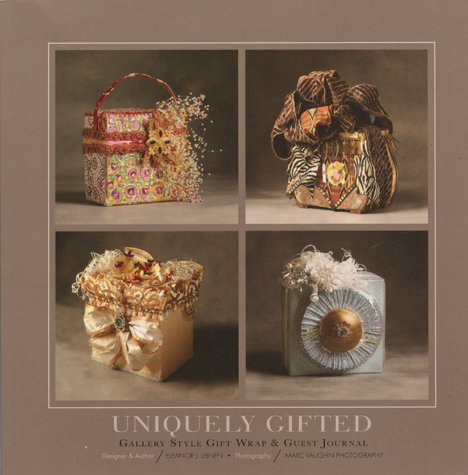
Unique gift wrapping BookUniquely Gifted by Eleanor J. Leinen with beautiful photography by Marc Vaughn shows you how to create a work of art with each gift. Whether you are a crafter or not, you can find yourself creating beautiful gifts with things you already have on hand or can easily purchase. Items such as ribbons, fabrics and papers are combined with such items as old jewelry, tassels, trims, beads, silk flowers, beads, and many more items to create these beautiful wrappings.

Since each wrapping is very unique, instructions are not provided. But with all the “stuff” we have in our stashes, we can follow Eleanor’s inspiration to create our own works of art. Creating them with a box or giftbag that can be opened without damage to our artistic endeavors will allow our work of art to remain intact and a gift in itself. This is a fun book and I plan to create works of art with my wrapping from now on!

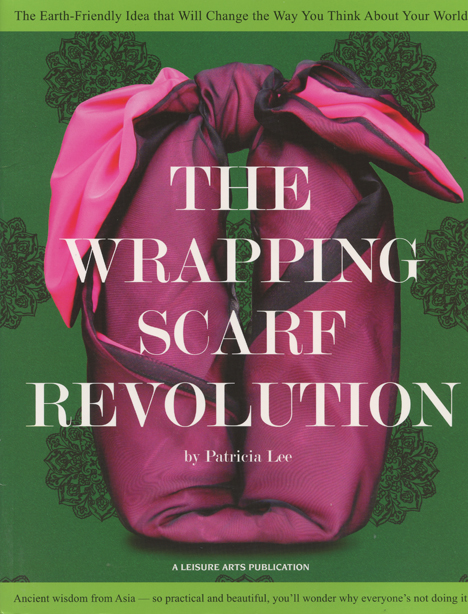
Wrapping scarf book

The Wrapping Scarf Revolution by Patricia Lee offers a different method of wrapping by creating gorgeous wrapping scarfs from fabrics. The wrapping scarf can be used over and over which is very economical.

The book is filled with easy-to-follow diagrams of the many different styles of wraps, including wrap bags. You just choose the fabric you want and start creating wraps adding embellishments as you desire. I have a huge stash of fabric and plan to also put the techniques in this book to use.

A wrapping scarf can also allow you to create a tradition when swapping presents back and forth using a special scarf – from friend to friend, mother to daughter, sister to sister.

I love both books so please check back. I will show you projects that I create using the techniques of both books. (My mind is already whirling away with ideas!)

For full disclosure, I purchased both books.

Here’s to pretty wrappings and a happy holidays!

Phyllis
Decoupaging Red Poppies to Embellish a Table

Does a crafter/artist/quilter/sewer ever get away from creating? Even if you are away from all your stashes of products, the mind is still buzzing away on new ideas and projects to work on.

A few weeks ago, I was  work-cationing (working while on vacation, with emphasis on working).  My friend Brenda Pinnick visited for a few days, which lead our brainstorming on craft projects we loved creating. Since we didn’t have our product stashes with us, we visited local craft stores to pick up a few suppies.

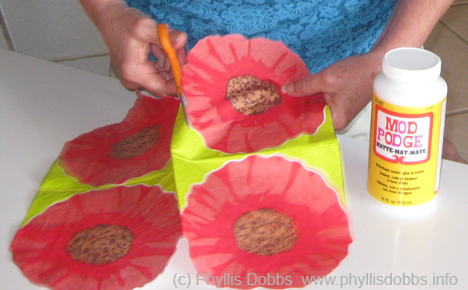
We detoured by Tuesday Morning were we found a fabulous selection of paper napkins.  Hummmmm, there are so many uses for paper napkins other than the normal wiping of hands and decoupaging heads the list.  After buying a bottle of Mod Podge, we were set.

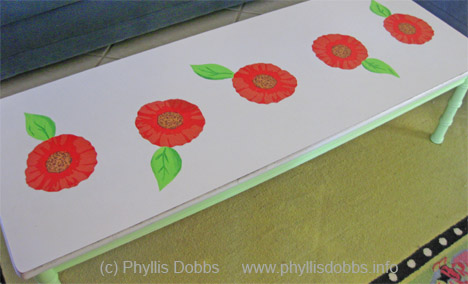
I have previously painted the legs of this coffee table a light apple green and thought the top would look great with flowers. My napkin selection included a package of red poppy shaped napkins, perfect for my project.

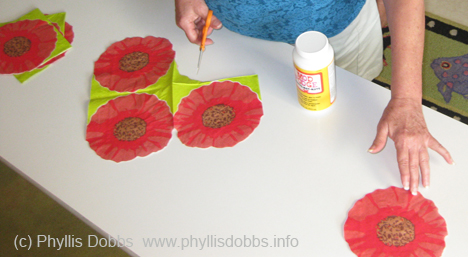
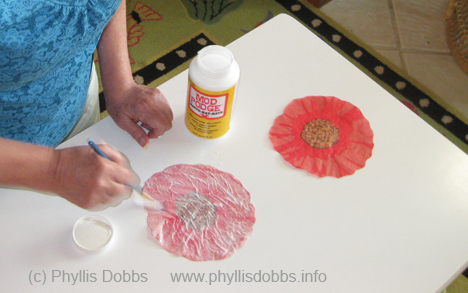
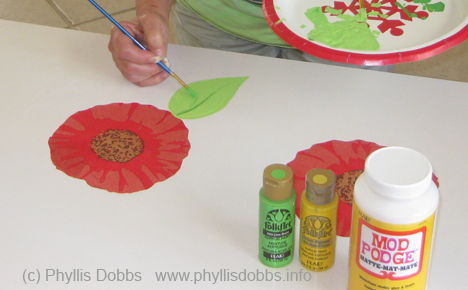
First, I cut the flowers and  arranged 5 down the center of the table. I painted Mod Podge to the back of the flowers to glue them to the table. After the flowers dried on the table, I added several coats of Mod Podge to the top to seal the flowers, allowing drying time between each coat of Mod Podge.

After the Mod Podge dried, I painted a leaf to each flower.

Since red poppies have always been one of my favorite flowers, I’m excited that I can enjoy them on the table for years to come.

Look around and if you have a table or other items that has gotten stale, think decoupage with fun prints.

Have a great craft day,

Phyllis
Repurpose (recycle) a tee shirt into a Halloween Treat Bag

Repurpose one of your old tee shirts into a fun Halloween Trick-or-Treat bag for the kids (or for yourself to carry around for Halloween).  

To make this easy tote bag for Halloween, all you need is the following supplies –

Black long sleeve tee shirt

Green fabric paint (great if you use glow-in-the-dark paint)

2 pieces of green ribbon

Green rattail cording

Small orange buttons

2 large orange buttons

1 large orange decorative button brad

2 small yellow buttons

1 large yellow button

1/3″ wide orange ribbon

Needle and thread or glue

Piece of cardboard

Scissors

Instructions:

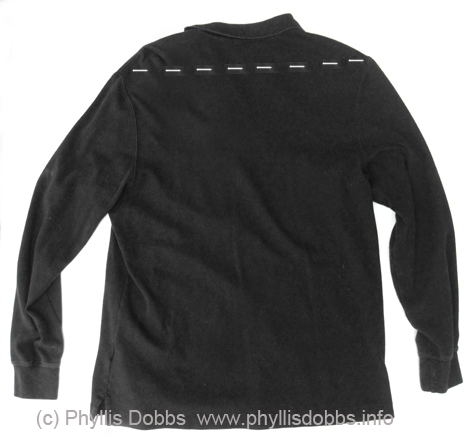
Lay tee shirt flat and cut the top of the tee shirt off above the top edge of the sleeves.  The cutting line is marked on the tee shirt below.

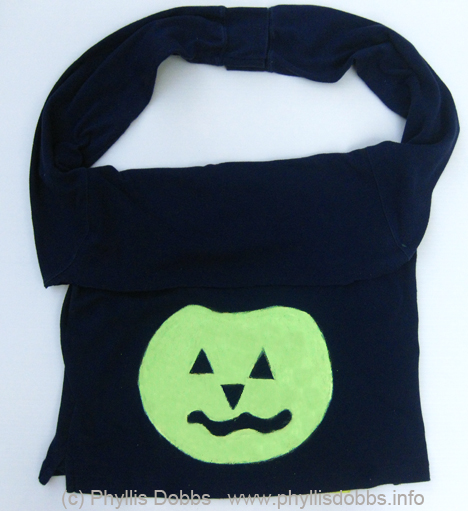
Fold the top of the tee shirt down over the front so that the bottom of the arm hole for the sleeve is at the top and the folded piece forms a flap.

Place the piece of cardboard between the 2 layers of the tee shirt and under where you will paint. Paint a pumpkin on the front of the tee shirt below the folded over edge and 2 to 3 inches above the bottom edge.

Sew the bottom front and back of the tee shirt together, sewing the seam 1 1/4″ above the bottom edge. Twist the sleeves and over lap the cuff edges by 1″ and sew together. Cut the bottom edge below the seam to form fringe.

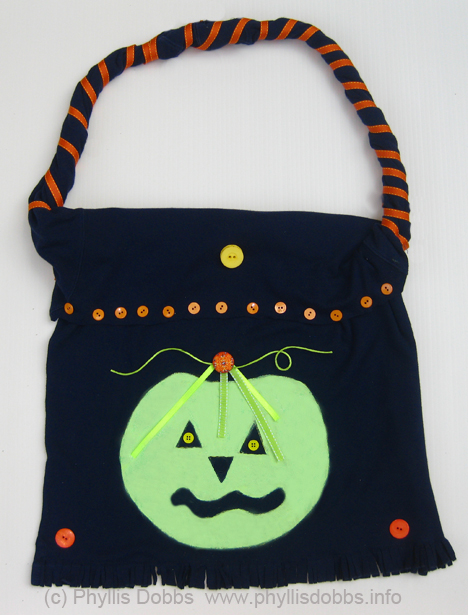
Sew the end of the orange ribbon to the base of one sleeve “strap” and wrap around the strap until you reach the other end, cut the ribbon and sew the ribbon end to the strap. Fold 2 different lengths of ribbon together and stitch the fold to the tee shirt centered above the pumpkin.  Arrange the green rattail cording and sew loosely to the shirt as shown.  Glue or sew the orange brad on top of the ribbon at the fold.

Sew or glue buttons – 2 small yellow buttons in the eyes, 2 large orange buttons in the bottom corners, the yellow button centered on the folded over teeshirt area, and a row of small orange buttons to the edge of the fold over.

I hope you enjoy this project!  Be creative and paint a skull or any other Halloween design or use a different color shirt – let your imagination fly or enlist the help of the kids.  Your trick or treaters will love carrying this bag.

Phyllis
Halloween Craft – Decoupaged Pumpkin Treat Basket

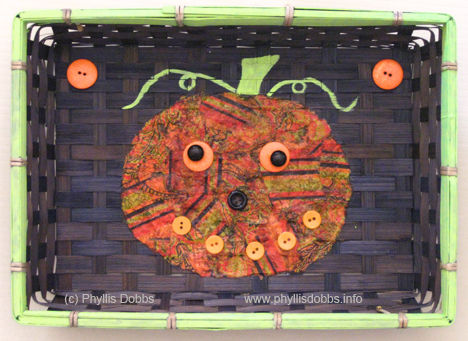
Make an easy Halloween Basket to hold candy for trick-or-treaters.  All is takes is a basket to decorate (I found this one at Goodwill for $1) and a few supplies.

The pumpkin was created with a paper napkin torn into pieces then decoupaged with Mod Podge.

Supplies –

Basket

Mod Podge

Assorted orange and black buttons

Green Paint (Plaid Folk Art)

Paper Napkin or other orange pattern paper

Paint brushes

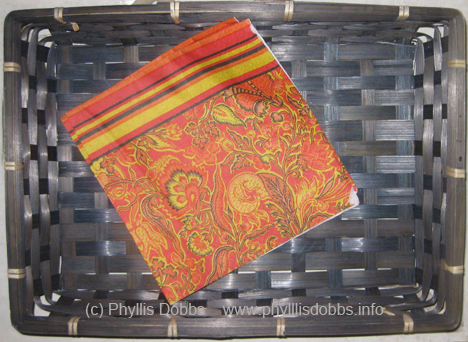
I found these gorgeous paper napkins at Tuesday Morning.  They are the perfect colors for Halloween and the fall season.

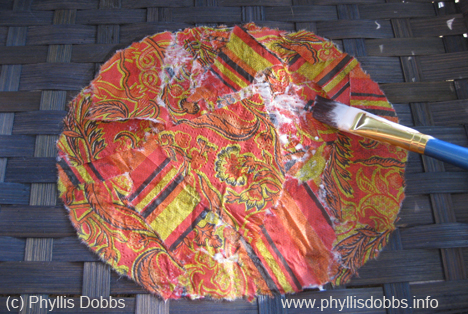
After drawing pumpkin shape on the basket, I tore the napkins into assorted sizes and shapes, with curved edges on some to loosely fit the curved edge of the pumpkin. Then I applied Mod Podge with a brush to the basket inside the pumpkin area, a section at a time.  I added the pieces of torn napkin on to the area with the Mod Podge, overlapping pieces and fitting the curved edges along the outside edge of the pumpkin.

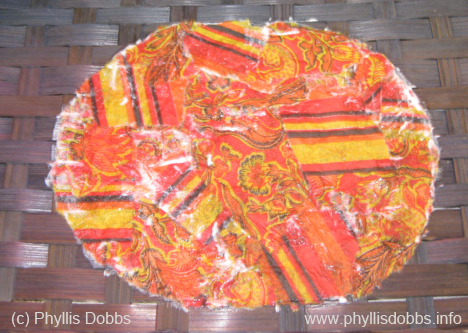
After filing the pumpkin and I keep adding the paper pieces so that there were 2 layers of paper for the pumpkin.

When all the napkin pieces were in place, I applied a final coat of Mod Podge on the top of the pumpkin to seal the paper.

After the pumpkin dried, I painted the stem and vine as well as around the rim of the basket.  I glued buttons for eyes with smaller round black buttons on larger orange buttons.  A black button was used for the nose and a row of small orange buttons for the mouth.  A large orange button was glued in the top corners.

I wish you a boo-dashious Halloween.  Please check back – I’m working on several more crafty and sewing items for Halloween!

Phyllis
“Keep it Green” ecology art on new products.

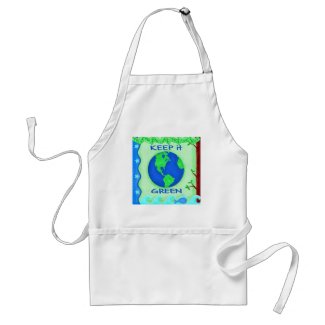
Keep It Green” art is a fun and whimsical way to show your love of the earth and in protecting it.  The elements of earth are incorporated into this art, with the sky, stars, seas, and forests all represented in borders that surround the earth.  A small blue whale adds a charming touch to the seas. The image is available on products in my Zazzle store.

The products available include the apron above (aprons aren’t just for cooking but can be used for crafts and gardening as well).  Other items include tees and other clothing, totes, stationery items, stamps, and much more.  There’s even a dog sweater so that your dog can match what you wear as well as help get the message out to Keep it Green!

Check out all the other products to show your support of keeping the earth clean and alive for generations to come as well as to support Mother Earth and Earth Day.

Have a great week and remember to help “Keep It Green”.

Phyllis

Holiday Blog Hop – You can win!

Welcome to my turn in a Holiday Blog hop.  I’m delighted to be part of this blog hop put together by talented artists.  We are taking turns sharing a fun holiday project or craft and hope that you are inspired to make some using our free patterns and instructions.  And leave a comment on each of the artists blog and you may win a random drawing for a prize by each artist.

I love to entertain over the holidays and often need more festive dishes or bowls.  I painted this terra cotta flower pot to give an extra bowl to hold holiday treats (or even a plant).  Since stripes and dots are very popular design elements and which I also happen to love, I used these to decorate it.  It’s easy to do and you can make one and use it that night.

1.  Use a terra cotta flowerpot the size of your choice – you can make it as big or small as you like.  Wash the flower pot and go over it with alcohol to disinfect it.

2.  With a pencil, draw the lines for the stripes around the rim.  I made the stripes on mine about an inch wide.  Also, draw 1/2 inch circles randomly on the bottom of the pot.

3.  Paint the red dots and the red stripes, alternating the stripes.  Paint the background of the bottom pot white and the remaining stripes.  It will take 2-3 coats of paint.  Let it dry between coats.  Paint the inside of the pot your choice of white or red.

4.  When the paint has dried, add small white dots in a line on the red stripes.

5.  After all has dried, use a clear satin acrylic to seal the paint.

6.  Fill with your choice of snacks, chips, ornaments or whatever you desire.

Please leave a comment to be entered into a random drawing for a prize.  Also please visit the other artist that are participating in this blog hop and leave comments for a chance at more prizes.

Nov 14 – Terri Conrad

Nov 15 – Brenda Pinnick

Nov 16 – Tori Higa

Nov 17 – Joyce Shelton

Nov 18 – Me!  Phyllis Dobbs

Nov 19 – Cherish Fleider

Nov 20 – Joy Hall

Nov 21 – Barbara Johansen Newman

Nov 22- Sharyn Sowell

As part of this blog hop, we are supposed to answer these questions to give some information about ourselves.  Mine are below.

5 things we might not know about you that you’d like to share.

1.  I love to listen to music when I work and have music of every genre except rap.  The type of music I play depends on what I’m working on.

2.  I planted lettuce for the first time this fall and was delighted that it turned out so tasty.  The only place I had to plant it was in the flowerbed by the mailbox, but the bright greens looked very pretty and my husband backed down from being horrified by veggies growing front and center of our yard.

3.  I’m a color junkie and often buy stupid stuff just because I like the color, however anything with great color is not stupid! Like a purple cooler to carry to the beach when we have several in basic red and white.

4.  I enjoy social gatherings with my girlfriends such as bunko, girl’s poker, pokeno and book club. And, I don’t have time to read the books so I go to listen, socialize and drink wine.

5.  I feel guilty because I don’t get around to exercising as frequently as I want – almost non-existent at this point as I’m working hard on close deadlines.

5 things going on in my creative world.

1.  In October, I signed with a fabulous agent, Jewel Branding & Licensing and am very excited about this partnership.

2.  I’m working on several new art collections and am looking forward to seeing new products created with my art at the January markets.

3.  I’m putting together a quilt e-book.

4.  I’ve been creating Christmas crafts to share with my blog readers.

5 things that really inspire me.

1.  Color, lots of it.

2.  Humor

3.  Nature, especially the greens

4.  Flowers, even though this is technically part of nature.

5.  People – family, friends, and other artists.  I’m also really inspired by the paintings of Matisse – love all his work.


Be sure to leave a comment and be included in a drawing for a prize.

Phyllis