Decoupaging Red Poppies to Embellish a Table

Does a crafter/artist/quilter/sewer ever get away from creating? Even if you are away from all your stashes of products, the mind is still buzzing away on new ideas and projects to work on.

A few weeks ago, I was  work-cationing (working while on vacation, with emphasis on working).  My friend Brenda Pinnick visited for a few days, which lead our brainstorming on craft projects we loved creating. Since we didn’t have our product stashes with us, we visited local craft stores to pick up a few suppies.

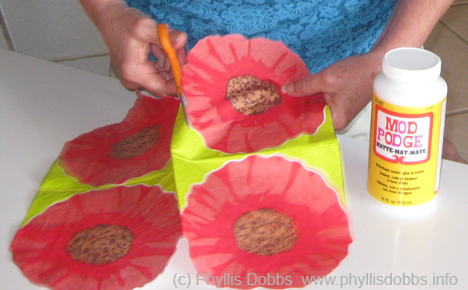
We detoured by Tuesday Morning were we found a fabulous selection of paper napkins.  Hummmmm, there are so many uses for paper napkins other than the normal wiping of hands and decoupaging heads the list.  After buying a bottle of Mod Podge, we were set.

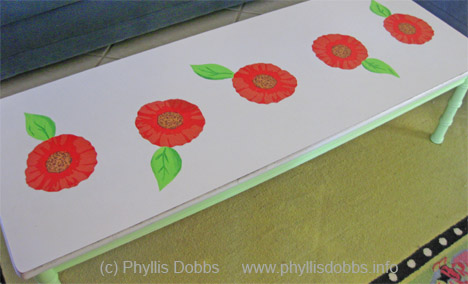
I have previously painted the legs of this coffee table a light apple green and thought the top would look great with flowers. My napkin selection included a package of red poppy shaped napkins, perfect for my project.

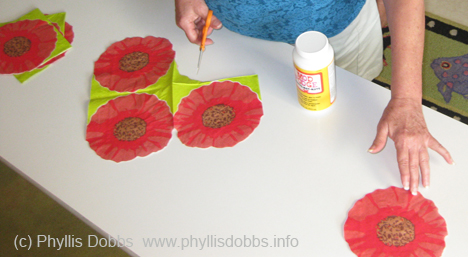
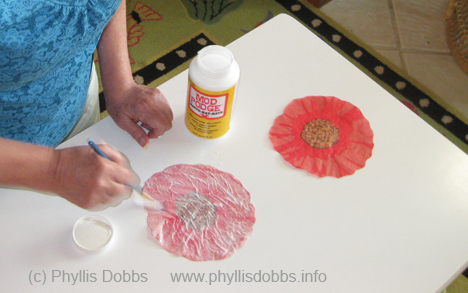
First, I cut the flowers and  arranged 5 down the center of the table. I painted Mod Podge to the back of the flowers to glue them to the table. After the flowers dried on the table, I added several coats of Mod Podge to the top to seal the flowers, allowing drying time between each coat of Mod Podge.

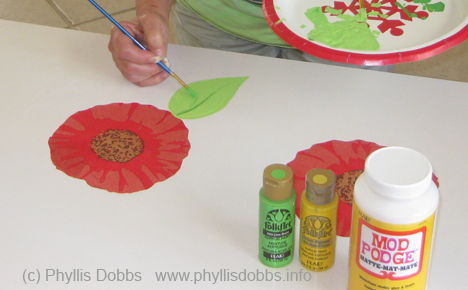
After the Mod Podge dried, I painted a leaf to each flower.

Since red poppies have always been one of my favorite flowers, I’m excited that I can enjoy them on the table for years to come.

Look around and if you have a table or other items that has gotten stale, think decoupage with fun prints.

Have a great craft day,

Phyllis

Terrorific Tuesday – Week 3 of Halloween DIY Crafts

terrorific tuesday 2010 week 3
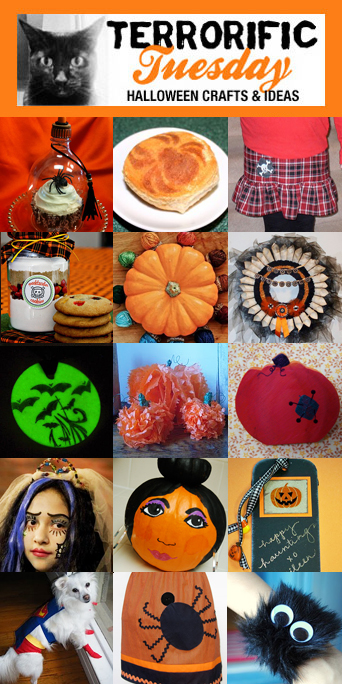
Use a 2-liter bottle to make a super cute Halloween cupcake dome with Pattiewack!

Glory shows you how to make Creepy Spider Biscuits with spider Halloween stencils and edible color spray!

Make a funky and functional Plaid Skull&Crossbones Skirt with Excell Crafts!

Vanessa and Erin team up to make Awesome Halloween Cookies in a Jar Crafts complete with free easy to download sticker and label printables!

Cheryl Ball shares her beautiful Embroidery Floss Acorns – the perfect fall accent.

Korinne whips up a spectacular Vintage Style Halloween Wreath on her Crafterella blog.

Make Glow in the Dark Jewelry Using Polymer Clay and Rubber Stamps with Kate at the Rubberstamping About.com page!

Learn how to make festive Pom Pom Pumpkins on the Marvelously Messy blog!

Paint a super easy Pumpkin Pin with Ann Butler to accent your fall wardrobe!

Be a hit at the costume contest with this Corpse Bride Costume by the Crafty Chica!

Alexa Westerfield a.k.a. Swelldesigner shows you how to make a Snooki Painted Pumpkin inspired by the popular Jersey Shore Guidette!

Eileen Hull shares a Cute Halloween Bookmark project that will melt your Halloween heart!

Sebastian is faster than a speeding bullet in his Superman Costume featured on the Sew DoggyStyle blog!

Phyllis Dobbs wows us with this festive Spider Apron perfect for Halloween baking!

Silvia shows you how to make a No-Sew Fuzzy Monster Cuff – the perfect craft project for all ages!

That’s it for this week! If you are interested in playing in my fun Terrorific Tuesday roundup, e-mail Alexa at swelldesigner (at) gmail (dot) com and she’ll send you the details!

Terrorific Tuesday – Week 2 of Halloween DIY Crafts

terrorific tuesday 2010 week 2

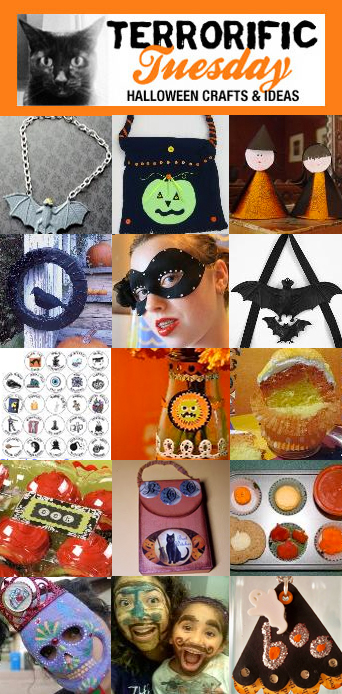
Silvia Chenault turns a toy bat into an instant neckpiece (but will it bite your neck?)

Phyllis Dobbs shows us how to recycle a t-shirt into a really cool Halloween trick-or-treat bag!

Kate Pullen brews up adorable Paper Cone Witches!

Messy Missy makes a super spooky wreath with Duct tape!

Avalon Potter goes glam with her Halloween Masquerade Ball mask!

Patty Cappelluti goes bat crazy making this spooky bat door decoration!

Crafterella is a ghoul gone wild in her Ghoul Scout Costume. Download the custom patches she made for her costume!

Alexa Westerfield a.k.a. Swelldesigner upcycles a Starbucks bottle into a swell Halloween vase!

Cheryl Ball delights us with yummy candy corn cupcakes!

Pattiewack upcycles an apple tray into a festive cupcake carrier. So inexpensive and easy!

Ann Butler crafts up a boo-tiful holder for your ATCs complete with a black cat!

Glory whips up a super fun and healthy pumpkin-inspired muffin meal for her kids. Love it!

Crafty Chica makes the perfect mask to celebrate Dia de los Muertos.

Maya in the Moment has some face painting fun with her little cousin and of course, hilarity ensues!

Eileen Hull has a ghostly good time creating this cute diecut necklace!

That’s it for this week! If you are interested in playing in the fun Terrorific Tuesday roundup, e-mail Alexa at swelldesigner (at) gmail (dot) com and she’ll send you the details!

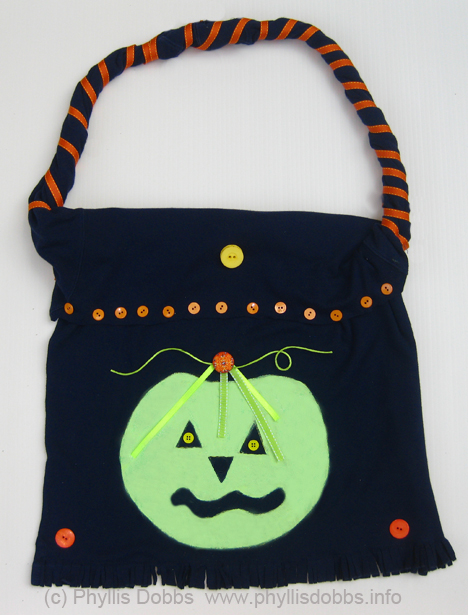
Repurpose (recycle) a tee shirt into a Halloween Treat Bag

Repurpose one of your old tee shirts into a fun Halloween Trick-or-Treat bag for the kids (or for yourself to carry around for Halloween).  

To make this easy tote bag for Halloween, all you need is the following supplies –

Black long sleeve tee shirt

Green fabric paint (great if you use glow-in-the-dark paint)

2 pieces of green ribbon

Green rattail cording

Small orange buttons

2 large orange buttons

1 large orange decorative button brad

2 small yellow buttons

1 large yellow button

1/3″ wide orange ribbon

Needle and thread or glue

Piece of cardboard

Scissors

Instructions:

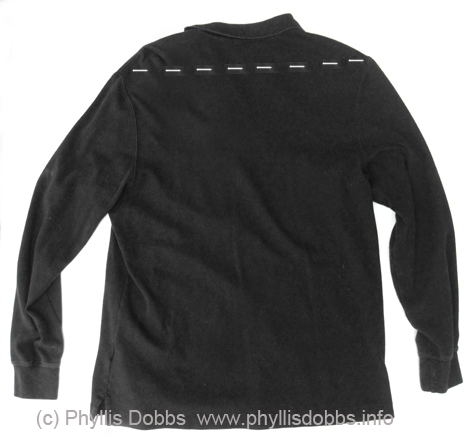
Lay tee shirt flat and cut the top of the tee shirt off above the top edge of the sleeves.  The cutting line is marked on the tee shirt below.

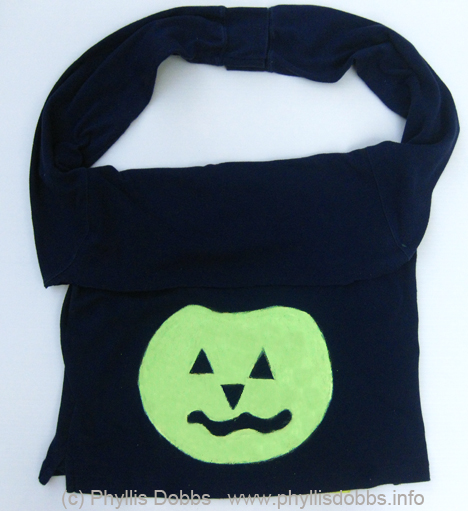
Fold the top of the tee shirt down over the front so that the bottom of the arm hole for the sleeve is at the top and the folded piece forms a flap.

Place the piece of cardboard between the 2 layers of the tee shirt and under where you will paint. Paint a pumpkin on the front of the tee shirt below the folded over edge and 2 to 3 inches above the bottom edge.

Sew the bottom front and back of the tee shirt together, sewing the seam 1 1/4″ above the bottom edge. Twist the sleeves and over lap the cuff edges by 1″ and sew together. Cut the bottom edge below the seam to form fringe.

Sew the end of the orange ribbon to the base of one sleeve “strap” and wrap around the strap until you reach the other end, cut the ribbon and sew the ribbon end to the strap. Fold 2 different lengths of ribbon together and stitch the fold to the tee shirt centered above the pumpkin.  Arrange the green rattail cording and sew loosely to the shirt as shown.  Glue or sew the orange brad on top of the ribbon at the fold.

Sew or glue buttons – 2 small yellow buttons in the eyes, 2 large orange buttons in the bottom corners, the yellow button centered on the folded over teeshirt area, and a row of small orange buttons to the edge of the fold over.

I hope you enjoy this project!  Be creative and paint a skull or any other Halloween design or use a different color shirt – let your imagination fly or enlist the help of the kids.  Your trick or treaters will love carrying this bag.

Phyllis

Terrorific Tuesday – Halloween DIY projects for each week!

terrorific tuesday 2010 week 1

Kate Pullen shares 3 cute digital stamps Free cute spider digital stamps.

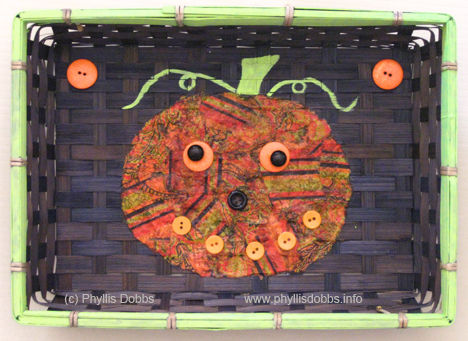
Phyllis Dobbs makes an easy Halloween Decopauge Pumpkin Treat Basket.

Jenna Excell shares her super cute and spooky Bones Halloween Apron.

Korinne Zimmerman a.k.a. Crafterella makes a wonderful spray bleach shirt using an adorable Moon Owl Stencil.

Glory’s Mischief haunts her house with her Faux Cats in window.

Ann Butler makes this boo-tiful Reverse Collage Decopauge Jack-o-Lantern.

Eileen Hull tucks away Halloween cards in this fun Sizzix ScoreBoard notebook pocket.

Silvia Chenault and Patty Cappelluti share two super spooky projects on Silvia’s blog: Vampire Art and Creepy Mirrors!

Pattiewack shows you how to make this cute and Wicked Pillow.

Messy Missy brings the LOLs with her Mean Kitteh.

Alexa Westerfield a.k.a. Swelldesigner whips up a Cute Candy Corn CD Cupcake Stand .

Kathy Murillo a.k.a. Crafty Chica delights us with glittery Skull Bookmarks.

That’s it for this week! If you are interested in playing in Swelldesigner’s Terrorific Tuesday roundup, e-mail her at swelldesigner (at) gmail (dot) com and she’ll send you the details!

Halloween Craft – Decoupaged Pumpkin Treat Basket

Make an easy Halloween Basket to hold candy for trick-or-treaters.  All is takes is a basket to decorate (I found this one at Goodwill for $1) and a few supplies.

The pumpkin was created with a paper napkin torn into pieces then decoupaged with Mod Podge.

Supplies –

Basket

Mod Podge

Assorted orange and black buttons

Green Paint (Plaid Folk Art)

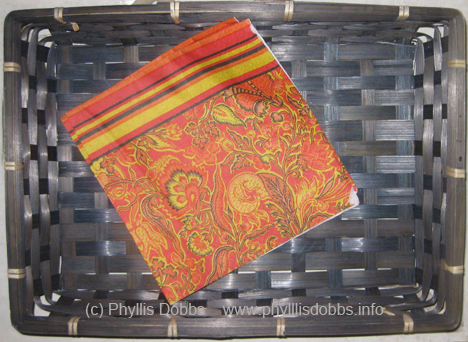
Paper Napkin or other orange pattern paper

Paint brushes

I found these gorgeous paper napkins at Tuesday Morning.  They are the perfect colors for Halloween and the fall season.

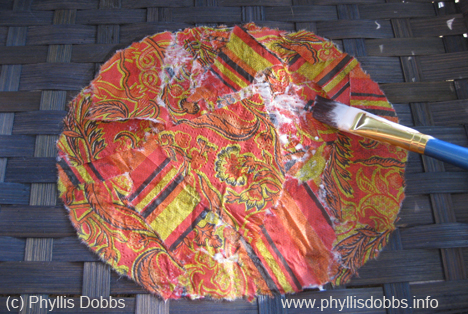
After drawing pumpkin shape on the basket, I tore the napkins into assorted sizes and shapes, with curved edges on some to loosely fit the curved edge of the pumpkin. Then I applied Mod Podge with a brush to the basket inside the pumpkin area, a section at a time.  I added the pieces of torn napkin on to the area with the Mod Podge, overlapping pieces and fitting the curved edges along the outside edge of the pumpkin.

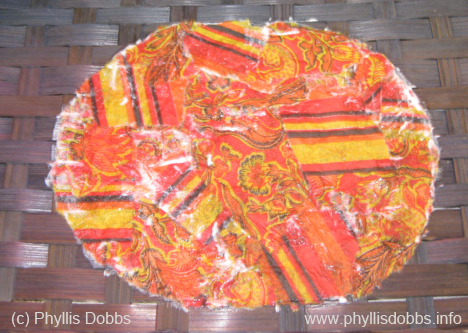
After filing the pumpkin and I keep adding the paper pieces so that there were 2 layers of paper for the pumpkin.

When all the napkin pieces were in place, I applied a final coat of Mod Podge on the top of the pumpkin to seal the paper.

After the pumpkin dried, I painted the stem and vine as well as around the rim of the basket.  I glued buttons for eyes with smaller round black buttons on larger orange buttons.  A black button was used for the nose and a row of small orange buttons for the mouth.  A large orange button was glued in the top corners.

I wish you a boo-dashious Halloween.  Please check back – I’m working on several more crafty and sewing items for Halloween!

Phyllis

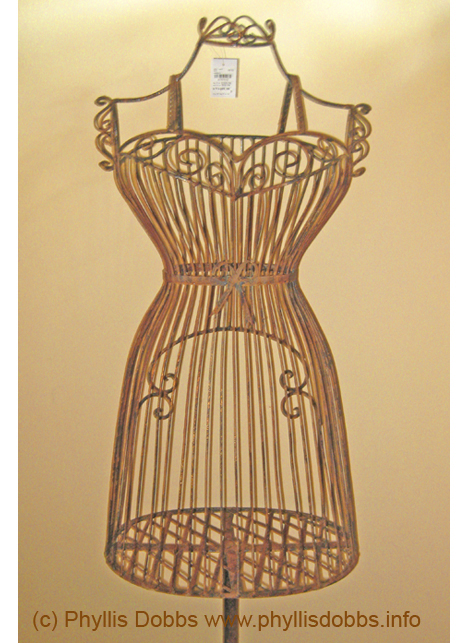
An unexpected treasure – a wonderful metal dress form.

Sometimes the unexpected happens – you find something that you didn’t know you were looking for until you see it! Look at this fabulous dress form I found in, of all places, Tuesday Morning.  I was shopping with my friend Brenda Pinnick for unique items to craft with when I spotted this dress form.  Its perfect for displaying aprons (I have several patterns mentally designed so I could “justify” buying it!)

A few months ago, I scoured the internet looking for the perfect dress form to display aprons and found a wicker one that I liked.  Now my wicker gal has a little sister joining her in my studio.

The only downside is that I was at the beach and had to convince my husband that I could pack around it for our trip home – not an easy task with either the convincing or the packing! I know its not the typical beach purchase, but a treasure is a treasure!

Please check back for a Halloween apron that I’m working on as well as for some other special arts and crafts that were created while beaching.

Phyllis

Craft for Health

Crafting – its not only a fun, recreational hobby, it can also help with health issues.  To me, crafting is a stress-buster.  But it also helps with a medical problem that I have with Restless Leg Syndrome.  A wonderful blog, Craft for Health, tells how crafting has helped with various illnesses as well as stressful situations.  The posts are heart warming, informative, helpful and cover such a variety of situations.
Craft for Health just celebrated their 1st year anniversary and reposted the blog post that I wrote.  I love sharing it with you and if you suffer from Restless Leg Syndrome, you may receive relief by picking up a paintbrush, a glue gun or a needle and craft away in the wee hours when you can’t sleep.

Have a great day and stay cool (its a really hot day here)!

Phyllis

Therapeutic benefits of crafting – Craft for Health

I’ve always known that crafting reduces stress.  As I work on a quilt, sewing, needlework or other craft project, I can always feel the stress just float away  But did you know that crafting is therapeutic for all types of health conditions?

In a new blog, Craft for Health , crafters and artists write about the therapeutic effects of crafting on their health issues or traumatic events in their lives.  You can read my guest blog on how crafting helps me with Restless Leg Syndrome.

Craft for Health was founded by Kathy Peterson and Barb Dehn  RN, NP.  Kathy says, on her inspiration for creating this blog, “I always heard people telling me how much they enjoyed crafting and used it as therapy.  I also saw a void in the market.  So I approached Barb Dehn, a long time friend and business colleague about combining forces together (craft expertise with medical expertise) and we launched CFH. Together we are promoting health and wellness through crafting. Whether it’s quilting, scrap booking or using a hot glue gun, crafting can help everyone create hand made health.”

Kathy has a long career as a design expert, author and TV host and spokesperson and is currently co-hosting Lifetime TV’s The Balancing Act.  Barb is a TV health expert (ABC, CNN, NBC) and spokesperson, visits with patients and publishes health brochures.

I invite you to read my post as well as all the other inspirational and sometimes heartbreaking posts.

May you have a happy and healthy day!

Phyllis


Guest Blog on ThinkCrafts.com

I was invited to write a guest blog on ThinkCrafts.com by Create for Less.  I enjoyed writing about crafting and how it inspired and influenced a creative career for me.  I learned crafts early, taught by my mother and aunt.  As I see all the emphasis on various retro periods, I think of the crafts I was doing during each period.

ThinkCrafts.com is hosted by a craft expert and professional of many years, Maria Nerius and is a fabulous site for anyone who loves art, crafts, creative design and working with their hands.

I invite you to read my post and would love to receive comments from you.

Phyllis